Chapter 4
63
Troubleshooting
Function Specific Troubleshooting
4. T
roub
lesho
o
ting
Step 8.
Press the
SELF TEST
softkey to display the
SELF TEST
page.
Step 9.
Use the
CURSOR
arrow keys to move the cursor to the
TEST MENU
field.
Step 10.
Use the softkeys to select the
HANDLER INTERFACE
test.
Step 11.
Press the
EXECUTE
-
TEST START
softkeys to execute the
HANDLER INTERFACE
test.
Step 12.
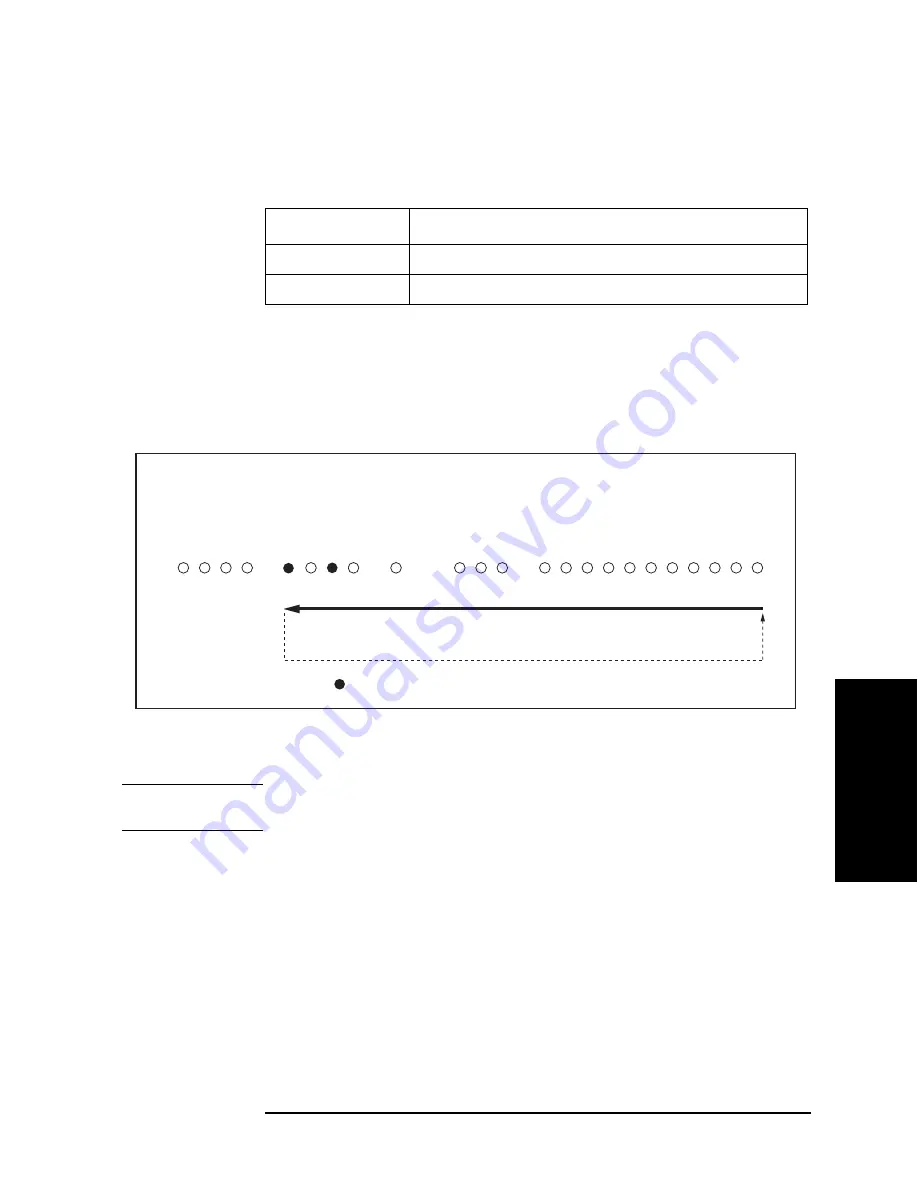
Confirm that the LEDs on the handler simulator turn ON in accordance with the E4981A’s
output signals displayed on the LCD. The LEDs turns ON light in the sequence shown in
.
Figure 4-11
Handler Interface Function Check
Step 13.
Press the
TEST STOP
softkey.
NOTE
Do not execute any SELF TEST except for the Handler Interface Test or the E4981A will
become inoperative.
Step 14.
Return the jumper and switch settings on the interface board to their original settings.
Softkey
Function
INCR +
Increments the test number of the Test Menu.
DECR -
Decrements the test number of the Test Menu.
㪼㪋㪐㪏㪇㪸㫊㪼㪈㪇㪌㪈
㪘㪣㪘㪩㪤㪄
㪚㪟㪅㪈
㪚㪟㪅㪉
㪚㪟㪅㪊
㪚㪟㪅㪋
㪠㪥㪛㪜㪯㪄
㪜㪯㪫㪅㪫㪩㪠㪞㪄
㪜㪦㪤㪄
㪬㪥㪙㪘㪣㪄
㪪㪩㪜㪡㪄
㪧㪣㪦㪄
㪧㪟㪠㪄
㪘㪬㪯㩷㪙㪠㪥㪄
㪦㪬㪫㩷㪦㪝㩷㪙㪠㪥㪪㪄
㪙㪠㪥㪐㪄
㪙㪠㪥㪏㪄
㪙㪠㪥㪎㪄
㪙㪠㪥㪍㪄
㪙㪠㪥㪌㪄
㪙㪠㪥㪋㪄
㪙㪠㪥㪊㪄
㪙㪠㪥㪉㪄
㪙㪠㪥㪈㪄
㪔㩷㪣㪜㪛㩷㪦㪥㩷㩿㪘㫃㫎㪸㫐㫊㪀
Содержание E4981A
Страница 1: ...Keysight E4981A 120 Hz 1 kHz 1 MHz Capacitance Meter Service Guide ...
Страница 2: ......
Страница 13: ...Contents 11 L 145 M 145 N 145 O 146 P 146 Q 146 R 147 S 147 T 147 U 148 Warning Message 149 ...
Страница 14: ...12 Contents ...
Страница 70: ...68 Chapter4 Troubleshooting Performance test failure troubleshooting ...
Страница 84: ...82 Chapter5 Replaceable Parts Replaceable Parts List Front Panel Figure 5 12 Front Panel ...
Страница 96: ...94 Chapter6 Replacement Procedure 3 4 Rack Module Top Replacement Figure 6 3 Screw Fastening Sequence ...
Страница 98: ...96 Chapter6 Replacement Procedure PSU Deck Assembly Removale Figure 6 4 PSU Deck Assembly Removal ...
Страница 100: ...98 Chapter6 Replacement Procedure PSU Assembly Replacement Figure 6 5 PSU Assembly Replacement ...
Страница 102: ...100 Chapter6 Replacement Procedure Front Chassis Assembly Removal Figure 6 6 Front Chassis Assembly Removal ...
Страница 104: ...102 Chapter6 Replacement Procedure Front Panel Assembly Removal Figure 6 7 Front Panel Assembly Removal ...
Страница 108: ...106 Chapter6 Replacement Procedure Interface Board Assembly Replacement Figure 6 10 Screw Fastening Sequence ...
Страница 118: ...116 Chapter6 Replacement Procedure Power Inlet Assembly Replacement Figure 6 17 Power Inlet Assembly Replacement ...
Страница 122: ...120 Chapter6 Replacement Procedure Inverter Assembly Replacement Figure 6 20 Inverter Assembly Replacement ...
Страница 124: ...122 Chapter6 Replacement Procedure Display Support Removal Figure 6 21 Display Support Removal ...
Страница 132: ...130 Chapter7 Post Repair Procedures Post Repair Procedures ...
Страница 138: ...136 AppendixB Firmware Update Update the E4981A firmware using USB cable ...
Страница 139: ...137 1 Chapter Title 2 Chapter Title 4 Chapter Title 5 Chapter Title C Power Requirement C Power Requirement ...
Страница 142: ...140 AppendixC Power Requirement Power Requirements ...


