


Full Digital Color Doppler Ultrasonic Diagnostic Instrument (Vet) User’s Manual V1.00
- 75 -
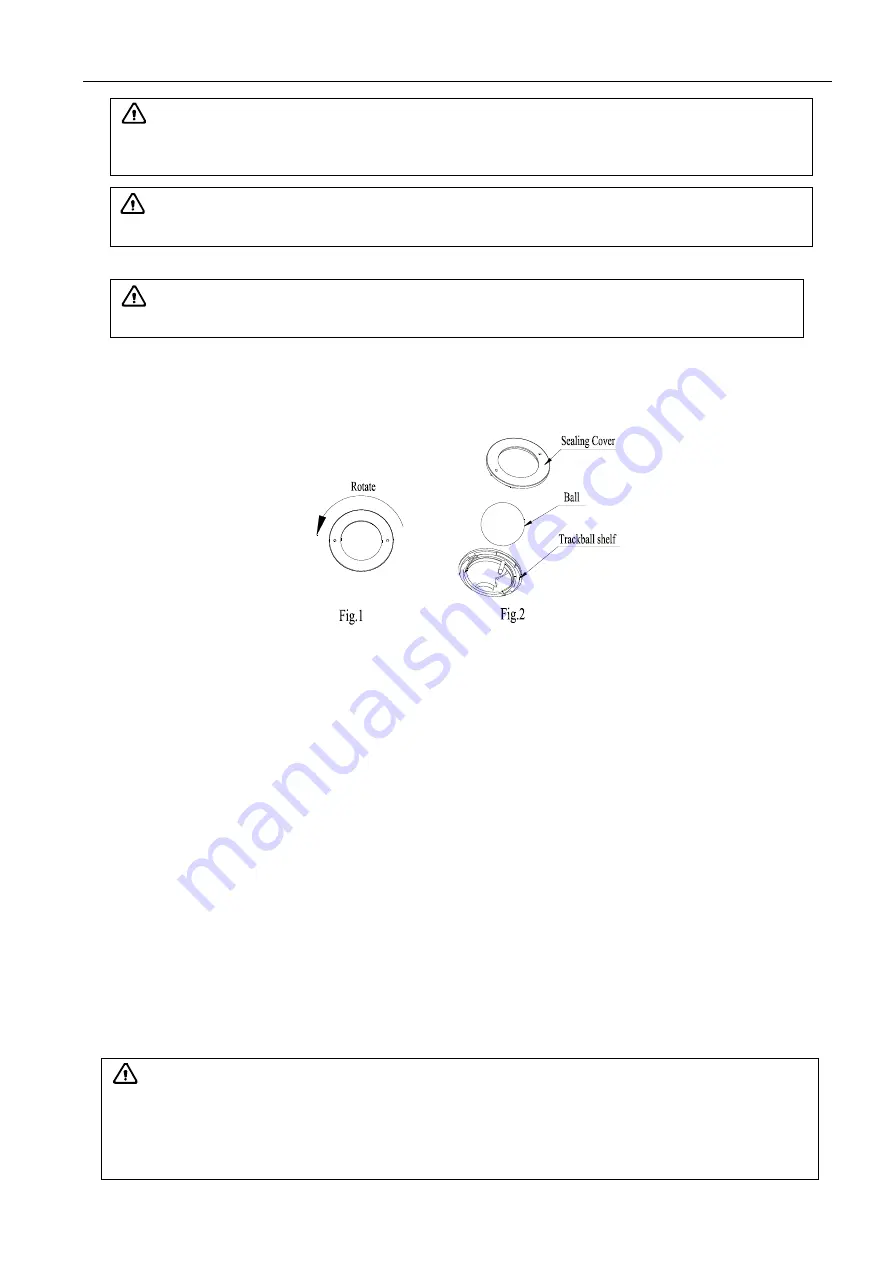
22.1.4 Clean the trackball
1. Dismantle the trackball
Respectively hold down the both sides of sealing cover with middle fingers of left hand and right hand
or hold down the two small holes of the cover with two small screwdriver, and then forced rotate it
counterclockwise, remove the cover and take out the trackball. As follows:
2. Clean the trackball
①
Clean the trackball lightly with dry, soft flax or anti-static LED clean cloth generally.
②
In case of die-hard blots, clean with soft cloth dipped in moderate detergent and then air-dry it.
3. Clean the trackball shelf
Clean the trackball shelf lightly with dry, soft flax or anti-static LED clean cloth.
4. Install the trackball
Place the sealing cover into the trackball shelf, respectively hold down the both sides of sealing
cover with middle fingers of left hand and right hand or hold down the two small holes of the cover
with two small screwdriver, and then forced rotate it clockwise to lock the cover (When locking, the
two small holes of the sealing cover are in the
horizontal line).
22.1.5 Clean the video recorder, printer
1. Use the soft dry cloth to wipe the video recorder, printer.
2. If it is difficult to wipe away the blemish, clean with soft cloth dipped in moderate detergent and then
air-dry it.
22.1.6 Clean the control panel, shell and probe bracket
Clean the instrument surface with soft, dry cloth or with soft cloth dipped in moderate water cleaning
media to remove the blots, and then dry the instrument with soft, dry cloth or with air.
22.2 Replace the fuse
Replace the fuse is to replace the power adapter.
Attention:
Trackball should be cleaned regularly, or because of dust, stains, etc.
resulting in the non-flexible use of trackball.
Attention:
Do not clean the screen with hydrocarbon detergent such as alcohol or OA
equipment cleaning media. These kinds of liquid may degrade the internal function of the
screen.
Attention:
Prohibit using sharp objects to touch the LED screen, and prohibit pressing
or squeezing against the LED screen.
Attention:
1. The fuse is inside the power adapter.
Fuse shall be replaced by professional engineer.
2.
Before replacing the fuse, you must disconnect the mains supply. External fuse need to put
insulation heat shrink tubing.
3. Fuse Type: T3.15AL250VAC