JANOME Embroidery Software Instruction Book
Chapter 17 Reshaping and Editing Objects
129
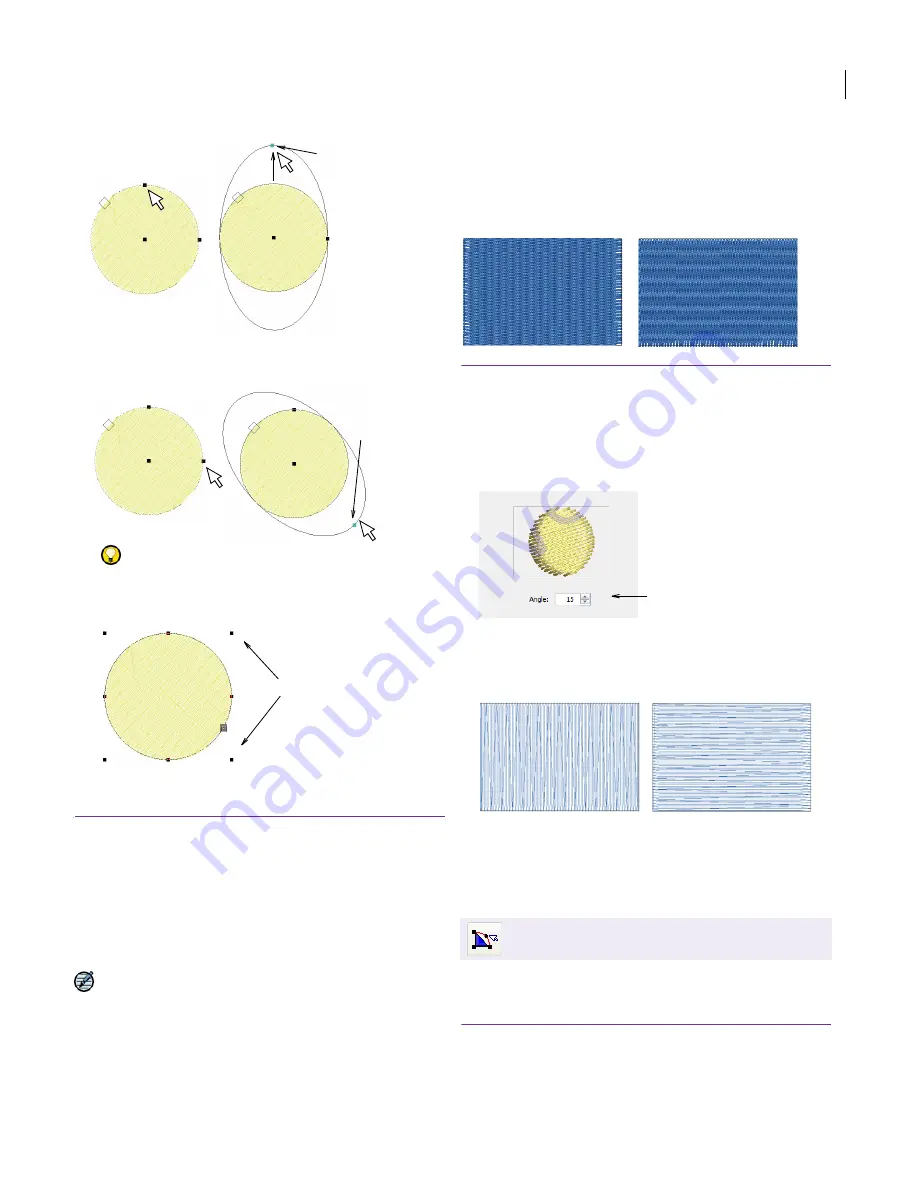
To reshape and spin the object around its center
point, use the side control point.
Try this!
To scale a circle without changing it to an
oval, select it with the
Select
tool, and use the corner
selection handles to scale it.
Adjusting stitch angles
Stitch angle adjustments depend on the type of
object you are working with. With Parallel Fill
objects you can set a
stitch angle
for the entire
object. You can do the same with Turning Angle
Fill objects. You can also adjust the stitch angle in
Turning Angle Fill and Parallel Fill objects using
the Reshape tool.
Note You cannot change the stitch angle of
Border objects as the stitches automatically turn
to follow the shape. You can, however, change the
stitch angle of Parallel Fill Circle objects by
moving the stitch entry point.
Adjusting Parallel Fill stitch angles by
object details
You can change the
stitch angle
of Parallel Fill
objects using Object Details.
To adjust Parallel Fill stitch angles by object
details
1
Select and double-click a
Parallel Fill
object.
The
Object Details > Fill Stitch
tab opens.
2
Select the
Parallel Fill
tab.
3
Enter the required stitch angle in the
Fill Stitch Angle
field.
4
Click
OK
.
Adjusting Parallel Fill stitch angle
on-screen
You can change the
stitch angle
of Parallel Fill
objects using the Reshape tool.
To adjust Parallel Fill stitch angles on-screen
1
Select a
Parallel Fill
object.
Drag top
control point
Drag side
control point
Scale using corner
selection handles
Click Edit > Reshape to display control points and
stitch angle lines in selected objects.
Enter required
stitch angle
Angle: 90°
Angle: 0°
Содержание DigitizerPro
Страница 236: ...234 Part IX Software Feature Table ...
Страница 243: ...241 Part X Appendices Glossary Index ...


