Honeywell
37
Motion Detection
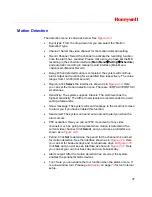
The detection menu is shown as below. See
Figure 4-13
.
Event type: From the drop-down list you can select the “Motion
Detection” type.
Channel: Select the video channel for the motion detection setting.
Record Channel: Select the channel to activate the recording function
once the alarm has sounded. Please make sure you have set the MD
recording in the schedule interface (
Main Menu
Setting
Schedule
)
and automatic recording in manual record interface (Main Menu-
>Advanced->Manual Record)
Delay: When detected motion is completed, the system will continue
alarm output and recording for a specified time respectively. The value
ranges from 10-300(Unit: second).
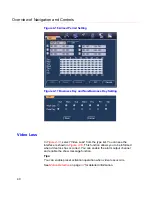
Region:
Click
Select
, the interface is shown as in
Figure 4-14
. Here
you can set the motion detection zone. There are 396(PAL)/330(NTSC)
small zones.
Sensitivity: The system supports 6 levels. The sixth level has the
highest sensitivity. The fifth or lower levels are recommended to avoid
setting a false alarm.
Show message: The system will send message to the local host screen
to alarm you if you have enabled this function.
Send email: The system can send out an email to alert you when the
alarm occurs.
PTZ activation: Here you can set PTZ movement (of any video
channels) such as going to a preset when motion is detected in the
current video channel. Click
Select
, and you can see an interface is
shown as in
Figure 4-15
.
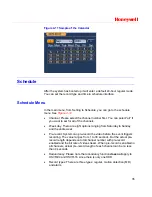
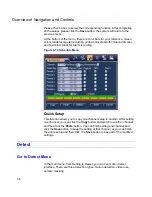
Period:
Click
Set
to determine the period for the channel to be armed
for motion detection. See the interface shown as in
Figure 4-16
. Here
you can set for business days and non-business days. In
Figure 4-16
,
click
Set
, and you will see an interface as shown in
Figure 4-17
. Here
you can set your own business day and non-business day.
Alarm output: After the motion detection has occurred, the system
enables the peripheral alarm devices.
Tour: Here you can enable the tour function when the alarm occurs. It
is a one-window tour. Please go to
Display
on page
74
for tour interval
setup.
Содержание HSVR-04
Страница 2: ......
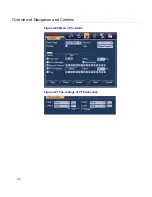
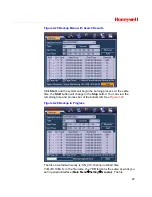
Страница 47: ...Honeywell 39 Figure 4 14 Motion Detection Zone Setting Figure 4 15 PTZ Activation Setting ...
Страница 100: ...Understanding of Menu Operations and Controls 92 Figure 5 38 The Shutdown Menu ...
Страница 103: ...Honeywell 95 Figure 6 2 The Internet Options Window ...
Страница 115: ...Honeywell 107 Figure 6 21 HDD Information Menu Log Here you can view system log See Figure 6 22 ...
Страница 130: ...Web Client Operation 122 Figure 6 37 The NTP Setup Menu Alarm Alarm setup interface is shown as in Figure 6 38 ...
Страница 133: ...Honeywell 125 Figure 6 39 The Detection Setup Menu Figure 6 40 The Detection Zone Setup ...
Страница 142: ...Web Client Operation 134 Figure 6 47 The Auto Maintenance Menu Abnormity The abnormity interface is shown as below ...

