50
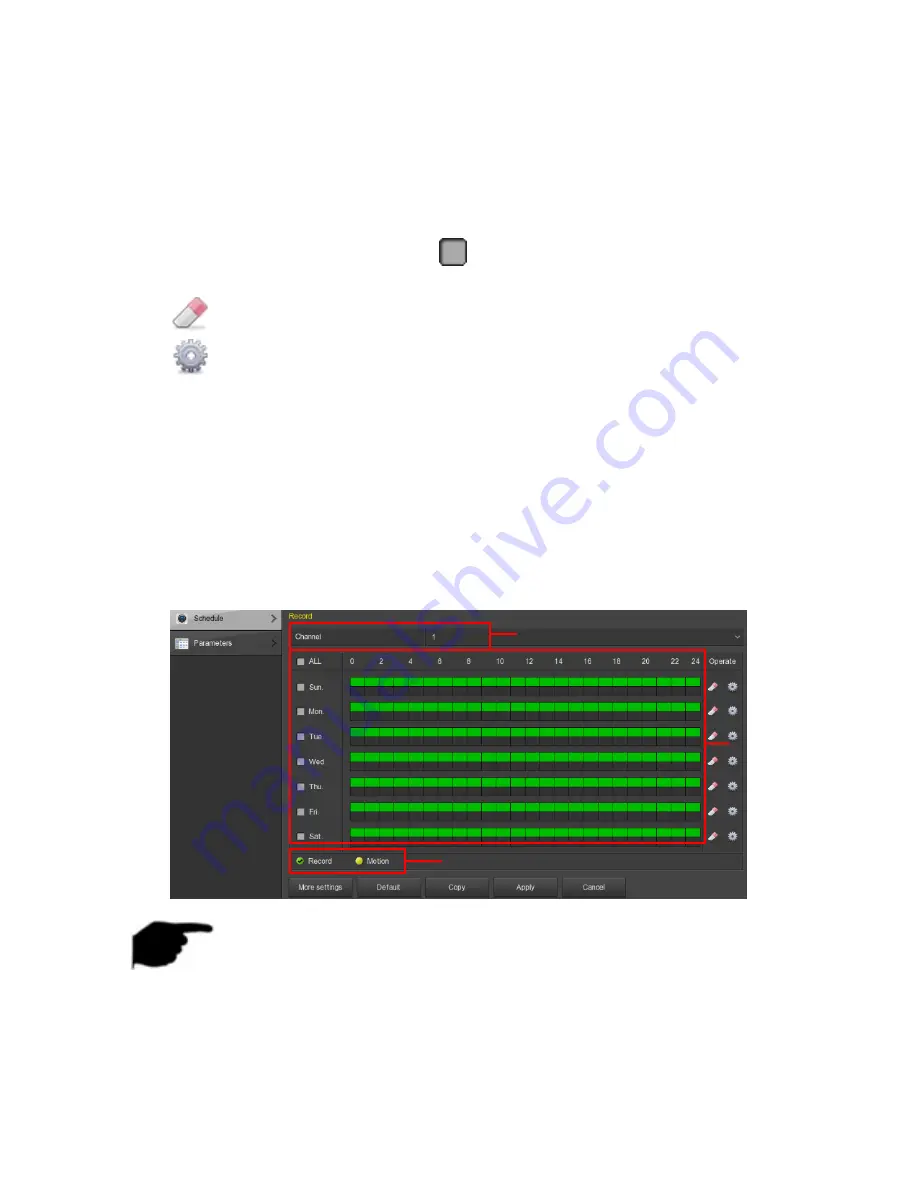
Channel:
Select the channel for setting the recording to set a different
recording schedule for each channel. If you make the same settings for
all channels, select "All".
Record Type:
Select check the box to select corresponding record type.
There are Record and Motion.
Week day:
Select the week number. If you select "All", it means to the
entire week, or you can select "
" in front of the number of days to
set individual days.
:
Delete the time period for the currently selected recording type.
:
Click to enter the Record Schedule.
Copy:
After complete the setup, you can click "Copy" button to copy
current setup to other channel(s).
Drawing schedule record
Step 1:
Select the recording channel to be set (as shown in Figure 5-16 1).
Step 2:
Select the recording type to be set. Green is normal recording, and
yellow is motion detection recording (as shown in Figure 5-16 2).
Step 3:
Hold down the left mouse button and drag the mouse to draw the
time period in the time period diagram (as shown in Figure 5-16 3).
Figure 5-16
Instruction
There are 6 time periods available for each day, and the device will start
the corresponding type of recording within the set time range.
Select “All” to edit the time period of all week.
3
2
2
2
1
2


