


15
The last of the special keys is the BREAK key. In its idling state (when no characters are being
transmitted), the keyboard loop switching transistor conducts. Hence, the loop circuit is in the mark
condition. For testing, the current may be interrupted, changing the loop to the space condition, by
depressing the BREAK key. Releasing the key returns the loop switch to normal operation.
When the keyboard power switch is turned off, the station loop will be interrupted, since no current can
flow in the loop switching transistor. If you wish to use other equipment connected in the loop, the circuit
may be completed by either switching the keyboard on and allowing it to idle, or by setting the MODE switch
to the Morse position. In the latter case, one section of the MODE switch bridges across the output
transistor, allowing loop current to flow.
3.3 Morse Code Operation
Morse codetyping with the DKB-2010 keyboard is very similar to RTTY operation. Set the MODE switch to
the Morse position and rotate the volume control clockwise to switch the keyboard on. Allow a few seconds
for the identifier circuit to clear itself. Set the WEIGHT control to Norm. Touch any letter key and adjust the
VOLUME control for the desired audio sidetone level. The SPEED control may be adjusted for any code
speed from 8 to 60 words per minute.
The MEMORY FULL lamp and the n-key rollover features work the same as in the RTTY mode to help you
pace your typing. Since Morse transmissions do not involved a fixed line length, the END OF LINE warning
light is not operative. However, it may light if the MODE switch is set to the Morse position when the
keyboard power is switched on. To extinguish the lamp, move the MODE switch to any of the RTTY
positions and press the return key. Then return the switch to the Morse setting.
The HERE IS, CQ, and AUX keys operate in their normal manner, but the RTTY test generator (QBF key)
is inappropriate for Morse transmission and therefore does not function. The BLANK key produces the
standard eight-dot Morse error signal.
Five "double character" keys ([SK], [AS], [AR], [KN] and [BT]) are available exclusively in the Morse
mode. Each of these appears on the upper portion of the key, but is enclosed by square brackets indicating
that it is not necessary to press a SHIFT key when transmitting the character. If, however, you strike the SK,
AS or BT keys while holding one of the shift keys down, the punctuation marks shown on the lower half of
the key will be produced, as shown in Table 3.1. The AR and KN keys produce the same output regardless
of the SHIFT key position.
Only 10 of the punctuation marks are used for Morse code ( . , / : ; ? - ( ) and '). Of these, the last seven
are transmitted using the SHIFT key. Attempting to transmit any of the remaining punctuation marks
produces the Morse error signal
The space bar performs its normal function to ensure proper spacing between words. You will find it
particularly useful when you type fast enough to store more than one character at a time in the keyboard
memory.
The BREAK key operates in the Morse mode, but has a different effect than in RTTY operation. When
pressed, it closes the electronic keying switch, holding the transmitter on the air for tuning and adjustment.
Releasing the key returns the keying circuit to normal operation.
The WEIGHT control offers a choice of four weight ratios, varying from very light (1:7) to heavy (5:3). In
Morse code, the Weight is the ratio of the length of a dot to the length of the space between dots and
dashes. At the very light setting, the dots will sound very short. As the switch is moved toward the heavier
weight ratios, the dots will sound longer when compared to the spaces between dots and dashes.
Experiment with the setting until you find the one that seems the most pleasing.
The volume control adjusts the sidetone oscillator output level. The pitch may be changed, if necessary,
by an internal adjustment, described in Section VI.
Содержание DKB-2010
Страница 1: ......
Страница 20: ...18...
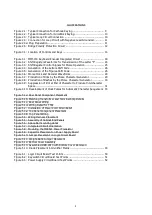
Страница 39: ...37 Table 4 3 ROM Converter Input and Output Codes...
Страница 43: ...41 Table 5 1 Coding Chart for Identifier Character A0 A1 A2 A3 A4 A5 A6 CQ key AUX key HERE IS key...
Страница 44: ...42 Table 5 1 Coding Chart for Identifier Character A0 A1 A2 A3 A4 A5 A6 CQ key AUX key HERE IS key...
Страница 52: ...50 Figure 6 1 Logic Circuit Board Test Points...
Страница 53: ...51 Figure 6 2 Keyswitch Circuit Board Test Points...
Страница 54: ...52 Figure 6 3 Power Supply Circuit Board Test Points...
Страница 57: ...55 Table 6 4 DKB 2010 Wire List...
Страница 63: ...61...
Страница 64: ...62...
Страница 65: ...63...
Страница 67: ...65...
Страница 69: ...67...
Страница 71: ...69...
Страница 73: ...71...
Страница 75: ...73...
Страница 77: ...75...
Страница 79: ...77...
Страница 81: ...79...
Страница 83: ...81...
Страница 85: ...83...
Страница 87: ...85...
Страница 89: ...87...
Страница 91: ...89...
Страница 92: ...90...
Страница 93: ...91...
Страница 94: ...92...
Страница 95: ...93...
Страница 96: ...A1 EXTENDED MEMORY OPTION FOR THE DKB 2010 KEYBOARD INSTRUCTION MANUAL...
Страница 100: ...A5...
Страница 101: ...A6...