


4. ADVANCED SETTINGS
4-10
4.7
System Menu
The [System] menu contains settings which do not require regular adjustment.
4.7.1
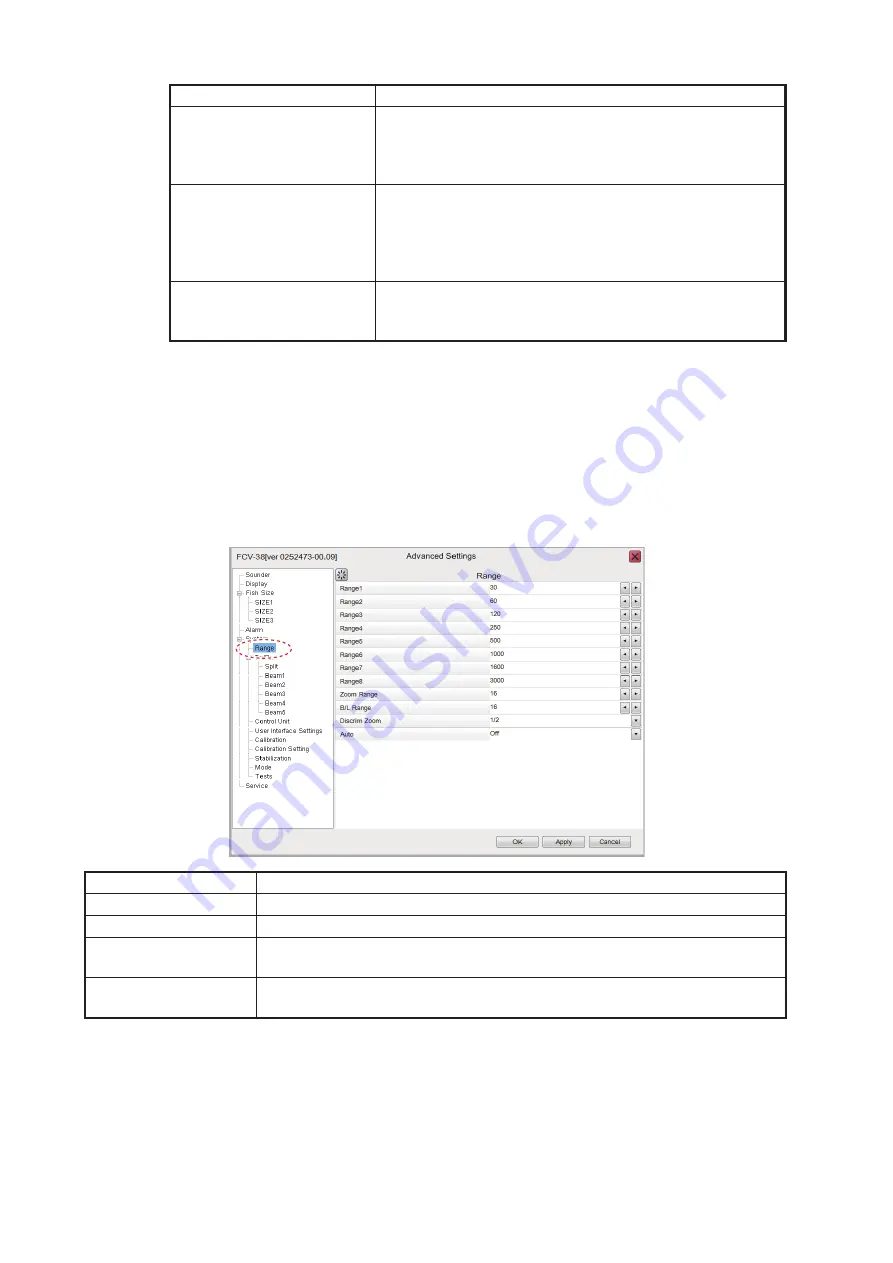
Range menu
The Range section of the [System] menu contains range-related settings.
[Pulse Length]
Available only when [TX Pulse] is set to [Manual]. A low
setting gives a higher resolution, however the range is
lowered. A high setting give a longer range, however the
resolution is lowered.
[RX Band]
Rx bandwidth is automatically set according to [TX Pulse]
→
[Pulse Length].The [Normal] setting provides good per-
formance. If noise is a problem switch to [Narrow]. For
better resolution, click [Wide]. [Manual] enables manual
setting of Rx band width, at [RX Band Width].
[RX Band Width]
Operative when [Manual] is selected at [RX Band]. A
small value decreases the noise. On the other hand, a
large value gives better resolution.
Menu item
Description
[Range1] to [Range8]
Changes the range setting for the preset ranges.
[Zoom Range]
Changes the range at which zoomed items appear on the display.
[B/L Range]
Bottom line range. Change the range for bottom line and bottom discrimi-
nation.
[Discrim Zoom]
Sets the room ratio for the Discrimination Zoom function. See
section 1.13.4.
Menu item
Description
FCV-38[ver 0252473-xx.xx]


