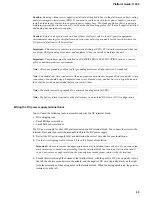
4.
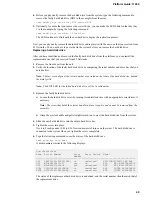
Before you physically remove the hard disk drive from the system, type the following command to
remove the faulty hard disk drive (HD2 in the example) from the array:
tmsh modify sys raid array MD1 remove HD2
5.
Optionally, to ensure that you remove the correct drive, you can make the LED blink for that bay (bay
1 in the example) by typing the following command:
tmsh modify sys raid bay 1 flash-led
The LED continues to blink until the new hard drive begins the replication process.
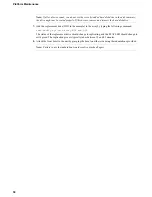
Next, you can physically remove the hard disk drive and replace it with the new one that you received from
F5 Networks. You do not have to power down the system before you remove the hard disk drive.
Replacing a hard disk drive
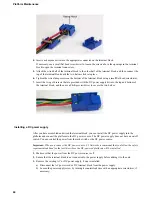
After you have identified and removed the faulty hard disk drive from the platform, you can install the
replacement drive that you received from F5 Networks.
1.
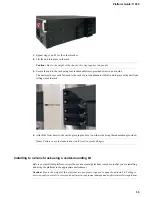
Remove the front bezel from the unit.
2.
Verify the location of the faulty hard disk drive by comparing the serial number and drive bay that you
noted earlier.
Note: The last seven digits of the serial number are printed on the front of the hard disk drive, behind
the metal grille.
Note: The STAT LED for the failed hard disk drive will be lit solid amber.
3.
Remove the faulty hard disk drive:
a) Loosen the hard disk drive screw by turning it counterclockwise with an appropriate screwdriver, if
necessary.
Note: The screw that holds the ejector handle in place is captive and cannot be removed from the
assembly.
b) Grasp the ejector handle and pull straight toward you to eject the hard disk drive from the system.
4.
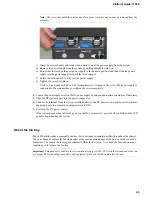
Slide the new hard disk drive into the empty hard drive bay.
5.
Tighten the screw into place.
Use 4 to 5 inch-pounds (0.45 to 0.56 Newton-meters) of torque on the screw. The hard disk drive is
connected to the system when you tighten the screw completely.
6.
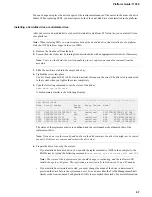
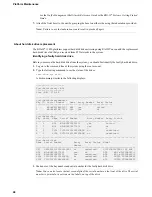
Type the following command to see the status of the hard disk drives:
tmsh show sys raid disk
A disk summary similar to the following displays:
Sys::Raid::Disk
Name
Serial Number
Array
Array Status
Model
Member
--------------------------------------------------------------------------
CF1
CB225535315009033B03
no
undefined
SILICONSYSTEMS INC 8GB
HD1
WD-WCAT1E420107
yes
ok
ATA
WDC WD3000BLFS-0
HD2
WD-WCAT10944438
yes
undefined
ATA
WDC WD3202ABYS-0
SSD1
CVPO014601CG160AGN
no
undefined
ATA
INTEL SSDSA2M160
SSD2
CVPO0146016R160AGN
no
undefined
ATA
INTEL SSDSA2M160
The status of the replacement hard disk drive is undefined, and the serial number should match that of
the replacement drive.
49
Platform Guide: 11050
Содержание BIG-IP 11050
Страница 1: ...Platform Guide 11050 MAN 0322 03 ...
Страница 2: ......
Страница 26: ......
Страница 39: ...Chapter 3 Platform Maintenance About platform maintenance ...
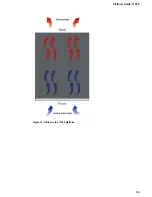
Страница 55: ...Figure 13 Airflow in the 11050 platform 55 Platform Guide 11050 ...
Страница 56: ......
Страница 63: ...Appendix C China RoHS Requirements Hazardous substance levels for China ...
Страница 65: ...Appendix D Repackaging Guidelines About repackaging the platform ...
Страница 67: ...5 Place the accessory box on the foam insert 6 Close and seal the shipping box 67 Platform Guide 11050 ...
Страница 68: ......

