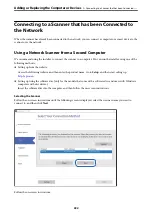
Making Settings for Connecting to the Computer
We recommend using the installer to connect the scanner to a computer. You can run the installer using one of the
following methods.
❏
Setting up from the website
Access the following website, and then enter the product name. Go to
Setup
, and then start setting up.
❏
Setting up using the software disc (only for the models that come with a software disc and users with Windows
computers with disc drives.)
Insert the software disc into the computer, and then follow the on-screen instructions.
Selecting the Connection Methods
Follow the on-screen instructions. On the
Select Your Operation
screen, select
Set up Scanner connection again
(for new network router or changing USB to network, etc.)
, and then click
Next
.
Follow the on-screen instructions to finish setup.
If you cannot connect, see the following to try to solve the problem.
“Cannot connect to a Network” on page 202
Making Settings for Connecting to the Smart Device
You can use the scanner from a smart device when you connect the scanner to the same Wi-Fi network (SSID) as
the smart device. To use the scanner from a smart device, access the following website, and then enter the product
name. Go to
Setup
, and then start setting up.
Access to the website from the smart device that you want to connect to the scanner.
When Changing the Computer
When changing the computer, make connection settings between the computer and the scanner.
Making Settings for Connecting to the Computer
We recommend using the installer to connect the scanner to a computer. You can run the installer using the
following method.
❏
Setting up from the website
Access the following website, and then enter the product name. Go to
Setup
, and then start setting up.
❏
Setting up using the software disc (only for the models that come with a software disc and users with Windows
computers with disc drives.)
Insert the software disc into the computer, and then follow the on-screen instructions.
Follow the on-screen instructions.
Adding or Replacing the Computer or Devices
>
Re-setting the Network Connection
>
226
Содержание DS-790WN
Страница 17: ...Color Grayscale Black White Product Features High Quality Scanning with Automatic Document Detection 17 ...
Страница 34: ...Specifications and Placing of Originals Specifications of Originals 35 Placing Originals 40 ...
Страница 133: ...3 Click Edit Required Settings for Scanning Setting a Shared Network Folder Creating the Shared Folder 133 ...
Страница 147: ...Customizing the Control Panel Display Registering Presets 148 Editing the Home Screen of the Control Panel 150 ...
Страница 245: ...Where to Get Help Technical Support Web Site 246 Contacting Epson Support 246 ...

