


Understanding Your Printer Software (Windows
®
Only)
301
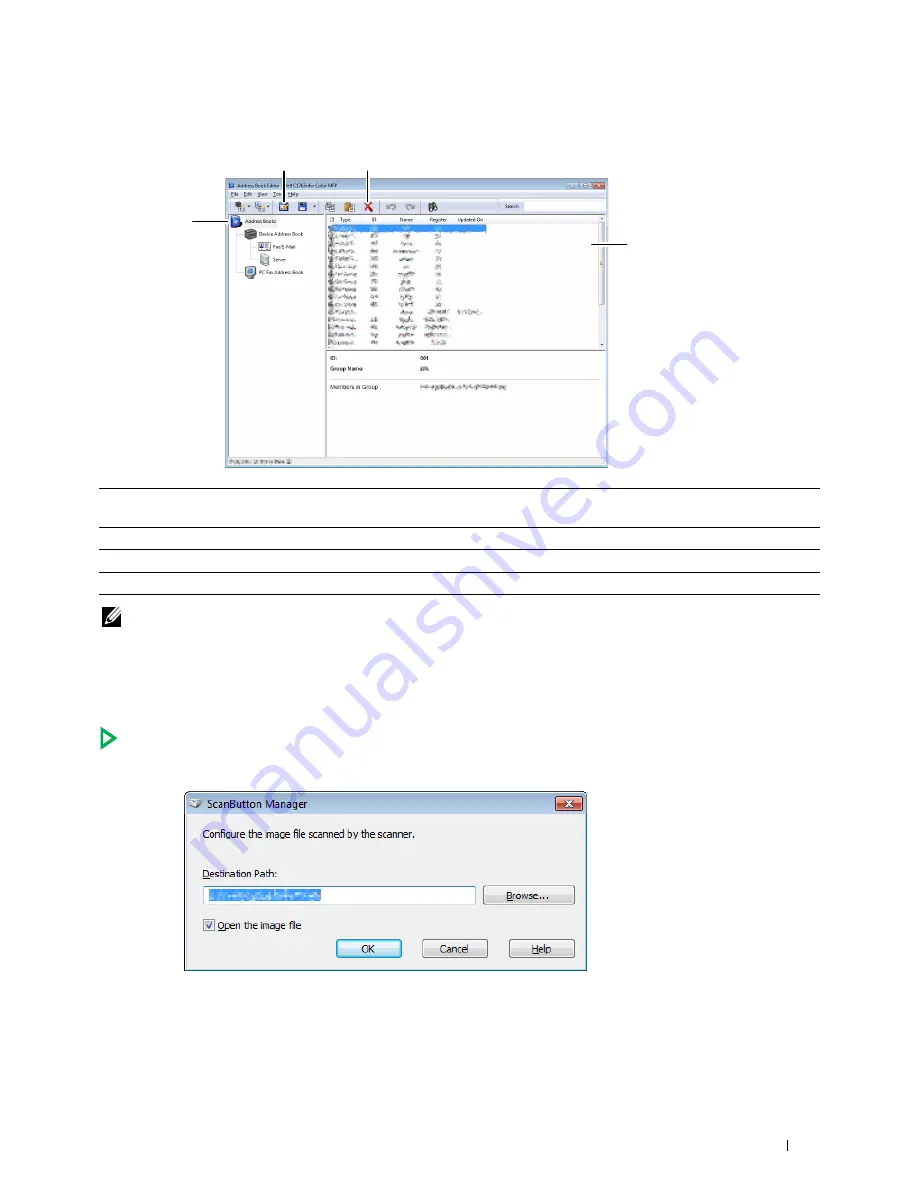
Address Book Editor
NOTE:
You must install the fax driver before reading or editing the Address Book entries.
For more information about
Address Book Editor
, see the
Help
of
Address Book Editor
.
ScanButton Manager
This software allows you to configure the output destination of the scanned file and to select whether to open the
file using the related application. These settings are available when scanning to a computer by pressing the
(
Start
) button on the operator panel. For details about how to scan documents, see "Scanning From the
Operator Panel - Using an Application" on page 248.
1
Read the
Device
Address Book
entries from the printer to the
Address Book Editor
and read the
PC Fax Address Book
entries from the PC to the
Address Book Editor
.
2
Allows you to edit a selected
Address Book
entry in the edit dialog box.
3
Deletes a selected
Address Book
entry.
4
Displays
Address Book
entries.
1
4
2
3
Содержание C1765nf Color Laser
Страница 2: ......
Страница 16: ...14 Contents ...
Страница 18: ...16 ...
Страница 20: ...18 Notes Cautions and Warnings ...
Страница 22: ...20 Dell C1765nf C1765nfw Color Multifunction Printer User s Guide ...
Страница 34: ...32 ...
Страница 36: ...34 Removing Packaging Material ...
Страница 48: ...46 Connecting Your Printer ...
Страница 54: ...52 Setting Up Your Printer ...
Страница 58: ...56 Setting the IP Address ...
Страница 66: ...64 Loading Paper ...
Страница 90: ...88 Installing Printer Drivers on Computers Running Macintosh ...
Страница 92: ...90 ...
Страница 98: ...96 Operator Panel ...
Страница 204: ...202 Understanding the Printer Menus ...
Страница 212: ...210 Print Media Guidelines ...
Страница 229: ...227 Printing Copying Scanning and Faxing 18 Printing 229 19 Copying 233 20 Scanning 247 21 Faxing 275 ...
Страница 230: ...228 ...
Страница 234: ...232 Printing ...
Страница 248: ...246 Copying ...
Страница 276: ...274 Scanning ...
Страница 300: ...298 ...
Страница 316: ...314 Specifications ...
Страница 317: ...315 Maintaining Your Printer 25 Maintaining Your Printer 317 26 Clearing Jams 331 ...
Страница 318: ...316 ...
Страница 345: ...Clearing Jams 343 8 Close the rear cover ...
Страница 346: ...344 Clearing Jams ...
Страница 347: ...345 Troubleshooting 27 Troubleshooting 347 ...
Страница 348: ...346 ...
Страница 367: ...365 Appendix Appendix 366 Index 371 ...
Страница 382: ...380 Index ...