DESIGNER’S HANDBOOK 4189350049C EN
Page 38 of 206
A warning is issued if the only available supply is below the limit and the alert is issued if only one of the two supply
inputs is below the limit (or lost). This is of course in a system with redundant power supplies.
A warning or alert beep audio signal can also be activated. (Only issued once when the warning or alert first
occurs).
4.5.3
Warning/alert output
Not only warnings for power supply faults, but also all other active warnings and alerts will be sent in an emergency
message on CANopen.
In the product profile stored in a customised library, it is also possible to pre-configure one or both relays in the DX1
module to be activated when the XDi detects a warning and/or alert.
4.6
First time setup using the wizard
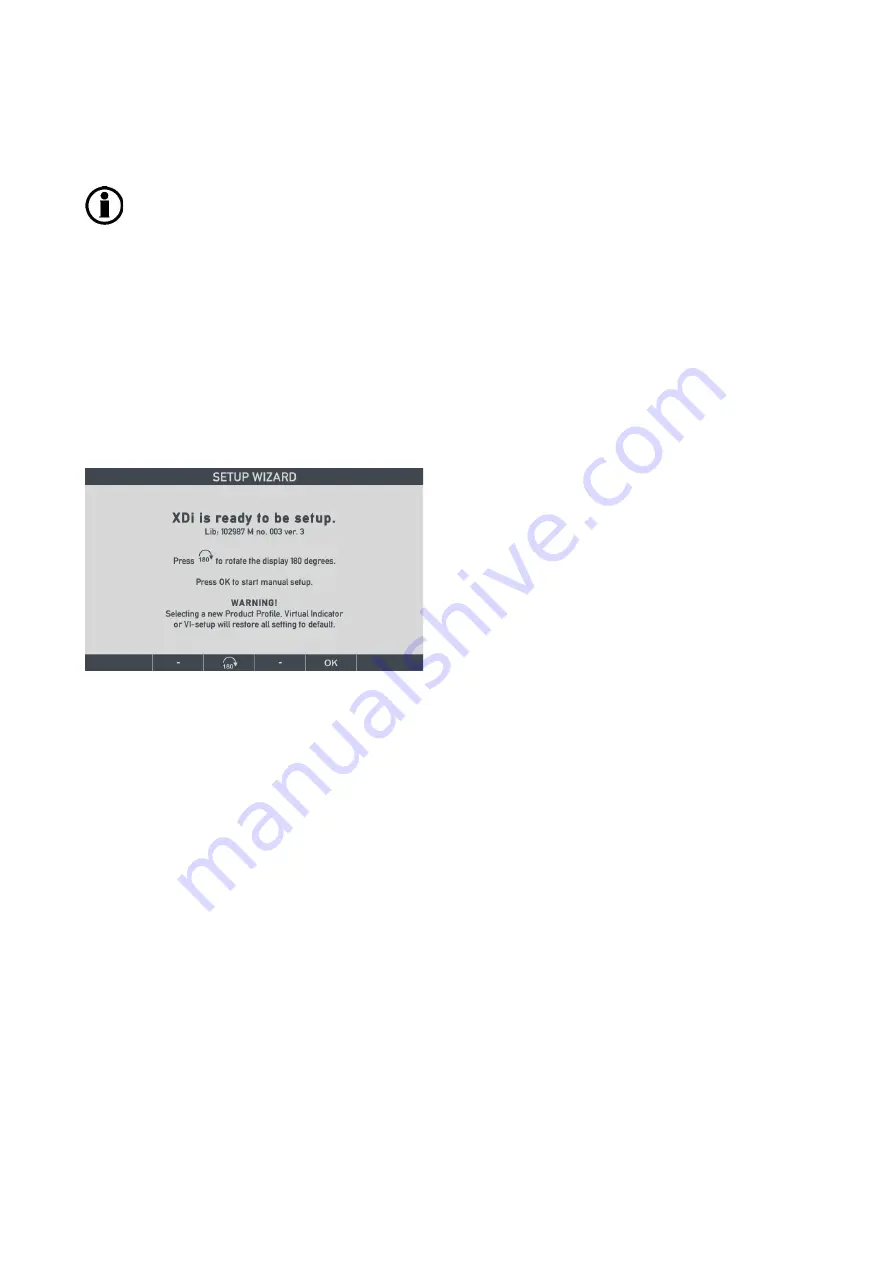
When the XDi unit is received from factory and has not previously been set up, it will automatically start the setup
wizard when powered up the first time:
Please note that the library owner, performance class, library number and version of this library are indicated below
the headline.
Important:
check that the library identification and version are correct before you start to set up the XDi.
4.6.1
Rotate the display180
O
.
The XDi display has a wide viewing angle. However, depending on the colour pallet used on the virtual indicator, a
change of colour may be observed when the display is viewed from below. To compensate for this in installations
where the indicator is normally looked at from an angle below the centre line, it is possible to rotate the
presentation 180
o
and install the XDi indicator upside down.
When the recommended DEIF colours are used in the virtual indicator design, the colours are very slightly affected
by the change in viewing angle.
For convenience, it is even possible to have this 180
o
rotation predefined in a customised XDi library, in which case
the XDi will start up being rotated 180
o
.
4.7
Manual setup procedure
When you press the “OK” soft
-key, the wizard will guide you through the 5 main setup steps.
4.7.1
Step 1 - Select CAN Node ID
First step is to assign a CAN Node ID as soon as it is selected XDi is accessible on the CAN bus.
If you don’t use CAN bus in your system, just select the default CAN NodeID by pressing OK.
It is recommended always to have at least one power line monitored.


