


CatonCaster HD422 User Manual
2.5 DC Power Connection
The CatonCaster HD422 with the DC chassis option is intended for use on 48V DC systems. A power cable
is not included for this option. In order to apply power to the unit in this configuration, simply connect the
screw terminals on rear of the unit to the rack’s DC power rails.
Be sure that the power source and cable is used in conjunction with an over-current protective device rated
at 50V, 5A, type: Slow-blo fuse as part of battery-supply circuit. Also, to reduce the risk of shock and damage
to equipment, it is recommended that the chassis grounding screw (1.3) located on the rear of the
CatonCaster HD422 – be connected to the installation’s rack, battery negative terminal, and/or earth ground.
2.6 Maintenance
The CatonCaster HD422 is virtually a maintenance-free piece of equipment. There are no user serviceable
parts on the inside of the unit.
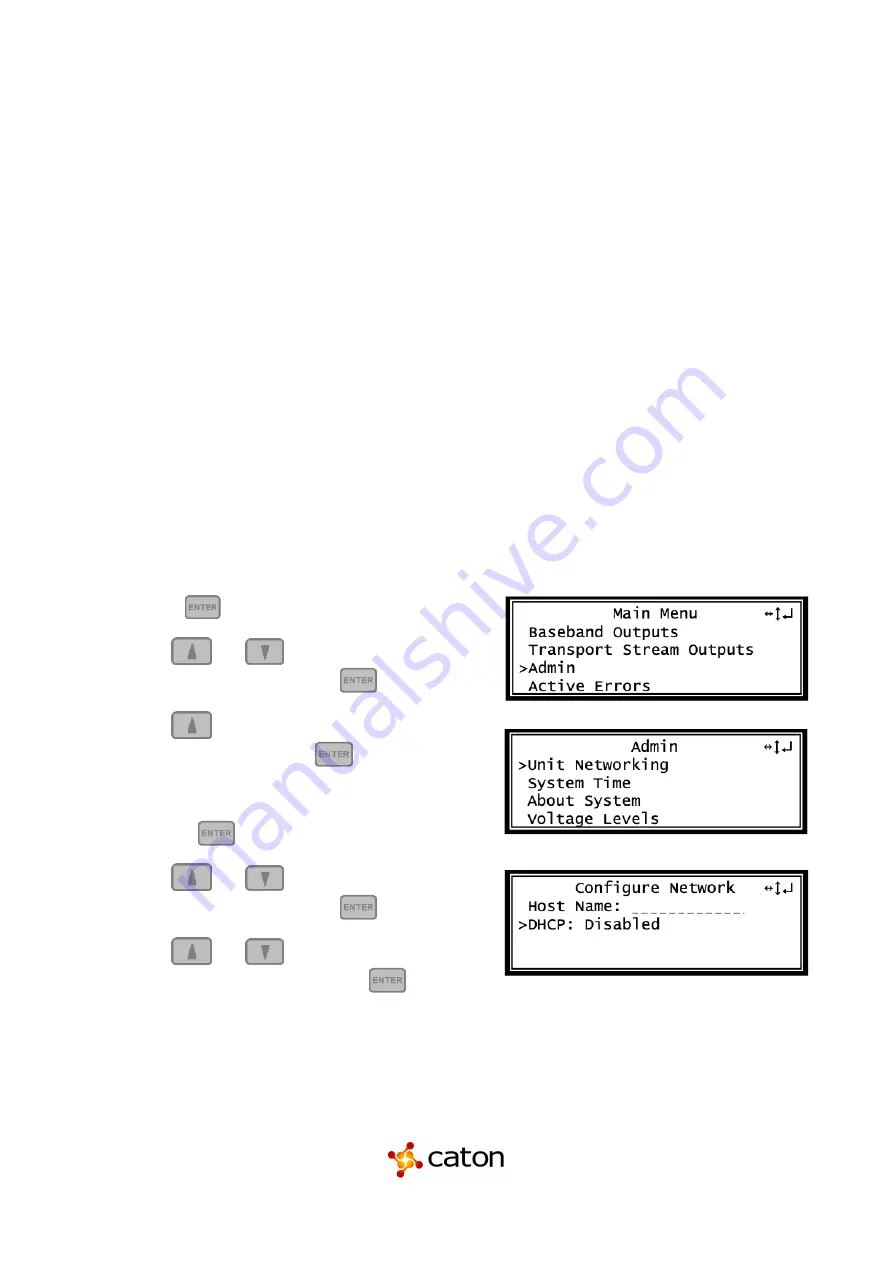
2.7 Network Setup via Front Panel
The CatonCaster HD422 can be setup on a network connection to allow remote management and SNMP
configuration. For these features to work, the network settings for the CatonCaster HD422 must first be
configured properly for the network it is connected to.
Static IP Address
To setup the CatonCaster HD422 with a static IP address, use the following steps:
Page of
15
107
www.catontechnology.com
July 2020 R1
1. Press the
button.
2. Use the
and
buttons to move the
cursor to “Admin”, then press the
button
3. Use the
and buttons to move the cursor to
“Unit Networking”, then press
the button.
Note: The first menu displayed is status menu. In
order to begin making changes to networking
settings press
button.
4. Use the
and
buttons to move the
cursor to “DHCP”, then press the
button.
5. Use the
and
buttons to change the
selection to “Disabled” then press the
button.


