


Chapter 2
2-18
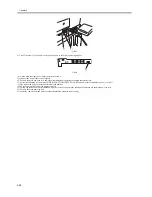
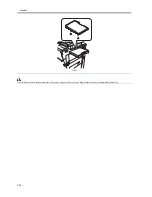
F-2-63
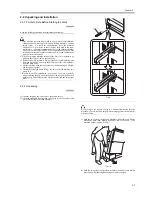
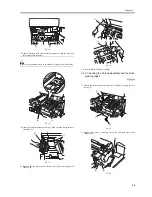
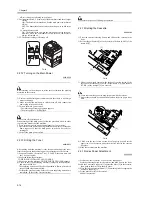
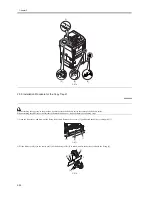
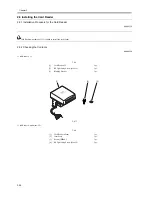
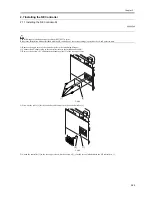
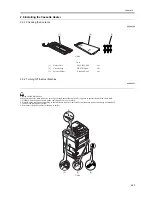
<Attaching the service book holder>
1) Remove the double-faced tape at the back of the service book holder
[1], and attach the holder to the bottom of the machine.
Points to Note
When attaching the service book holder to the machine, 6mm or more
space must be ensured between the front of the bottom sheet metal [2]
and the front of the service book holder. If the paper deck is attached
afterward without the space, the paper deck rail hits the service book
holder.
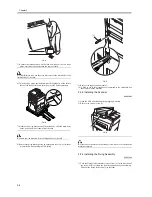
When attaching the paper deck at the same time, be sure to attach the
paper deck before the service book holder.
F-2-64
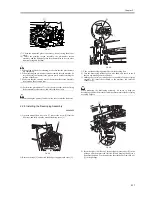
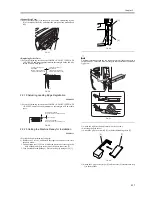
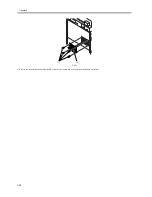
Prohibited area of affixation
- Inside the machine (inside the front cover)
- The area blocking the louver
- The area blocking the grip
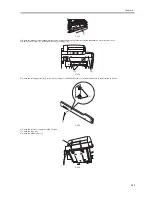
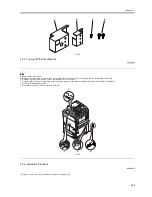
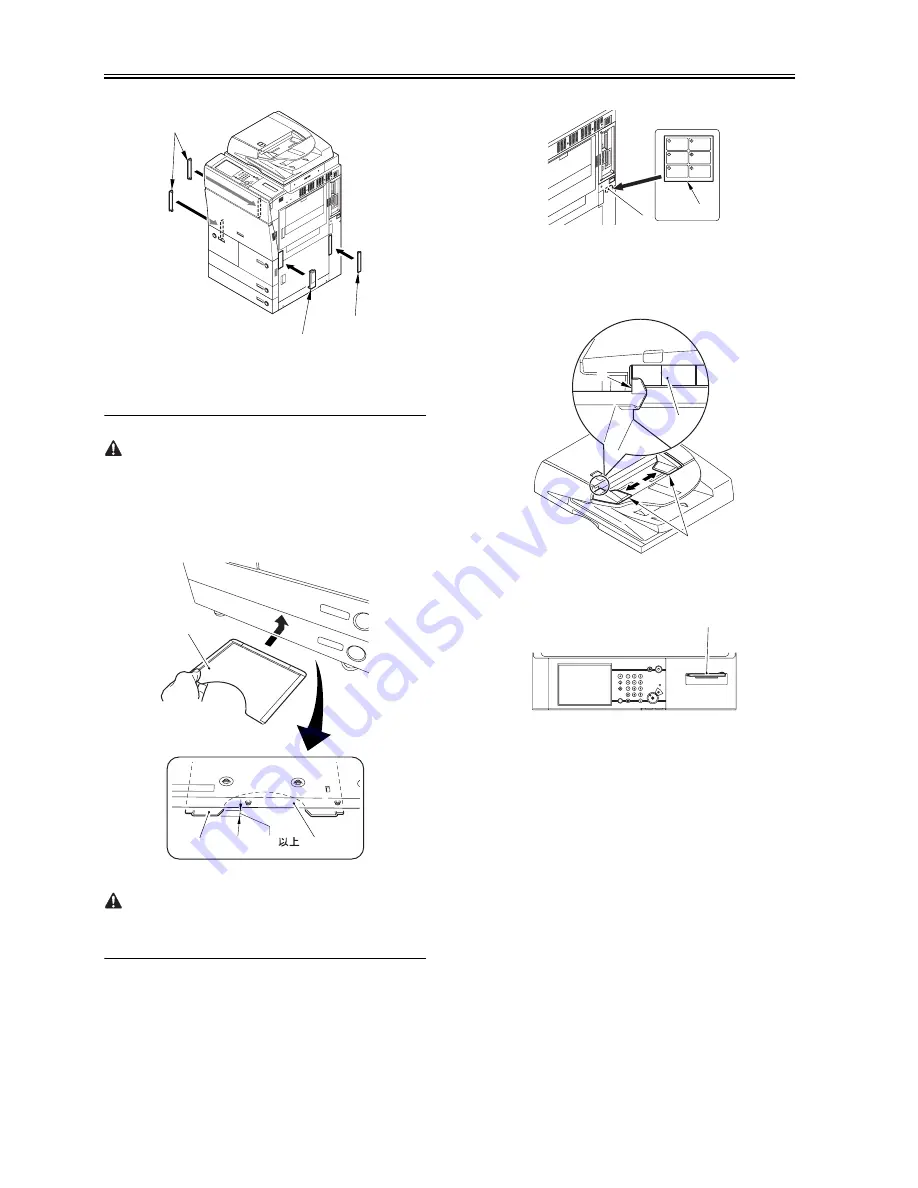
<Attaching the Shut-Down Warning Label>
1) Pick out the Shut-Down Warning Label [1] prepared in the
appropriate language, and attach it to the bottom left side [3] of the
main power switch [2] of the machine's right cover (lower rear).
F-2-65
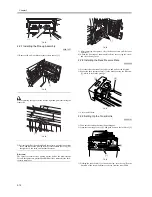
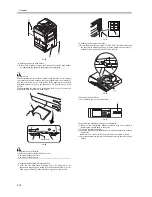
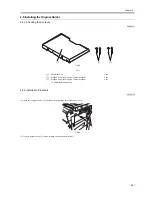
<Attaching the document size label>
1) Widen the document size plates [1] to the A4/A3 position, and attach
the label while matching the part A of the document size plate [1]
with the A4/A3 position of the ADF size label [2].
F-2-66
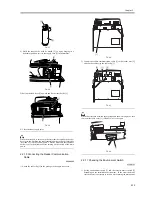
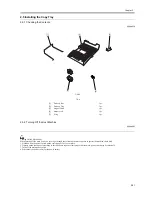
<Mounting the Touch Pen>
1) Set the touch pen on the control panel.
F-2-67
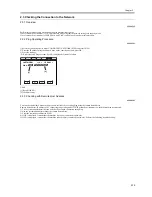
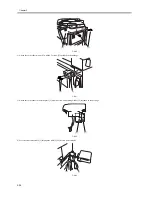
<Steps after the machine gets ready for installation>
1) Refer to the Installation Manual included with each option if
attaching the options such as the sorter.
2) Clean up around the machine.
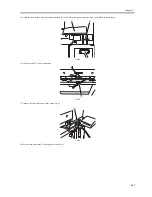
3) Move the machine to the installation site, and fix the machine with the
2 adjusters.
Reference: Use a driver if the adjusters cannot be rotated by hand.
4) Enter requirements in the service book, and store it in the service book
holder.
[1]
[1]
[2]
[1]
6mm
[1]
[2]
[2]
[1]
A4
A3
A
[2]
[1]
[1]
Содержание iR5570 Series
Страница 1: ...Mar 29 2005 Service Manual iR6570 5570 Series ...
Страница 2: ......
Страница 6: ......
Страница 26: ...Contents ...
Страница 27: ...Chapter 1 Introduction ...
Страница 28: ......
Страница 30: ......
Страница 55: ...Chapter 2 Installation ...
Страница 56: ......
Страница 58: ...Contents 2 9 3 Mounting the Cassette Heater 2 34 ...
Страница 98: ......
Страница 99: ...Chapter 3 Basic Operation ...
Страница 100: ......
Страница 102: ......
Страница 110: ......
Страница 111: ...Chapter 4 Main Controller ...
Страница 112: ......
Страница 114: ......
Страница 135: ...Chapter 5 Original Exposure System ...
Страница 136: ......
Страница 181: ...Chapter 6 Laser Exposure ...
Страница 182: ......
Страница 184: ......
Страница 192: ......
Страница 193: ...Chapter 7 Image Formation ...
Страница 194: ......
Страница 198: ......
Страница 259: ...Chapter 8 Pickup Feeding System ...
Страница 260: ......
Страница 299: ...Chapter 8 8 35 F 8 51 PS36 M19 M14 Reversing flapper Outside delivery roller Point of reversal PS37 ...
Страница 349: ...Chapter 8 8 85 F 8 290 1 Feeding roller 2 Separation roller 3 Pressure lever 4 Pressure spring 1 2 A B 3 4 ...
Страница 350: ......
Страница 351: ...Chapter 9 Fixing System ...
Страница 352: ......
Страница 401: ...Chapter 10 External and Controls ...
Страница 402: ......
Страница 406: ......
Страница 448: ......
Страница 449: ...Chapter 11 MEAP ...
Страница 450: ......
Страница 452: ......
Страница 455: ...Chapter 12 Maintenance and Inspection ...
Страница 456: ......
Страница 458: ......
Страница 468: ......
Страница 469: ...Chapter 13 Standards and Adjustments ...
Страница 470: ......
Страница 505: ...Chapter 14 Correcting Faulty Images ...
Страница 506: ......
Страница 508: ......
Страница 537: ...Chapter 15 Self Diagnosis ...
Страница 538: ......
Страница 540: ......
Страница 565: ...Chapter 16 Service Mode ...
Страница 566: ......
Страница 568: ......
Страница 633: ...Chapter 17 Upgrading ...
Страница 634: ......
Страница 636: ......
Страница 641: ...Chapter 17 17 5 F 17 4 HDD Boot ROM Flash ROM System Software ...
Страница 646: ...Chapter 17 17 10 F 17 11 8 Click START F 17 12 ...
Страница 659: ...Chapter 17 17 23 F 17 32 2 Click Start F 17 33 3 When the downloading session has ended click OK ...
Страница 661: ...Chapter 17 17 25 F 17 35 2 Click Start F 17 36 3 When the downloading session has ended click OK ...
Страница 663: ...Chapter 17 17 27 F 17 38 2 Click Start F 17 39 3 When the downloading session has ended click OK ...
Страница 668: ...Chapter 17 17 32 F 17 46 2 Click Start F 17 47 3 When the downloading session has ended click OK ...
Страница 675: ...Chapter 17 17 39 F 17 59 2 Select the data to download F 17 60 3 Click Start ...
Страница 677: ...Chapter 18 Service Tools ...
Страница 678: ......
Страница 679: ...Contents Contents 18 1 Service Tools 18 1 18 1 1 List of Special Tools 18 1 18 1 2 List of Solvents Oils 18 2 ...
Страница 680: ......
Страница 683: ...Mar 29 2005 ...
Страница 684: ......


