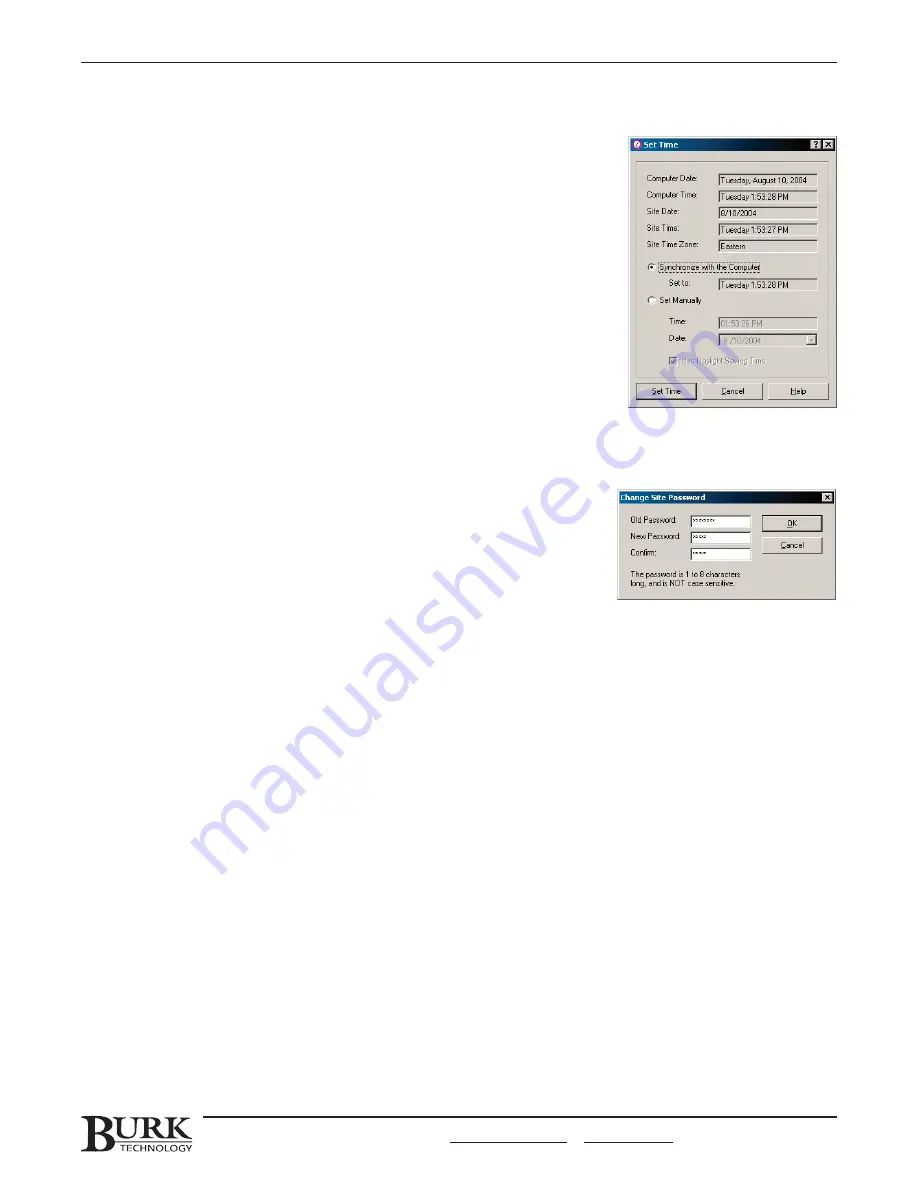
SET TIME
There are two options for setting the time at your sites. You can choose to
synchronize the time with your computer or to input the time manually.
To set the time at your site:
1. In the Site List, select the desired site (or click on any unit at that site).
2. From the Site Menu, choose S
Se
ett T
Tiim
me
e.
3. Click the S
Sy
yn
ncch
hrro
on
niizze
e w
wiitth
h tth
he
e C
Co
om
mp
pu
utte
err button if you want the site to
update its time to match that of your computer (while still accounting
for the time zone and Daylight Saving Time). Click the S
Se
ett M
Ma
an
nu
ua
alllly
y
button to enter the site time yourself.
4. Click S
Se
ett T
Tiim
me
e when you are done. The site will update its time to the
new settings and then resume keeping time independently.
CHANGING THE SITE PASSWORD
Each I/O and Voice Interface unit stores the site password that Lynx uses to
gain access to your site. This is the password entered in the Site Wizard when
you first set up your site (see page 17). Once you have your units networked,
it is strongly recommended that you change the default password (which is
P
PA
AS
SS
SW
WO
OR
RD
D).
Note: The site password is distinct from the login password you use to access Lynx, and it is distinct from Voice
Interface passwords used for telephone dial-in. To change those passwords, see the next section for Lynx users and
passwords, or go to page 47 for Voice Interface users and passwords.
To change the site password:
1. Connect to your site and select that site in the Site List (if it is not already selected).
2. From the Site menu, choose S
Se
ett P
Pa
assssw
wo
orrd
d.
3. When the Change Site Password dialog appears, enter the current password and new password where
prompted, and then confirm the new password.
4. Click O
OK
K to change the password. Lynx will then change the password on all connected units.
Note: When Lynx verifies the site password on the initial connection, it is only concerned with the password saved on
the unit with the direct or modem connection. This means you can add or remove units from your site without
separately changing the password for each one. However, when you change the site password, Lynx uploads the new
password to all networked units.
CHAPTER 9: SOUNDS, OPTIONS & PASSWORDS
89
CUSTOMER SUPPORT: 978-486-3711 • [email protected] • www.burk.com
Содержание GSC3000
Страница 8: ...GSC3000 VRC2500 INSTALLATION OPERATION MANUAL viii ...
Страница 22: ...GSC3000 VRC2500 INSTALLATION OPERATION MANUAL 14 ...
Страница 32: ...GSC3000 VRC2500 INSTALLATION OPERATION MANUAL 24 ...
Страница 40: ...GSC3000 VRC2500 INSTALLATION OPERATION MANUAL 32 ...
Страница 52: ...GSC3000 VRC2500 INSTALLATION OPERATION MANUAL 44 ...
Страница 61: ...CHAPTER 6 MODEM SITE EQUIPMENT CONNECTIONS 53 CUSTOMER SUPPORT 978 486 3711 support burk com www burk com ...
Страница 68: ...GSC3000 VRC2500 INSTALLATION OPERATION MANUAL 60 ...
Страница 120: ...GSC3000 VRC2500 INSTALLATION OPERATION MANUAL 112 ...
Страница 128: ...GSC3000 VRC2500 INSTALLATION OPERATION MANUAL 120 ...
Страница 132: ...GSC3000 VRC2500 INSTALLATION OPERATION MANUAL 124 ...
Страница 140: ...GSC3000 VRC2500 INSTALLATION OPERATION MANUAL 132 ...
Страница 144: ...GSC3000 VRC2500 INSTALLATION OPERATION MANUAL 136 ...


