Taking Captures
Since captures can be used for a variety of purposes, there are a number of ways to set them up. To manually
take a capture, just click the Take Capture icon in the standard toolbar icon. This will save the capture to the
unit. The data is then viewable in Lynx (see viewing captures below).
Captures as Alarm Actions
If you want to capture site conditions when a metering or status channel reaches an out-of-tolerance condition,
set up the capture as an Action when you configure that channel’s limits and alarms:
1. From the I/O Unit Configuration window, click on the Metering or Status tab to access the desired
channel.
2. Click the expand button ( ) by the channel number, and click in the Action field.
3. Specify Capture as the desired action, and choose the unit containing the data you want capture.
Note: You can only associate one action with an out-of-tolerance channel condition. If you want to issue a command
and take a capture, program a macro to this effect and then specify the macro as the associated action, as above.
See Chapter 10 for more on using macros.
Captures as Timed Events
For logging, it is best to schedule captures to occur as Timed Events:
1. Open the Unit Configuration window for the I/O unit and go to the Timed Events tab.
2. Set up the schedule for the capture in the Time field, and specify Capture in the Action field.
3. Select the unit containing the data you want to capture.
This will tell the I/O unit when to take the captures. In order to use the captures for site logging, make sure that
logging is enabled and configured for your site (see Logging, page 20).
Note: The CAPTURE macro command can also be used take a capture. See Chapter 10.
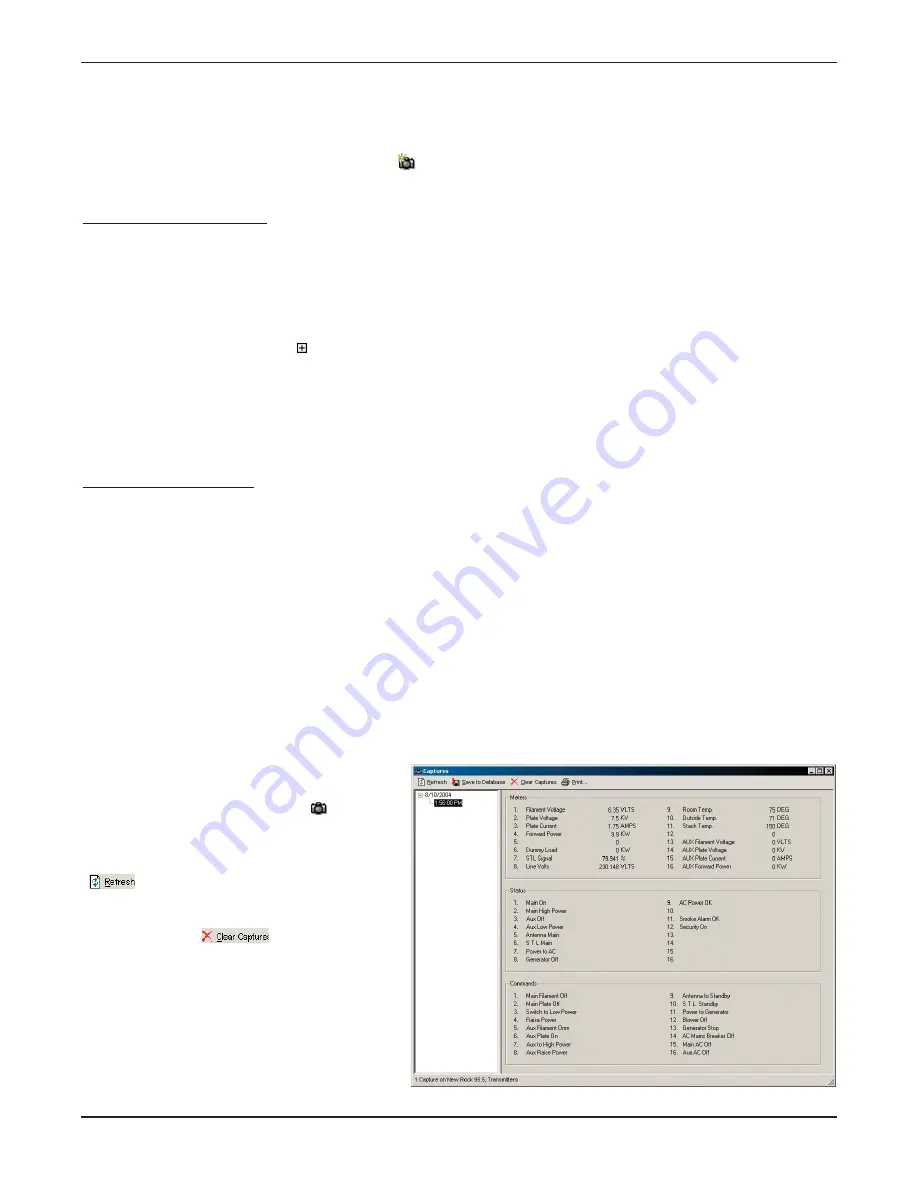
Viewing Captures
To view all the captures stored on the selected
I/O unit, click the View Captures (
) toolbar
icon. The Captures Window will appear,
showing you a table containing all the capture
data saved on the I/O unit. The Refresh button
(
) in the Captures Window toolbar
updates the Captures window to include the
most recent captures taken, and the Clear
Captures button (
) permanently
erases all Captures Window entries and
removes the captures from the I/O.
Note: If you use captures for your site logging,
avoid clearing the captures until Lynx has
downloaded them. To change how frequently
Lynx downloads the captures, click the Edit Site
toolbar icon and advance to the logging page
of the Site Wizard.
GSC3000 & VRC2500 INSTALLATION & OPERATION MANUAL
CHAPTER 7: SITE DATA & REPORTS
62
Содержание GSC3000
Страница 8: ...GSC3000 VRC2500 INSTALLATION OPERATION MANUAL viii ...
Страница 22: ...GSC3000 VRC2500 INSTALLATION OPERATION MANUAL 14 ...
Страница 32: ...GSC3000 VRC2500 INSTALLATION OPERATION MANUAL 24 ...
Страница 40: ...GSC3000 VRC2500 INSTALLATION OPERATION MANUAL 32 ...
Страница 52: ...GSC3000 VRC2500 INSTALLATION OPERATION MANUAL 44 ...
Страница 61: ...CHAPTER 6 MODEM SITE EQUIPMENT CONNECTIONS 53 CUSTOMER SUPPORT 978 486 3711 support burk com www burk com ...
Страница 68: ...GSC3000 VRC2500 INSTALLATION OPERATION MANUAL 60 ...
Страница 120: ...GSC3000 VRC2500 INSTALLATION OPERATION MANUAL 112 ...
Страница 128: ...GSC3000 VRC2500 INSTALLATION OPERATION MANUAL 120 ...
Страница 132: ...GSC3000 VRC2500 INSTALLATION OPERATION MANUAL 124 ...
Страница 140: ...GSC3000 VRC2500 INSTALLATION OPERATION MANUAL 132 ...
Страница 144: ...GSC3000 VRC2500 INSTALLATION OPERATION MANUAL 136 ...


