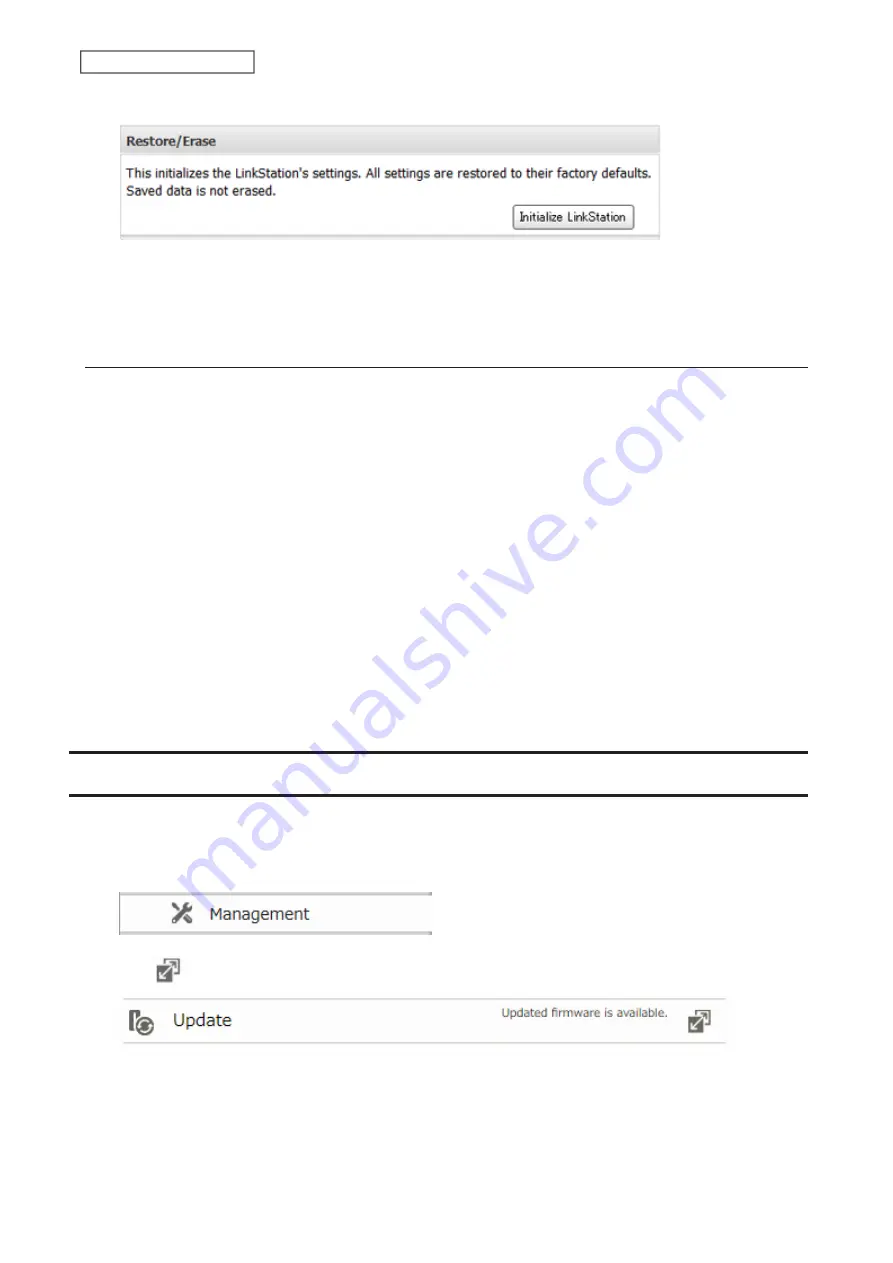
3
Click
Initialize LinkStation
.
4
The “Confirm Operation” screen will open. Enter the confirmation number, then click
OK
.
5
The LinkStation will restore its factory default settings.
Initializing with the Function Button
You can also initialize the settings with the function button.
1
Turn off the LinkStation.
2
Turn the LinkStation on while holding down the function button. The function LED will flash white.
3
Press the function button again while the LED is flashing.
4
Initialization will take 5 to 10 minutes. Do not power down the LinkStation while it is initializing and showing
the I23 message in NAS Navigator2 and with the power LED. When initialization is finished, the LinkStation will
automatically reboot.
Notes:
• The following settings will be initialized: admin username and password, IP address, and Ethernet frame size.
• To disable initializing username and password using the function button, navigate to
Management
>
Restore/
Erase
>
Edit
and change “Restore factory default settings” to “Keep current settings”. Be careful with this option! If
this is selected and you lose your admin password, you will not be able to reset it.
Updating the Firmware
If a new firmware version is available, a message is displayed when the LinkStation boots. You can update the
firmware as below:
1
From Advanced Settings, click
Management
.
2
Click
to the right of “Update”.
3
Click
OK
.
4
Click
Install Update
.
5
The “Confirm Operation” screen will open. Enter the confirmation number, then click
OK
.
80
Chapter 8 Advanced Features
Содержание LinkStation 200B
Страница 16: ...1 Open SmartPhone Navigator on your mobile device 2 Tap Open Settings 15 Chapter 2 Configuration...
Страница 24: ...3 Click Add Group 23 Chapter 3 File Sharing...
Страница 60: ...4 Enter the backup password and click OK 5 Click Create New Job 59 Chapter 6 Backup...
Страница 67: ...6 Click Time Machine 66 Chapter 6 Backup...
Страница 68: ...7 Click Select Backup Disk 8 Select the shared folder then click Use Disk 67 Chapter 6 Backup...
Страница 85: ...4 Select the desired Ethernet frame size and click OK 84 Chapter 8 Advanced Features...
Страница 89: ...2 Tap Create User 88 Chapter 9 Configuring from Mobile Devices...
Страница 96: ...2 Tap Create Folder 3 Enter the desired folder name and tap Apply 95 Chapter 9 Configuring from Mobile Devices...
Страница 100: ...3 Tap NAS Setup 99 Chapter 9 Configuring from Mobile Devices...
Страница 101: ...4 Enter a username and password This will create a new user Tap Next 100 Chapter 9 Configuring from Mobile Devices...
Страница 102: ...5 Enter the password from the previous step again and tap Next 101 Chapter 9 Configuring from Mobile Devices...
Страница 104: ...6 Enter the BuffaloNAS com name and tap Set 103 Chapter 9 Configuring from Mobile Devices...


