8
Click
OK
to save any changes. When saving changes to the external authentication server settings, you may
not to convert all current local users to external users. If a local user is converted to an external user, their user
information (including passwords) will be removed from the NAS. External users cannot be reverted to local
users.
9
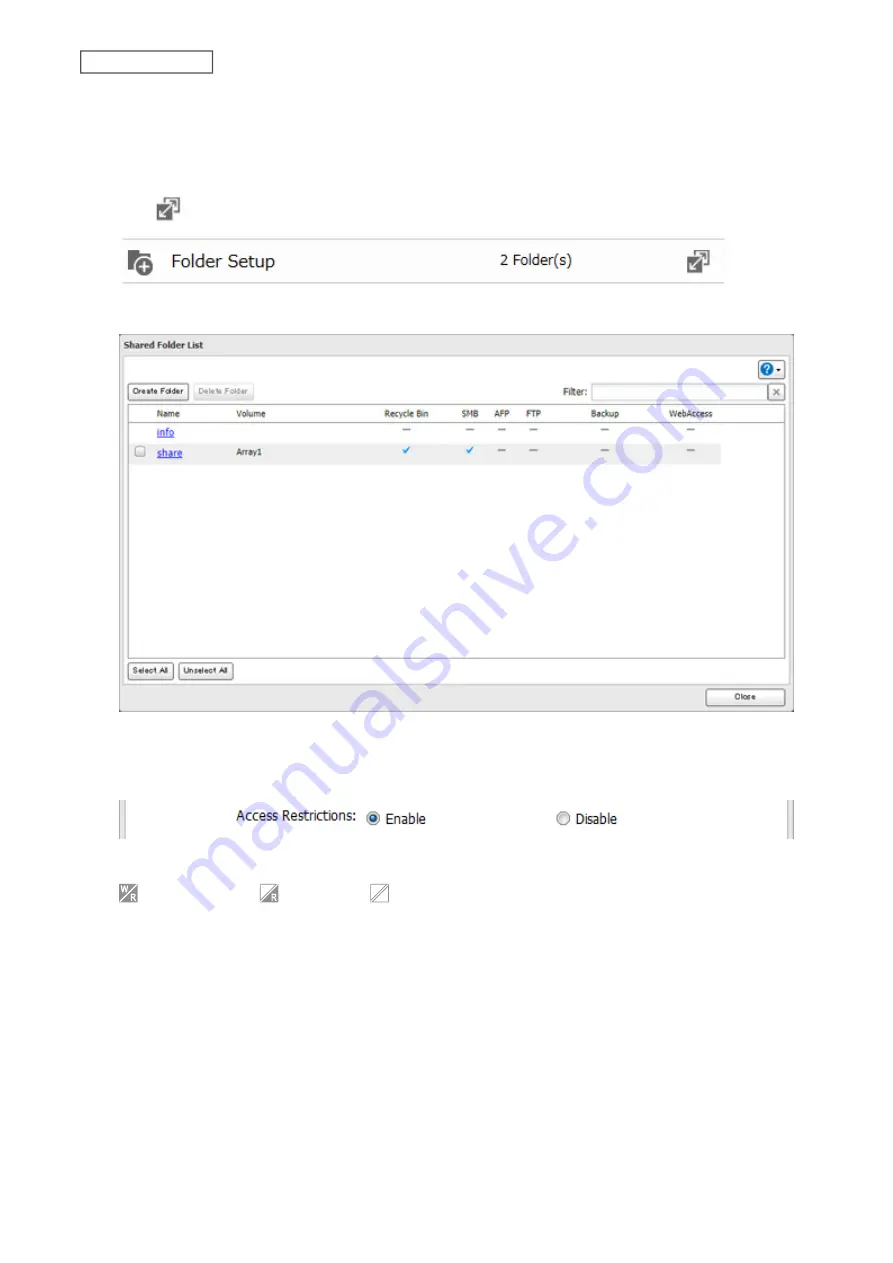
Click
to the right of “Folder Setup”.
10
Click the shared folder that you want to set access restrictions for.
11
Click
Edit
.
12
Enable “Access Restrictions”.
13
Click the
External Users
tab and select the level of access for each external user.
: Read and write
: Read-only
: No access
14
Click
OK
.
Notes:
• Users that are automatically registered belong to the “hdusers” group. They can be added to other groups from
within groups settings. Added users will be listed in “Users” > “External Users”. To delete a user that was registered
automatically, select that user and click
Delete External User
.
• If both read-only and read and write permissions are given to a user, the user will have read-only access. The most
restrictive attribute will apply.
• To access access-limited shared folders from OS X 10.7, use AFP instead of SMB, under “LAN Protocol Support”,
select the “AFP (Mac)” checkbox on the destination folders to use AFP.
33
Chapter 3 File Sharing
Содержание LinkStation 200B
Страница 16: ...1 Open SmartPhone Navigator on your mobile device 2 Tap Open Settings 15 Chapter 2 Configuration...
Страница 24: ...3 Click Add Group 23 Chapter 3 File Sharing...
Страница 60: ...4 Enter the backup password and click OK 5 Click Create New Job 59 Chapter 6 Backup...
Страница 67: ...6 Click Time Machine 66 Chapter 6 Backup...
Страница 68: ...7 Click Select Backup Disk 8 Select the shared folder then click Use Disk 67 Chapter 6 Backup...
Страница 85: ...4 Select the desired Ethernet frame size and click OK 84 Chapter 8 Advanced Features...
Страница 89: ...2 Tap Create User 88 Chapter 9 Configuring from Mobile Devices...
Страница 96: ...2 Tap Create Folder 3 Enter the desired folder name and tap Apply 95 Chapter 9 Configuring from Mobile Devices...
Страница 100: ...3 Tap NAS Setup 99 Chapter 9 Configuring from Mobile Devices...
Страница 101: ...4 Enter a username and password This will create a new user Tap Next 100 Chapter 9 Configuring from Mobile Devices...
Страница 102: ...5 Enter the password from the previous step again and tap Next 101 Chapter 9 Configuring from Mobile Devices...
Страница 104: ...6 Enter the BuffaloNAS com name and tap Set 103 Chapter 9 Configuring from Mobile Devices...


