Erasing Data on the LinkStation Completely
Under some circumstances, data from formatted drives can be recovered. The drive erasure process in this section
does a much more thorough job of erasing data. This procedure is recommended for removing all data from a drive
in a way that makes it nearly impossible to recover with current tools. The LinkStation will then be in the following
state:
• Both drives in JBOD
• An empty shared folder on each drive
• All settings returned to their default values
• All logs deleted
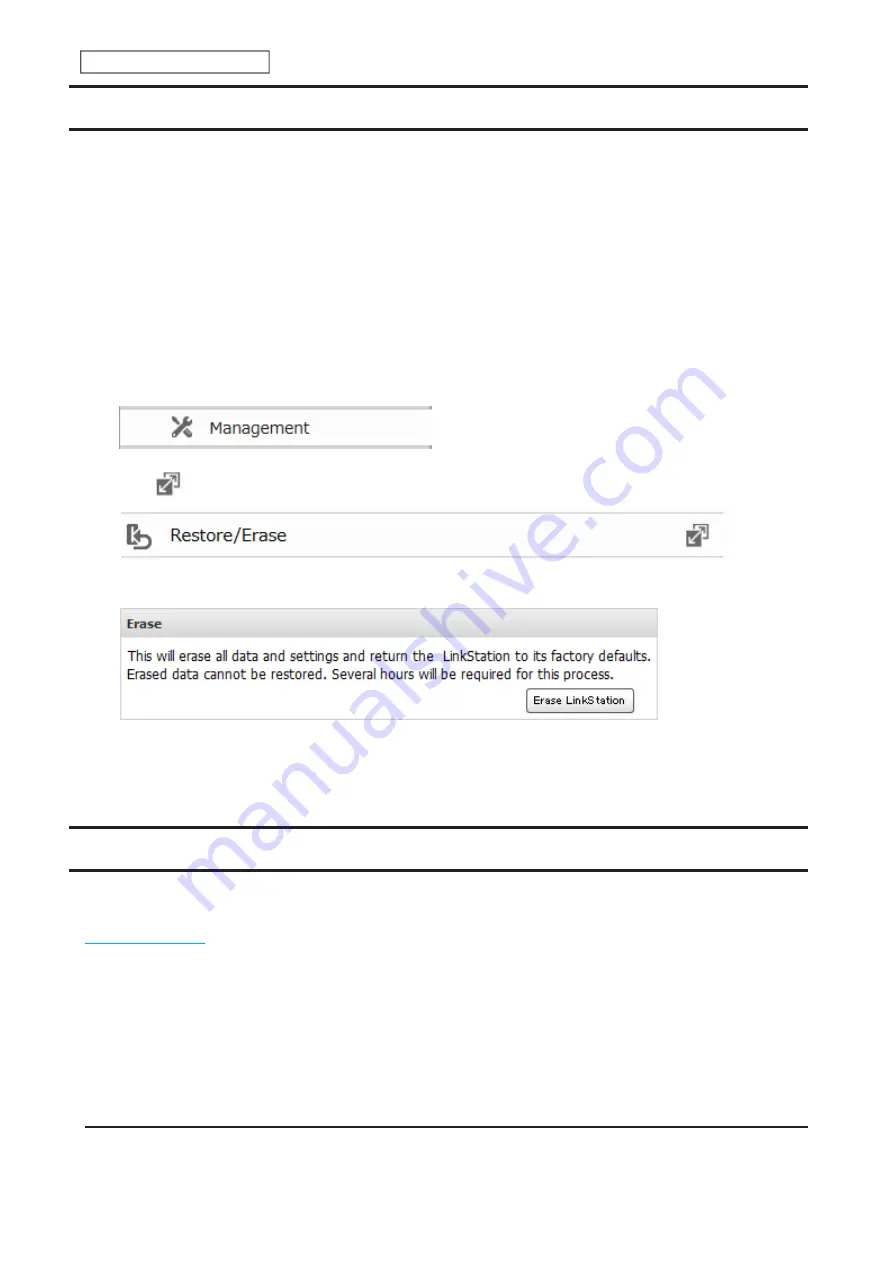
Follow the procedure below to completely and permanently erase all data from your LinkStation.
1
From Advanced Settings, click
Management
.
2
Click
to the right of “Restore/Erase”.
3
Click
Erase LinkStation
.
4
The “Confirm Operation” screen will open. Enter the confirmation number, then click
OK
.
5
All data on the LinkStation will be permanently erased.
Quotas
You can set a quota for each user or group as well as a threshold alert where you will receive an email notification if
the space used exceeds the configured threshold. To configure email notifications for the drive quota, refer to the
section in chapter 8.
Notes:
• When using quotas, disable the recycle bin or empty the trash folder often. The limited space includes the space
used for trash.
• Quotas apply per drive or per array. If a quota is set to 1 GB, each array or drive can use a maximum of 1 GB.
• Quotas cannot be set for external drives connected to the LinkStation.
• If both user and group quotas are configured for a user, the most restrictive quota will always apply.
Quotas for Users
Follow this procedure to limit the shared folder drive space available for a user.
45
Chapter 4 Storage Management
Содержание LinkStation 200B
Страница 16: ...1 Open SmartPhone Navigator on your mobile device 2 Tap Open Settings 15 Chapter 2 Configuration...
Страница 24: ...3 Click Add Group 23 Chapter 3 File Sharing...
Страница 60: ...4 Enter the backup password and click OK 5 Click Create New Job 59 Chapter 6 Backup...
Страница 67: ...6 Click Time Machine 66 Chapter 6 Backup...
Страница 68: ...7 Click Select Backup Disk 8 Select the shared folder then click Use Disk 67 Chapter 6 Backup...
Страница 85: ...4 Select the desired Ethernet frame size and click OK 84 Chapter 8 Advanced Features...
Страница 89: ...2 Tap Create User 88 Chapter 9 Configuring from Mobile Devices...
Страница 96: ...2 Tap Create Folder 3 Enter the desired folder name and tap Apply 95 Chapter 9 Configuring from Mobile Devices...
Страница 100: ...3 Tap NAS Setup 99 Chapter 9 Configuring from Mobile Devices...
Страница 101: ...4 Enter a username and password This will create a new user Tap Next 100 Chapter 9 Configuring from Mobile Devices...
Страница 102: ...5 Enter the password from the previous step again and tap Next 101 Chapter 9 Configuring from Mobile Devices...
Страница 104: ...6 Enter the BuffaloNAS com name and tap Set 103 Chapter 9 Configuring from Mobile Devices...


