only one bus-powered drive at a time. If there is insufficient bus power for your USB drive, connect its AC adapter.
Note that only the first partition of a connected USB drive is mounted. Additional partitions are not recognized.
Dismounting Drives
If the LinkStation is powered on, dismount drives (internal and external) before unplugging them. You may
dismount external drives using the function button, or dismount any drive from Settings. If the LinkStation is off,
then all drives are already dismounted and may be unplugged safely.
Note:
If you unplug your external drives without dismounting them, Settings may still show “usbdisk” in the shared
folder list. Reboot your LinkStation to clear it.
Dismounting with the Function Button
Press and hold the function button for three seconds. The white function LED will go out as all attached USB drives
are dismounted. You may now unplug them safely.
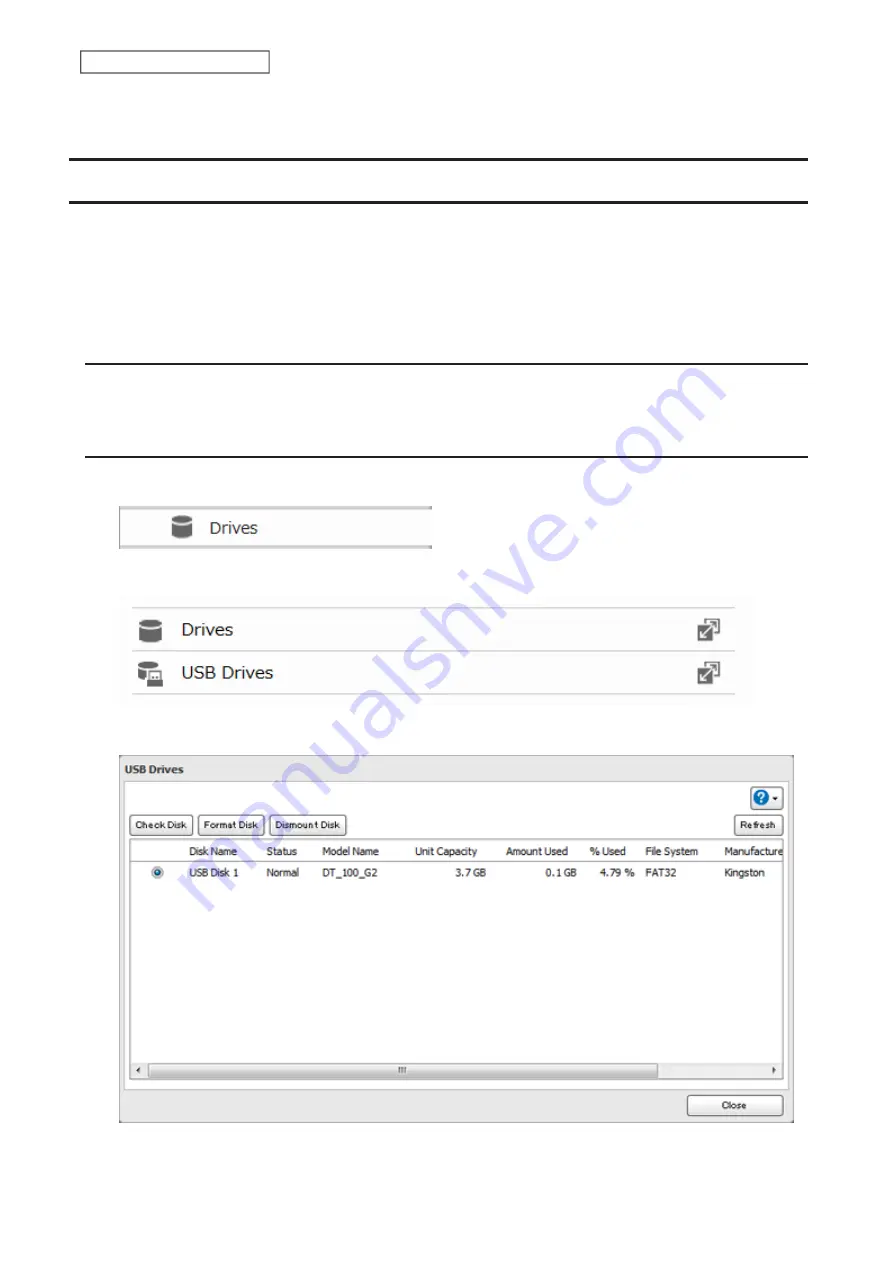
Dismounting from Settings
1
From Advanced Settings, click
Drives
.
2
Click
Drives
to dismount an internal drive or
USB Drives
to dismount an external drive.
3
Select the drive to dismount and click
Dismount Disk
.
4
The “Confirm Operation” screen will open. Enter the confirmation number, then click
OK
.
41
Chapter 4 Storage Management
Содержание LinkStation 200B
Страница 16: ...1 Open SmartPhone Navigator on your mobile device 2 Tap Open Settings 15 Chapter 2 Configuration...
Страница 24: ...3 Click Add Group 23 Chapter 3 File Sharing...
Страница 60: ...4 Enter the backup password and click OK 5 Click Create New Job 59 Chapter 6 Backup...
Страница 67: ...6 Click Time Machine 66 Chapter 6 Backup...
Страница 68: ...7 Click Select Backup Disk 8 Select the shared folder then click Use Disk 67 Chapter 6 Backup...
Страница 85: ...4 Select the desired Ethernet frame size and click OK 84 Chapter 8 Advanced Features...
Страница 89: ...2 Tap Create User 88 Chapter 9 Configuring from Mobile Devices...
Страница 96: ...2 Tap Create Folder 3 Enter the desired folder name and tap Apply 95 Chapter 9 Configuring from Mobile Devices...
Страница 100: ...3 Tap NAS Setup 99 Chapter 9 Configuring from Mobile Devices...
Страница 101: ...4 Enter a username and password This will create a new user Tap Next 100 Chapter 9 Configuring from Mobile Devices...
Страница 102: ...5 Enter the password from the previous step again and tap Next 101 Chapter 9 Configuring from Mobile Devices...
Страница 104: ...6 Enter the BuffaloNAS com name and tap Set 103 Chapter 9 Configuring from Mobile Devices...


