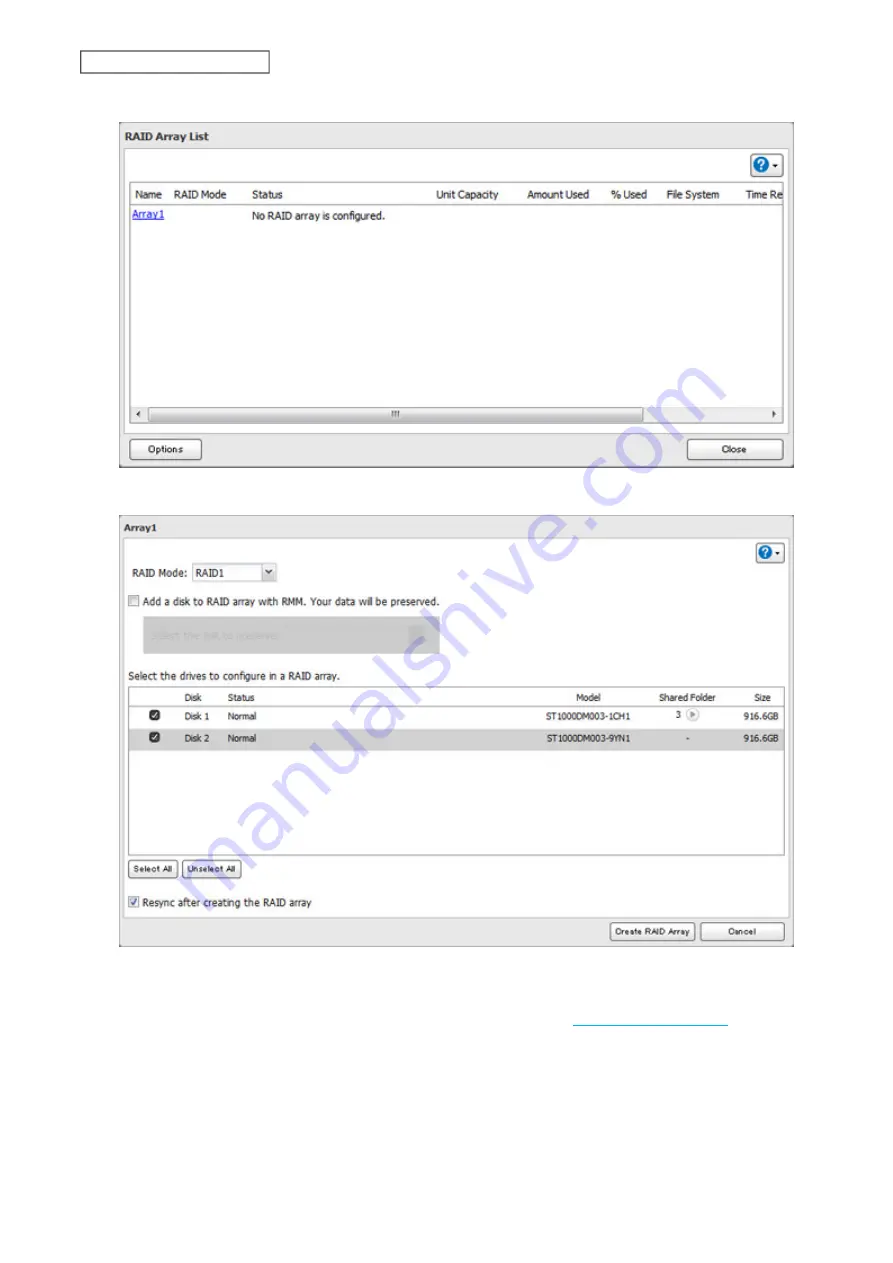
3
Choose a RAID array.
4
Select a RAID mode and the drives to be used, then click
Create RAID Array
.
5
The “Confirm Operation” screen will open. Enter the confirmation number, then click
OK
.
6
Click
OK
when completed. Next, create a shared folder by referring to the
section in
chapter 3.
Note:
Normally, after a RAID array is created, it is “resynced”, which optimizes the array and makes it more stable.
The resyncing process will take about one hour per terabyte of space in the array. File transfers will be slower during
this period, but the array will remain fully usable. The I17 message will also be displayed in NAS Navigator2 during
the resync. If you clear the “Resync after creating the RAID array” checkbox, the resync process will be skipped. If the
LinkStation is rebooted during the resync process, resyncing will begin again from the beginning.
37
Chapter 4 Storage Management
Содержание LinkStation 200B
Страница 16: ...1 Open SmartPhone Navigator on your mobile device 2 Tap Open Settings 15 Chapter 2 Configuration...
Страница 24: ...3 Click Add Group 23 Chapter 3 File Sharing...
Страница 60: ...4 Enter the backup password and click OK 5 Click Create New Job 59 Chapter 6 Backup...
Страница 67: ...6 Click Time Machine 66 Chapter 6 Backup...
Страница 68: ...7 Click Select Backup Disk 8 Select the shared folder then click Use Disk 67 Chapter 6 Backup...
Страница 85: ...4 Select the desired Ethernet frame size and click OK 84 Chapter 8 Advanced Features...
Страница 89: ...2 Tap Create User 88 Chapter 9 Configuring from Mobile Devices...
Страница 96: ...2 Tap Create Folder 3 Enter the desired folder name and tap Apply 95 Chapter 9 Configuring from Mobile Devices...
Страница 100: ...3 Tap NAS Setup 99 Chapter 9 Configuring from Mobile Devices...
Страница 101: ...4 Enter a username and password This will create a new user Tap Next 100 Chapter 9 Configuring from Mobile Devices...
Страница 102: ...5 Enter the password from the previous step again and tap Next 101 Chapter 9 Configuring from Mobile Devices...
Страница 104: ...6 Enter the BuffaloNAS com name and tap Set 103 Chapter 9 Configuring from Mobile Devices...


