

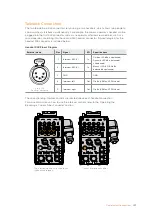


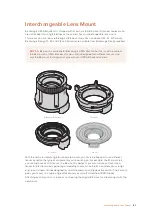
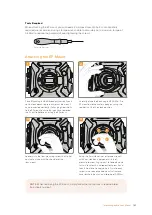
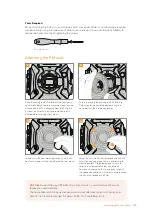


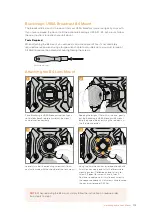
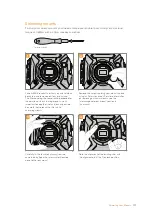

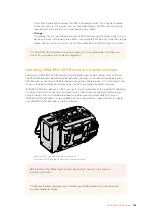

To attach an EF mount lens:
1
Align the dot on your lens with the dot on the camera mount. Many lenses have a visual
indicator, for example a blue, red or white dot.
2
Insert the lens into the mount and twist clockwise until it locks into place.
3
To remove the lens, hold down the locking button, rotate the lens counterclockwise
until its dot or indicator reaches the 12 o’clock position, and gently remove.
Attaching and removing an EF mount lens
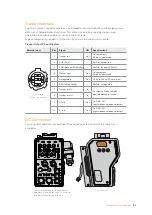
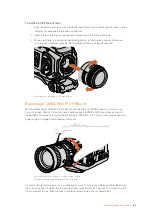
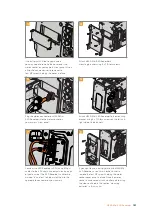
Blackmagic URSA Mini Pro F Mount
With the Blackmagic URSA Mini Pro F Mount attached to your URSA Broadcast, you can use
F mount lenses. Nikon’s F mount system stretches back to 1959, and F mount lenses are still
made today. This means that with the Blackmagic URSA Mini Pro F mount, you have access to a
huge range of vintage and contemporary lenses.
Use URSA Mini Pro F mount's iris adjustment ring to
smoothly change the aperture of F mount lenses.
It’s worth noting that the F mount is a mechanical mount. This means it does not offer electronic
focus or iris control. Instead, the F mount features a mechanical iris adjuster. This moves the the
iris pin present in most Nikon lenses to achieve smooth cine style iris adjustment.
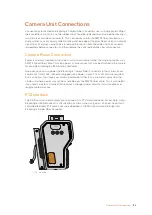
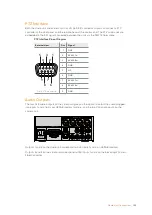
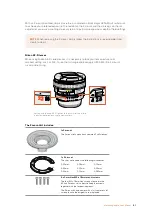
LENS
12V OUT
SDI OUT
168
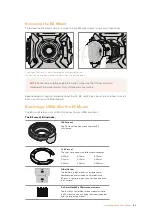
Interchangeable Lens Mount


