
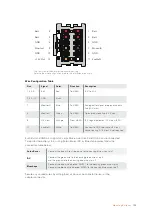

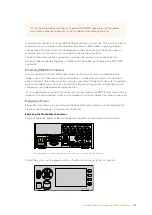


SDI
OUT
SDI
IN
REF
IN
TC I
N
12V
3
USB
SDI IN
SDI OUT
REF OUT
ETHERNET
4
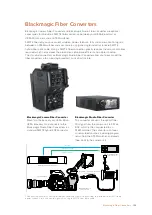
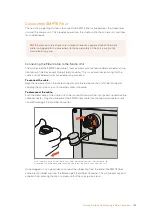
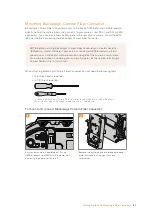
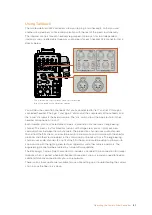
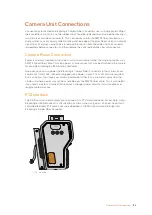
Attach Blackmagic Camera Fiber Converter’s
mounting bracket using 6 x T10 Torx screws.
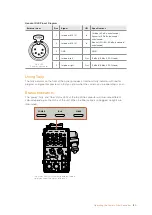
Plug the molex connector on Blackmagic
Camera Fiber Converter into the molex power
socket on your camera’s rear panel.
USB
SDI IN
SDI OUT
REF OUT
ETHERNET
5
USB
SDI IN
SDI OUT
ETHERNET
SDI OUT
12V
LENS
12V OUT
PUSH
SDI OUT
SDI IN
REF IN
TC IN
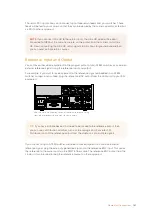
6
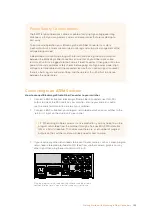
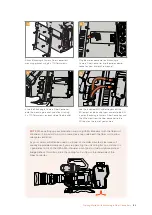
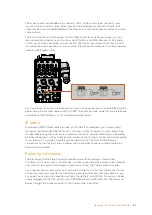
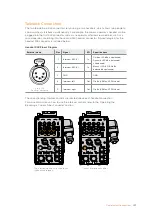
Slide the Blackmagic Camera Fiber Converter
onto the mounting bracket, and attach it using
2 x T10 Torx screws on each side of the bracket.
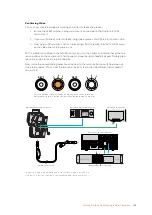
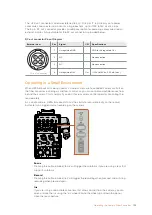
Use the included BNC cables to connect the
SDI output on the back of your camera to the SDI
input on Blackmagic Camera Fiber Converter, and
the SDI output from the fiber converter to the
SDI input on the rear of your camera.
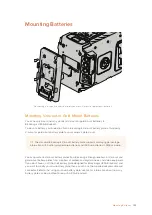
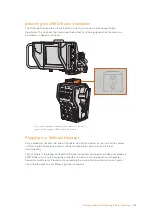
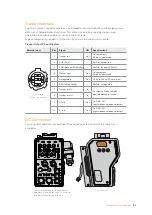
NOTE
When setting up your production and using URSA Broadcast with the fiber unit
attached, it's important to maintain some clearance underneath the fiber unit to allow
adequate ventilation.
As your camera will often be used on a tripod, or shoulder mounted, clearance will
already be provided. However, if you are operating the unit sitting flat on a surface it is
a good idea to attach the URSA Mini shoulder mount pad, or third party baseplate or
bridge plate as this will maintain the cooling fan's air flow in the underside of the
Fiber Converter.
146
Getting Started with Blackmagic Fiber Converters


