34
SERVLINK™
•
ServSwitch™ Elite models:
The attached PC CPUs can be addressed with
names if you’ve assigned names to them in the Elite menus (“webserver3”, for
instance); they can always be addressed with numbers. If there’s only one
switch in your system, the numeric addresses are a simple two-digit port
number, such as “05” or “12” (leading zeros are required for CPUs 1 through
9). If there are several cascaded switches in your system, the address consists of
the complete “port path,” with port numbers separated by dashes: The address
of the CPU on port 3 of a switch attached to port 2 of the master switch would
be “02-03”.
In the next few steps, you’ll enter the actual series of keystrokes that the ServLINK
will have to use to switch to the PC.
Normally, when you would send a switching command to a KVM switch from
your keyboard, you would press and release or press and hold one or more special
“hotkeys” that alert the switch to expect a command, then press and release the
keys that make up the address of the desired PC in sequence. (Most switches then
require you to finish the command by either releasing the hotkeys or pressing and
releasing [Enter].)
For example, if a PC CPU attached to a ServSwitch Multi had the address “25A”,
to switch to that CPU you would press and release the ServSwitch Multi’s hotkeys
(normally [Num Lock] and keypad minus [–]), then press and release [2], then
press and release [5], then press and release [A], then press and release [Enter].
Because the switch’s hotkeys will be used for other keyboard commands, those
are set separately on the ServLINK (see
Section 6.4
) and you don’t have to enter
them here. You do have to select all of the other characters in the command,
however:
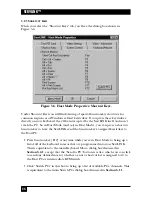
5. In the left-hand column labeled “Double Click for Key Press,” double-click the
first letter, number, or other character of the PC’s channel address. For our
example CPU with the address “25A”, that first character would be a “2”.)
6. Double-click the same number or letter in the “Double Click for Key Release”
column. This tells the ServLINK to release the key once it has been pressed.
This keystroke should appear in the “Macro Created” box located on the far
right. (Key names enclosed in brackets represent keypresses; key names
enclosed in greater than and less than signs represent key releases.)
7. Repeat steps 5 and 6 for the remaining characters that make up your
complete channel address, including any end-of-command characters.
(Unless your KVM switch explicitly requires uppercase letters, use
lowercase
letters only
for channel addresses.) For our example CPU with the address
“25A”, the Macro Created box should read “Press [2], Release <2>, Press [5],
Release <5> , Press [a], Release <a>, Press [Enter], Release <Enter>” when
you’re finished.
Содержание ServLink ACR3500A
Страница 111: ...NOTES ...
Страница 112: ...NOTES ...
Страница 113: ...NOTES ...
Страница 114: ...NOTES ...
Страница 115: ...NOTES ...


