


17
CHAPTER 3: Installation
3. Installation
NOTE
The illustrations in this chapter were made from a prototype unit. The
arrangement of the connectors on the back of your unit might be
slightly different.
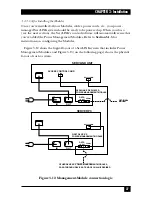
3.1 At the Local Site: Making Device and Power Connections
3.1.1 A
TTACHING
P
RIMARY
E
QUIPMENT
To install the ServLINK™ at your local site (the site where the computers you want
to access are), first power down all of the computers and KVM switches that you
will be attaching, directly or indirectly, to your ServLINK system. Then connect
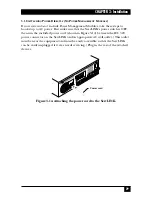
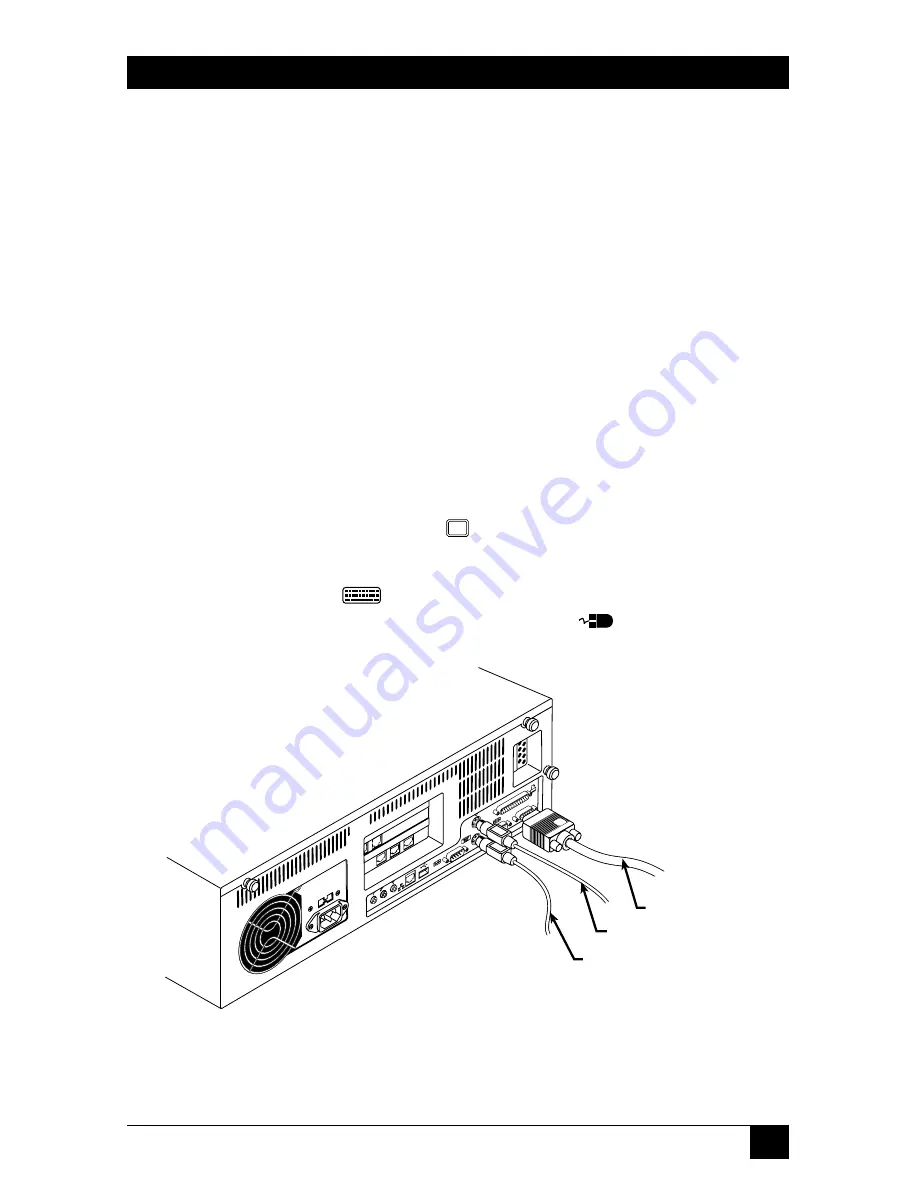
your peripherals to the ServLINK, as shown in Figure 3-1:
1. Plug the VGA monitor you wish to use with your ServLINK into the port
highlighted dark blue and labeled
on the back of your ServLINK unit.
2. Plug the included PS/2
®
type keyboard into the ServLINK port highlighted
lavender and labeled
. Plug the included PS/2 type mouse into the
ServLINK port highlighted light green and labeled
.
Figure 3-1. Attaching the peripherals to the ServLINK.
PS/2 Mouse Cable
PS/2 Keyboard Cable
VGA Monitor Cable
Содержание ServLink ACR3500A
Страница 111: ...NOTES ...
Страница 112: ...NOTES ...
Страница 113: ...NOTES ...
Страница 114: ...NOTES ...
Страница 115: ...NOTES ...


