


PresentationPRO-II • User’s Guide
101
6. Operations
Operational Configuration
léÉê~íáçå~ä=`çåÑáÖìê~íáçå
The following topics are discussed in this section:
•
Monitor Layout
•
Touch Screen Calibration
•
A Word About LOS
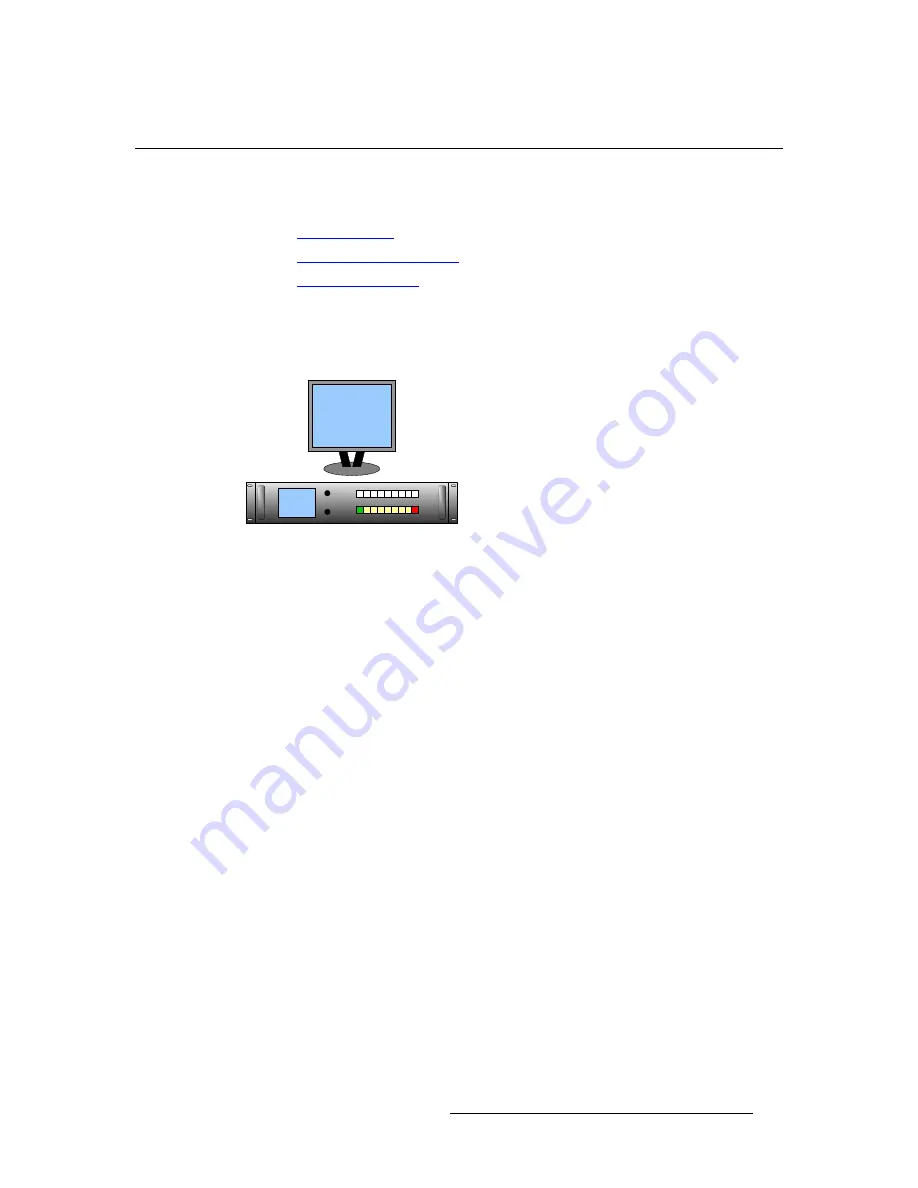
jçåáíçê=i~óçìí
Use the following diagram as a recommended layout for your monitor.
Figure 6-1.
Application Layout
For optimum viewing and utility, place your Program monitor in close proximity to the
chassis, either above or immediately to the right.
qçìÅÜ=pÅêÉÉå=`~äáÄê~íáçå
As an excellent prerequisite to all operating procedures, it is recommended that you
calibrate the Touch Screen.
Use the following steps to calibrate your Touch Screen display:
1.
If required, press {
HOME
} to display the
Home Menu
.
2.
Press {
DISPLAY
} to show the
Display Settings Menu
.
3.
Press {
LCD CAL
} to display the first
Touch Screen Calibration Menu
.
4.
Follow directions on screen to complete the calibration procedure.
^=tçêÇ=^Äçìí=ilp
On rare occasion, you can experience
LOS
(loss of signal) — typically due to a poor video
or computer connection. In these cases, PresentationPRO-II obeys a precise set of rules:
•
Scaler LOS
— If there is a LOS for a video signal inside a scaler (PIP or KEY),
the video switches to black, but the scaler remains in its current size and position.
•
Background LOS
— If there is a LOS for the background DVI input, the video
switches to the background’s selected matte color.
•
DSK LOS
— If there is a LOS for the DSK, the system switches the DSK
Off
(specifically, selecting "
none
" as the type).
In each case, when the video signal recovers, the system re-enables it as before.
Program
Содержание PresentationPRO-II
Страница 1: ...r d m molJff Manual 26 0405000 00 Revision A...
Страница 12: ...xii PresentationPRO II User s Guide Table of Contents...
Страница 132: ...120 PresentationPRO II User s Guide 6 Operations Capturing Still Frames...
Страница 144: ...132 PresentationPRO II User s Guide K p Input and Output Resolutions...


