Chapter 4 – Lubrication
Service manual AJP PR3/PR4 4 - 3
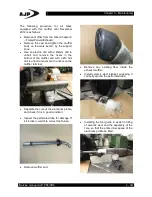
Remove the screw from the oil inlet pipe (2)
and sealing rings on the lower racord of the
radiator, using two wrenches not to damage
the oil radiator.
Remove the oil inlet pipe.
Inspection
Check that the racord screws and the oil hose
is clogged, damaged or worn and replace if
necessary. The engine should never work
with damage on the oil pipes or the radiator.
If they are clogged, clean it with a non-
flammable solvent with high combustion point.
! WARNING !
Never use gasoline or solvents with a low
flash point to clean the oil passage tubes.
Can cause fire or explosion.
Assembly
Place each oil pipe in the correct position,
between the front engine supports and the
frame, as shown in the following image.
Outlet pipe
Assemble the racord screw with sealing rings
in the upper oil cooler banjo.
Tighten the screw to the specified torque
value by keeping the oil pipe banjo aligned
with the frame tube.
Note
: Do not bend the oil outlet pipe.
Inlet pipe
Assemble the lower racord in the right
crankcase cover and tighten according to the
specified torque value.
Assemble the screw racord with sealing rings
made of copper in the lower banjo oil cooler.
Note:
Do not bend the oil inlet pipe. Make
sure that the oil pipe is not positioned against
the exhaust curves.
Adjust the two pipes in the correct position
before the final tightening on the oil cooler.
Tighten the racord screw of the oil inlet pipe to
the radiator with the specified tightening.
Always use a 22mm wrench to lock the
hexagon socket of the radiator to avoid
damage during tightening.
Tightening torques:
Oil pipe banjo on the right crankcase (200cm
3
/ M8x1):
26N.m (2,7Kgf.m)
Oil pipe banjo on the right crankcase
(M10x1,25):
34N.m (3,5Kgf.m)
Oil pipe racord on the clutch cover (M8x1):
26N.m (2,7Kgf.m)


