Network Connectivity
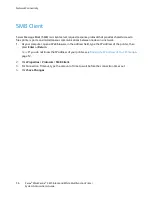
Configuring SMB
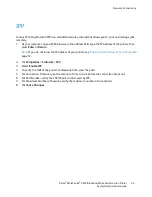
1.
At your computer, open a Web browser, in the address field, type the IP address of the printer, then
press
Enter
or
Return
.
Note:
If you do not know the IP address of your printer, see
Finding the IP Address of Your Printer
on
page 12.
2.
Click
Properties
>
Protocols
>
SMB
.
3.
Select
Enable SMB
.
4.
Select
TCP/IP
and
NetBEUI
as needed.
5.
For Host Name, type a name. The name can be up to 15 characters in length.
6.
For Workgroup, type a name. The name can be up to 15 characters in length. The workgroup name
can include alphanumeric characters and the following special characters: ! # $ @ & \ ( ) - . ^ _ { } ~
7.
For Maximum Number of Sessions, verify the maximum number of connections.
8.
To send the host name and workgroup name in unicode characters during SMB transmission, for
Unicode Support, select
Enabled
.
9.
To manage device host names in a workgroup, for Auto Master Mode, select
Enabled
. When there is
no master browser in the workgroup, Auto Master Mode allows the printer to become the domain
master browser at startup.
10.
To encrypt the password during SMB transmission, for Password Encryption, select
Enabled
.
11.
For Print Timeout, type the amount of time allowed in seconds before print data times out.
12.
For Non-print Timeout, type the amount of time in seconds before non-print data times out.
13.
Click
Save Changes
.
Xerox
®
WorkCentre
®
3615 Black and White Multifunction Printer
47
System Administrator Guide

