Administrator Tools
In IPv6 network configurations, the IPv6 address is assigned automatically.
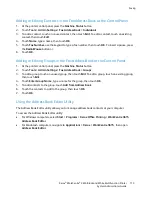
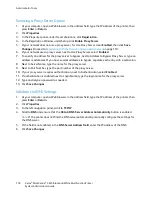
To assign a static IP address to the printer:
1.
At the printer control panel, press the
Menu
button.
Note:
To navigate through the menu, use the up or down arrow buttons.
2.
Navigate to
Admin Settings
, then press
OK
.
3.
Navigate to
Network Setup
, then press
OK
.
4.
Navigate to
TCP/IP
, then press
OK
.
5.
Navigate to
IPv4
, then press
OK
.
6.
Navigate to
IP Address
, then press
OK
.
When undefined, the address is 000.000.000.000.
7.
Set the IP address, then press
OK
.
The printer control panel displays a reminder that the printer must be turned off and then restarted
before the changed setting is applied. You can restart the printer after all the settings have been
modified.
8.
To return to
IP Address
, press the
Left
arrow button twice.
9.
Navigate to
Network Mask
and set the address. When finished, press
OK
.
10.
To return to
Network Mask
, press the
Left
arrow button twice.
11.
Navigate to
Gateway Address
, then set the address. When finished, press
OK
.
12.
Turn off the printer, then turn it on again.
13.
To verify the new settings, print the Configuration Page.
See also:
Online Support Assistant at:
www.xerox.com/office/WC3615support
126
Xerox
®
WorkCentre
®
3615 Black and White Multifunction Printer
System Administrator Guide


