


Page: 56
SmartPad LCD
™
© 2008 Xantech Corporation
brands of projectors look for extended OFF commands to avoid accidentally turning projectors off to protect
bulbs from unnecessary power cycles. To repeat an IR Command:
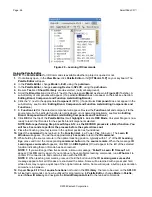
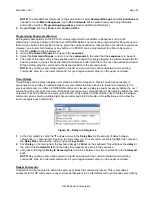
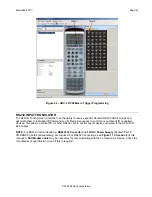
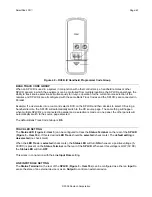
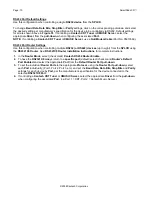
Figure 42 – Repeating an IR Command
1.
Right click the
command
in the
Command List
, select
Repeat
from the pop-up and roll the cursor into the
blank pop-up
. A
text block
will appear in the
blank pop-up
.
2.
Enter a
numeric value
with the
keyboard
for the number of times the command is to repeat.
3.
Click any inactive location on the screen (no
GTL
) or press
Enter
.
Delete A Command From the Command List
1.
In the
Command List
right-click
the
command
or
delay
to be deleted.
2.
Select
Delete
from the pop-up and the
command
or
delay
will be removed from the
Macro Command
List
.
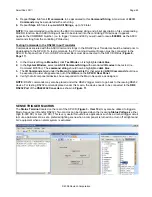
Testing Commands Placed on the Virtual SPLCD
Commands placed under buttons on the Virtual SPLCD can, and should, be tested prior to downloading to the
actual SPLCD. To test placed commands, the
PC
running
Universal Dragon
must be connected to the
SPLCD
via the
RS232
or
USB Programming Port.
The
IR output
of the
SPLCD
should be connected to a
Connecting Block
as shown in
Figure 8, Page 17
. Connect
IR Emitters
to the appropriate outputs on the
connecting block and attach them over the
IR eyes
on the components being tested.
NOTE:
If RS232 Commands have been placed under any GTL’s, the SPLCD must be connected to the RS232
controlled device with an
RS232422
as described in Section:
Testing RS232 Commands/Using SPLCD Test
.
1.
In the
Universal Dragon Tool Bar
, click
Test Mode
so it is highlighted in
dark blue
.
2.
Click a
GTL Source
or
Function Button
in the
SPLCD System Window
with placed IR commands to be
tested. (i.e. The MSRV Source Select Button).
3.
Each
command
and
delay
in the
Command List
will highlight
red
as it is being output from Universal
Dragon. The associated command(s) should output from the emitters and control the connected devices as
designed.
4.
Test all
Source
and
Function GTL’s
to confirm programming.
5.
Deselect the
Test Button
when testing is complete.
6.
Make necessary changes to button programming as needed following the steps in the previous sections
until all buttons are executing properly.