


1
機
能
各
部
の
名
称
ご
使
用
の
前
に
安
全
の
た
め
に
⁝
困
っ
た
と
き
付
録
接
続
画
面
調
節
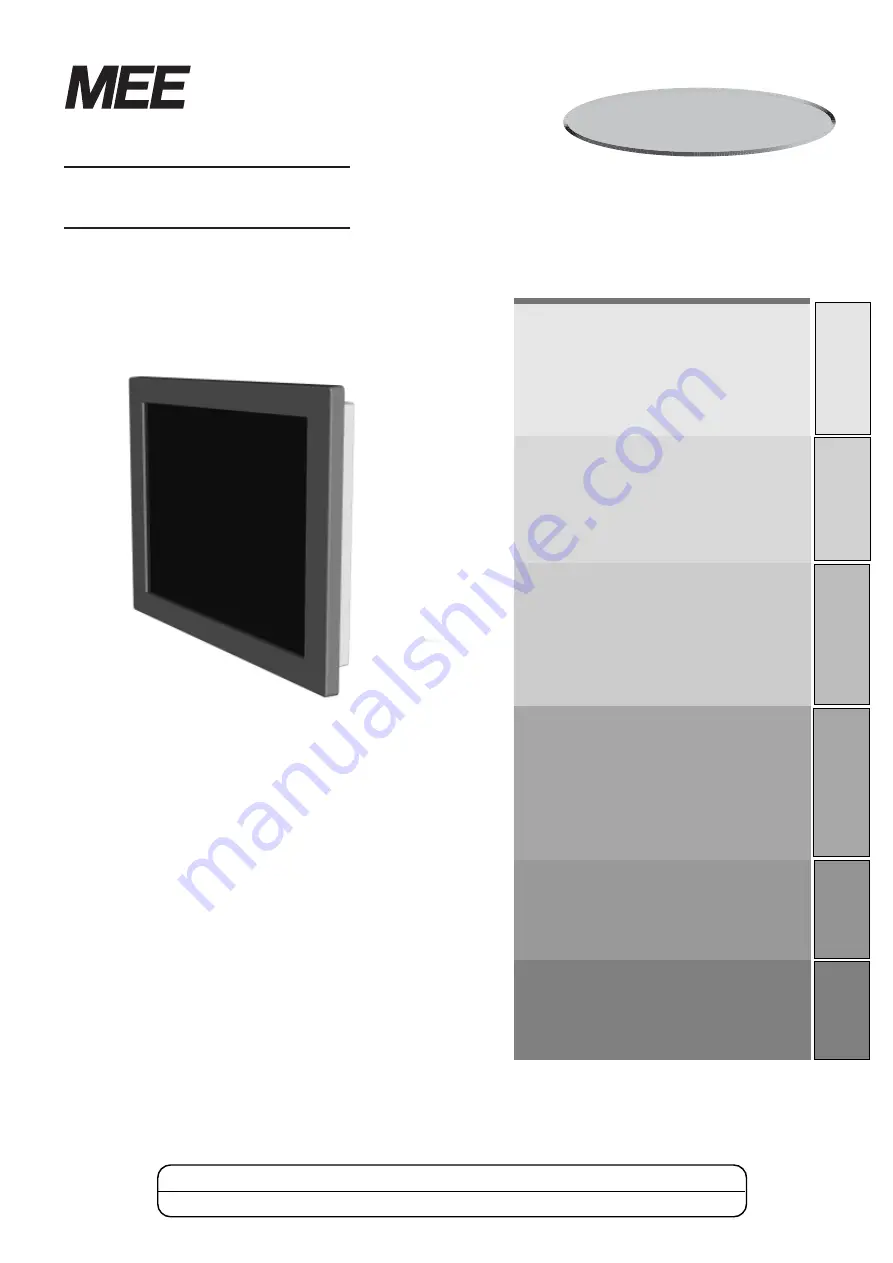
タッチセンサ付TFTカラー液晶モニタ
取扱説明書
TSD-AT1513-MN
■
■
■
■
■ この取扱説明書をよくお読みになり、正しくお使いください。特に「安全のために必ず守ること」は、タッチモニタをご使
この取扱説明書をよくお読みになり、正しくお使いください。特に「安全のために必ず守ること」は、タッチモニタをご使
この取扱説明書をよくお読みになり、正しくお使いください。特に「安全のために必ず守ること」は、タッチモニタをご使
この取扱説明書をよくお読みになり、正しくお使いください。特に「安全のために必ず守ること」は、タッチモニタをご使
この取扱説明書をよくお読みになり、正しくお使いください。特に「安全のために必ず守ること」は、タッチモニタをご使
用の前に必ず読んで正しくお使いください。
用の前に必ず読んで正しくお使いください。
用の前に必ず読んで正しくお使いください。
用の前に必ず読んで正しくお使いください。
用の前に必ず読んで正しくお使いください。
■
■
■
■
■ この取扱説明書に収録している保証書は必ず「お買上げ日・販売店名」などの記入を確かめて、販売店からお受け取りくだ
この取扱説明書に収録している保証書は必ず「お買上げ日・販売店名」などの記入を確かめて、販売店からお受け取りくだ
この取扱説明書に収録している保証書は必ず「お買上げ日・販売店名」などの記入を確かめて、販売店からお受け取りくだ
この取扱説明書に収録している保証書は必ず「お買上げ日・販売店名」などの記入を確かめて、販売店からお受け取りくだ
この取扱説明書に収録している保証書は必ず「お買上げ日・販売店名」などの記入を確かめて、販売店からお受け取りくだ
さ い 。
さ い 。
さ い 。
さ い 。
さ い 。
インターネットホームページ:http://www.mee.co.jp/sales/visual/touch-monitor/
製品情報などを提供しています。
もくじ
ページ
1. ご使用の前に ............................................ 2
2. 安全のために必ず守ること ...................... 3
3. 各部の名称 ............................................... 6
■ 本体背面 ............................................ 6
■ 付属品の確認 ..................................... 7
4. 接続 .......................................................... 8
■ 電源の接続 ........................................ 8
■ ケーブルの接続 ................................. 9
■ ケーブルの固定 ................................. 9
■ タッチセンサ用ドライバソフトのインストール .. 10
5. 画面調節 ................................................... 13
■ 画面の調節 ........................................ 13
■ タッチOSD機能 ................................ 14
6. 機能 .......................................................... 18
■ 自動画面表示 ..................................... 18
■ パワーマネージメント機能 ............... 18
7. 困ったとき ............................................... 19
■ 故障かな?と思ったら ...................... 19
■ 保証とアフターサービス ................... 21
8. 付録 .......................................................... 22
■ 仕様 ................................................... 22
■ さくいん ............................................ 23
アナログ抵抗膜方式
アナログ抵抗膜方式
Summary of Contents for TSD-AT1513-MN
Page 2: ...2 1 VCCI B P8 P6 VCCI Windows...
Page 3: ...3 2...
Page 4: ...4 1 1 During servicing disconnect the plug from the socket outlet...
Page 6: ...6 3 OSD On Screen Display 2 DC DVI D 5 OSD OSD 6 3 USB B 1 D SUB 9 4 D sub15 OSD DVI CAC DV2D...
Page 7: ...7 DC USB A B CD ROM D sub 15 D sub 15 2 D sub 9 D sub 9...
Page 11: ...11 OS TSD AT1513 MN OK...
Page 12: ...12 Controller USB USB Controller Serial Serial Serial Port COM USB PC...
Page 14: ...14 OSD OSD 1 OSD 3 OSD OSD OSD OSD OSD OSD OSD P16 OSD OSD OSD...
Page 16: ...16 4 OSD OSD 1 OSD B C D UPDD OSD A B C D 2 OSD OSD OSD OSD OSD 3 3 OSD OSD OSD...
Page 20: ...20 1 1 1 DC 5 5 2 3 1 DC 5 5 2 3 CD ROM P10 5 6 7 8...
Page 21: ...21 TSD AT1513 MN...
Page 46: ...22 Appendix MEMO...
Page 47: ...23 Appendix MEMO...


