V
,-,;�-= ......
i...J!
i
:=#"'-,
3.7 Upgrading with a 82077M Floppy Disk Controller
As has already been mentioned at the beginning, Golden Gate can be
upgraded with an own floppy disk controller. This is the component 82077AA
In the PLCC68 package (vortex order.No.: 8364).
The Golden Gate PCB provides a corresponding PLCC68 socket and suitable
connections for the floppy disk drives (one external and one internal). The
software that comes with Golden Gate contains all the functions to access this
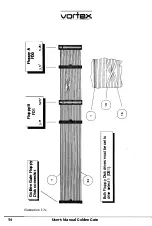
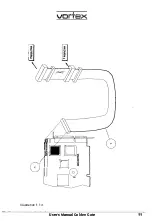
floppy disk controller, i.e. apart from the 82077 AA and the drives with their
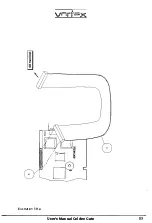
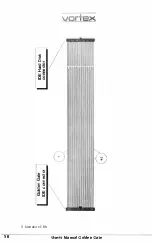
respective connection cables (see illustration 3.7.c) nothing else is required.
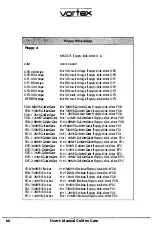
As soon as the floppy disk controller has been installed, floppy disk drives of
the following sizes and capacities can be used under MS-DOS:
Procedure:
Size
Formatted Capacity of Memory
3,5"
720KB
3,5"
1.44MB
3,5"
2,88MB
5,25"
360KB
5,25"
720KB
5,25"
1.2MB
During the installation of the 82077AA the Amiga must be switched off and all
cables be removed, otherwise all the instructions given for the installation of
the Golden Gate emulator itself apply.
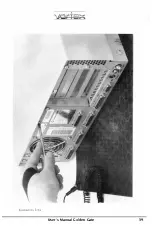
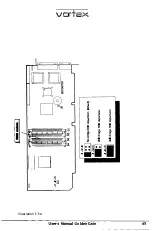
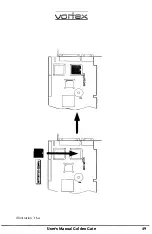
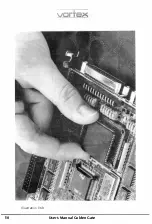
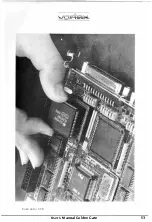
(a) Illustrations 3.7.a and 3.7.b show the location of the PLCC68 socket and
the orientation with w�ich the 82077AA floppy disk controller must be
plugged in as well as the connections for the floppy disk drives. A PLCC68 IC
socket showing a bevel at one corner is provided at a certain place of the
Golden Gate PCB for the installation of the 82077AA. PLEASE CHECK 1WICE,
whether the 82077AA has been plugged in with the correct orientation.
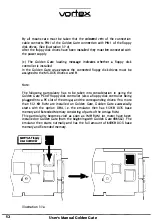
(b) After the floppy disk controller has been plugged in, the connection cable
is connected with Golden Gate and the floppy disk drives. All floppy disk
drives must be set on ID= I, independent of the fact whether they are to be
accessed as drive A or drive B.
User's Manual Golden Gate
51
I
Summary of Contents for Golden Gate 386SX
Page 32: ...Illustration 3 3 a 30 V 1 User s Manual Golden Gate ...
Page 33: ...Illustration 3 3 b _ s s User s Manual Golden Gate 31 ...
Page 34: ...1 11 Illustration 3 3 c 32 User s Manual Golden Gate ...
Page 35: ... __ lSF Illustration 3 3 d User s Manual Golden Gate 33 ...
Page 36: ...Illustration 3 3 e 34 User s Manual Golden Gate ...
Page 37: ...Illustration 3 3 f User s Manual Golden Gate 35 ...
Page 41: ...Illustration 3 4 A _ _ User s Manual Golden Gate 39 ...
Page 42: ...Illustration 3 4 b 40 User s Manual Golden Gate ...
Page 43: ...Illustration 3 4 c ff r User s Manual Golden Gate 41 ...
Page 44: ...Illustration 3 4 d 42 User s Manual Golden Gate ...
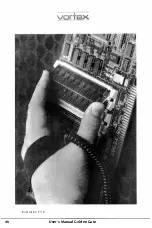
Page 48: ...illustration 3 5 b 46 User s Manual Golden Gate ...
Page 51: ...i lllust rat 1011 U a v r x 0 t1 0 t t1 1 0 User s Manual Golden Gate 49 I BOC38 ...
Page 52: ...y_ Illustration 3 6 b 50 User s Manual Golden Gate ...
Page 55: ...11 luslratlon 3 7 b F a User s Manual Golden Gate 53 ...
Page 57: ...VI VI 01 I Floppy Disk I I Illustration 3 7 d User s Manual Golden Gate ...
Page 59: ... 0 Illustration 3 8 a _Jr r j D I l I tJ I n User s Manual Golden Gate 0 57 ...

