Complete Manual for
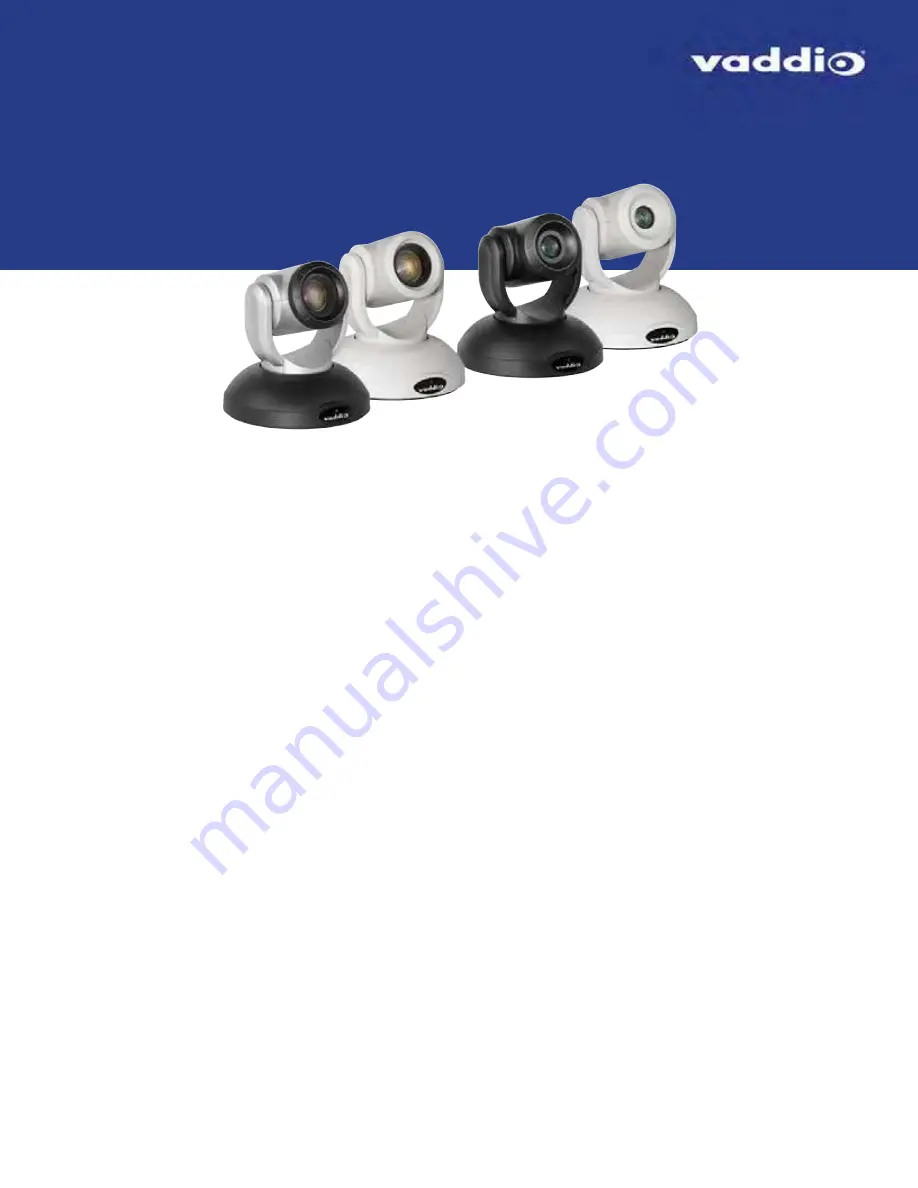
RoboSHOT 20 UHD
and RoboSHOT 40 UHD
Professional PTZ Cameras
Document 411-0028-30 Rev. C
January 2019
Page 1: ...Complete Manual for RoboSHOT 20 UHD and RoboSHOT 40 UHD Professional PTZ Cameras Document 411 0028 30 Rev C January 2019...
Page 2: ...d Cameras 10 Cabling Notes 11 Basic Connection Diagrams 12 Options for Power and Other Connections 13 RS 232 Serial Communication Settings and Port Pin outs 14 Speed and Encoding 14 Connector Pin Out...
Page 3: ...38 Configuring RTMP Streaming 39 Advanced Changing MTU 41 Stopping the IP Stream 41 Adjusting the Focus 42 Defining Video Mute Behavior for the RoboSHOT 40 UHD Camera 42 Lighting and Color Adjustments...
Page 4: ...twork settings get 68 system reboot 68 system factory reset 69 history 70 version 70 help 71 exit 71 RS 232 Serial Command Reference 72 Camera Movement Zoom and Focus Commands 72 Movement Zoom and Foc...
Page 5: ...ttings Via Hardware RoboSHOT 20 UHD 86 Restoring Factory Default Settings Via Hardware RoboSHOT 40 UHD 86 Operation Storage and Care 87 Compliance Statements and Declarations of Conformity 88 FCC Part...
Page 6: ...de for RoboSHOT 20 UHD and RoboSHOT 40 UHD Professional PTZ Cameras which covers unpacking physical features switch settings installation and initial power up Download manuals dimensional drawings and...
Page 7: ...white Europe and UK 999 9950 001W RoboSHOT 20 UHD silver black Australia and New Zealand 999 9950 009 RoboSHOT 20 UHD white Australia and New Zealand 999 9950 009W n RoboSHOT 20 UHD camera 998 9950 00...
Page 8: ...9952 009 RoboSHOT 40 UHD white Australia and New Zealand 999 9952 009W n RoboSHOT 40 UHD camera 998 9950 000 n 12 VDC 3 0 A switching power supply with AC cord set s n Thin Profile Wall Mount with mou...
Page 9: ...0x zoom range 4 1 field of view at 40x Horizontal field of view up to 70 Optical zoom to 20x combined optical and digital zoom from 20x to 40x at 1080p or 20x to 30x at 2160p n Dual arm mount provides...
Page 10: ...device is used n HDMI connector HDMI video output n HD SDI connector HD SDI video output n RS 232 port Allows an external device to control the camera using a modified VISCA protocol See RS 232 Serial...
Page 11: ...njector or OneLINK device is used n HDMI connector HDMI video output n SDI connector 3G SDI video output n Sync connector For genlock signal n RS 232 port Allows an external device to control the came...
Page 12: ...witch or switches on the back of the camera before mounting the camera Video Resolution Selector Set the desired output resolution for the camera with the rotary switch Notes The maximum resolution fo...
Page 13: ...ol n SW1 and SW2 up IR frequency 1 n SW1 down SW2 up IR frequency 2 n SW1 up SW2 down IR frequency 3 IR Leave switch 3 UP if the IR remote will be used Image Flip If mounting the camera upside down se...
Page 14: ...or use with it Always check the output voltage listed on the power supply label as power supplies for different products may look nearly identical Using the wrong power supply will void the warranty p...
Page 15: ...rces You can install the camera wall mount to a 2 gang wall box or directly to the drywall n If you mount it to drywall use the wall anchors provided with the wall mount n If you mount it to a wall bo...
Page 16: ...ble connector Use Cat 5e or better cable We recommend using high quality connectors and a high quality crimping tool We recommend shielded cabling if the cables will be coiled run tightly with other c...
Page 17: ...Diagrams Here is a simple set up for the RoboSHOT 20 UHD camera Here is a simple set up for the RoboSHOT 40 UHD camera using genlock 12 Complete Manual for RoboSHOT 20 UHD and RoboSHOT 40 UHD Professi...
Page 18: ...power supply in this configuration Connect the camera to a OneLINK device A single Cat 5e or better cable to the OneLINK HDBaseT connector provides power control network and video connectivity Networ...
Page 19: ...arity None Flow control None 9600 baud is default The 38400 baud setting is optional if the connected device supports it Connector Pin Out n Pin 1 Not used n Pin 2 Not used n Pin 3 Not used n Pin 4 No...
Page 20: ...the position of the mount 3 Level the mount and tighten the mounting screws 4 Connect the cables to the camera Caution If using local power rather than connecting to a OneLINK device or using PoE use...
Page 21: ...l operation blinks once when the camera receives a command from the remote n Red On air tally Pro A V color scheme only n Purple In standby mode or booting n Yellow Firmware update in progress Caution...
Page 22: ...and hold for 3 seconds Move the camera Arrow buttons and Home button dark red Move the camera to a preset position Position Preset buttons 1 through 6 bottom two rows Focus the camera Auto Focus butt...
Page 23: ...o Focus Switch the camera to Auto Focus mode Zoom Speed Select Slow or Fast movements for telephoto and wide angle shots n T slow and T fast Telephoto zoom in n W slow and W fast Wide angle zoom out M...
Page 24: ...video output 1 Press the Data Screen button on the remote The display presents the camera s IP address and MAC address 2 Press the Data Screen button again to dismiss the information If the address is...
Page 25: ...ser password is password but this can be changed Check with the system administrator if the camera s web interface requires you to log in Only the Controls page is available with user level access You...
Page 26: ...page View firmware version and switch settings reboot restore factory defaults and update firmware n Room Labels page Information to display on the web interface screens including the conference room...
Page 27: ...t is YCbCr n 3G HD SDI level A or B default is A n Indicator light select color scheme enable disable set behavior in standby mode n Codec control mode System DIP switches tab Read outs of the camera...
Page 28: ...onments Configuring the Device with a Static IP Address for Initial Installation NETWORKING PAGE Caution Consult your IT department before editing network settings Errors in network configuration can...
Page 29: ...e camera to the network 2 Connect the network port on the camera to the network port on a computer Depending on the computer you may need a crossover cable 3 On the computer open a browser and access...
Page 30: ...n save your work The camera is now ready to be connected to the network Changing the Camera s Hostname NETWORKING PAGE If your network supports hostname resolution you may find it convenient to change...
Page 31: ...In a network that assigns IP addresses automatically the camera s IP address may change from time to time To keep this from happening set the IP address to Static Do not change the IP address subnet m...
Page 32: ...asier to match logged events with other actions and external events 1 To make the time zone and NTP server editable enable Automatic NTP Updating 2 Select the desired time zone from the list 3 If desi...
Page 33: ...fault HTTP is also permitted n Allow or deny device discovery allowed by default Some of these capabilities may be absent if the camera has not been updated with the latest firmware Note Consult your...
Page 34: ...s network security professional 1 Select Show Advanced Settings The advanced options open 2 To switch to a secure HTTPS connection select Switch to HTTPS Note Your browser may present messages warning...
Page 35: ...on to the Camera s Web Interface ROOM LABELS PAGE The information you enter on this page is displayed on every page of the web interface 30 Complete Manual for RoboSHOT 20 UHD and RoboSHOT 40 UHD Prof...
Page 36: ...tion such as hostname 1 Configure the first camera 2 Export its configuration Export Data button The export downloads to your computer as a dat file The filename is the camera s hostname 3 Import the...
Page 37: ...l but it could save you some time and aggravation 5 Select Continue A progress message box opens and the indicator light on the front of the camera turns yellow If the update process presents warnings...
Page 38: ...era SYSTEM PAGE FIRMWARE TAB This can help if the camera stops responding as you expect In the System Utilities section select Reboot 33 Complete Manual for RoboSHOT 20 UHD and RoboSHOT 40 UHD Profess...
Page 39: ...ntacting Vaddio Technical Support on the Help page The link for support information varies depending on the camera model Accessing the Diagnostic Logs DIAGNOSTICS PAGE When you contact Vaddio technica...
Page 40: ...ual are from the RoboSHOT 20 UHD web interface some are from the RoboSHOT 40 UHD web interface Any differences will be noted Configuring IP Streaming STREAMING PAGE IP streaming is enabled by default...
Page 41: ...tically 1 Select Easy quality mode 2 Select the desired IP streaming resolution This determines the size of the window in which the stream is displayed 3 Easy quality mode only Select Video Quality 4...
Page 42: ...d resolution 3 Select the desired IP streaming frame rate 4 Select Constant or Variable bit rate 5 Constant bit rate only Set Max Bandwidth 6 Variable bit rate only Set the Quality Quantization slider...
Page 43: ...e for example demo studio 3 URL The location where the stream can be viewed This will change if you edit the path Your camera will present somewhat different information from this image as the streami...
Page 44: ...service To configure an RTMP streaming service 1 Select RTMP streaming and select Settings 2 Expand the information box for the service 3 Enter the name of the service 4 Paste in the key and URL s pr...
Page 45: ...available streaming services and select the one to use Note When RTMP streaming is selected and a service is configured the camera streams to that service until you stop the stream 40 Complete Manual...
Page 46: ...s except when you disable the stream Options n To stop IP streaming entirely Clear the Enable IP Streaming check box n To stop the video portion of the stream but leave the stream running Mute the vid...
Page 47: ...are not logged in as admin Focus control is available via the IR Remote Commander only Defining Video Mute Behavior for the RoboSHOT 40 UHD Camera By default Vaddio cameras send black video when video...
Page 48: ...iate adjustments When adjusting for the room lighting start with a factory defined CCU scene and adjust as needed After you customize the camera s color and lighting settings you can save the adjustme...
Page 49: ...ynamic Range automatically darkens bright areas and brightens dark areas to provide a more properly exposed image in challenging lighting conditions This setting can t be used with Backlight Compensat...
Page 50: ...too much detail is bad n Chroma adjusts the color intensity n Gamma adjusts the range grey density between bright areas and shadows If you change Red Gain or Blue Gain and you don t like the results...
Page 51: ...in Increase Chroma Decrease Gamma The subject is silhouetted against a bright background Enable Backlight Compensation Small sources of bright light point sources make it hard to see details in areas...
Page 52: ...appear white Enable Auto White Balance One Push White Balance Disable Auto White Balance and n adjust Red Gain decrease for less red increase for less green n adjust Blue Gain decrease for less blue i...
Page 53: ...tion that was previously associated with that preset The Store Preset dialog does not show which presets have already been defined Vaddio recommends renaming presets when you store them To store a pre...
Page 54: ...just as needed Setting the Direction for Camera Movements CAMERA PAGE By default the arrow buttons on the remote and in the web interface show the direction you would see the camera move if you were l...
Page 55: ...TAB The web interface presents error messages if the camera is not connected to a sync signal source The table of valid resolutions shows which resolution is currently selected on the camera 50 Comple...
Page 56: ...to physically move the physical switch es on the back of the camera if you need to change them This screen shot shows the DIP Switches tab for the RoboSHOT 20 UHD Where this camera has rear DIP switch...
Page 57: ...es Use the IR Settings switches to select the frequency to identify the camera as camera 1 camera 2 or camera 3 Refer to the settings table beside the soft DIP switches n IR On IR Off Enable disable t...
Page 58: ...n the LED is set to OFF it remains off even when the camera is sending video n Standard Control Mode Codec Control Mode Select Codec Control Mode if using the camera with a third party codec n Enable...
Page 59: ...om lighting adjustment if any have been stored Since the web interface is specific to the camera you are working with it does not offer camera selection Switching the Camera Off or On Standby Use the...
Page 60: ...nd speed information as well If no presets are defined the Controls page does not present the Presets section Use the Preset buttons to move the camera to any of its preset positions Adjusting the Col...
Page 61: ...n Using a question mark as a command parameter will bring up a list of available subcommands or parameters Example camera focus camera focus near Focus the camera near far Focus the camera far stop S...
Page 62: ...ion set position Sets the camera s absolute pan position in degrees as a floating point value between approximately 150 00 and 150 00 This is the minimum range Individual cameras may have an additiona...
Page 63: ...position in degrees as a floating point value between approximately 30 00 and 90 00 This is the minimum range individual cameras may have an additional degree or two of travel before they reach their...
Page 64: ...value The value of n maximum zoom depends on the camera s capabilities For example the range is 1 to 12 for a 12x camera If the value is out of range the camera returns an error message and no zoom c...
Page 65: ...speed 1 8 Optional integer 1 to 8 specifies the focus speed stop Stops the camera s focus movement mode get auto manual Returns the current focus mode or specifies automatic or manual focus Examples...
Page 66: ...ition as the specified preset tri sync 1 24 Optional Specifies that the camera uses Tri Synchronous Motion to move to this position using the specified speed save ccu Optional Saves the current CCU se...
Page 67: ...gain Returns gain as an integer 0 to 11 detail Returns detail as an integer 0 to 15 chroma Returns chroma as an integer 0 to 14 gamma Returns gamma as an integer 64 to 64 wide_dynamic_range Returns t...
Page 68: ...s 0 11 Sets the iris value as an integer 0 to 11 Can only be used when auto iris is off auto_iris on off Sets the auto iris state on or off Auto iris disables manual iris and gain when it is on gain 0...
Page 69: ...e factory CCU scene 2 camera ccu scene store custom 1 OK Saves the current CCU scene as custom CCU scene 1 camera led Set or change the behavior of the indicator light Synopsis camera led get off on O...
Page 70: ...sets the camera s video mute status When video is muted the camera sends black video with an on screen message stating that video mute is on This can be desirable when preparing the room or when priv...
Page 71: ...P Preset_Quality Video quality selected in Easy video quality mode IP Preset_Resolution Resolution selected in Easy video quality mode IP Protocol The IP streaming protocol in use RTSP or RTMP IP URL...
Page 72: ...packets to send Default is five packets size The size of each ECHO_REQUEST packet Default is 56 bytes destination ip The IP address where the ECHO_REQUEST packets will be sent Examples network ping 19...
Page 73: ...er the specified delay Note that a reboot is required when resetting the system to factory defaults system factory reset Synopsis system reboot seconds Options seconds The number of seconds to delay t...
Page 74: ...tware off factory reset hardware off OK Returns the factory reset status This evaluates the most recent system factory reset on or off command if one has been received then reads the rear panel DIP sw...
Page 75: ...unctionality from which previous commands can be recalled from within a single session History expansion is performed immediately after a complete line is read Examples of history expansion Substitute...
Page 76: ...erview of the CLI syntax Synopsis help Example help exit Ends the command session and then closes the socket Synopsis exit Example exit 71 Complete Manual for RoboSHOT 20 UHD and RoboSHOT 40 UHD Profe...
Page 77: ...oom Stop 8x 01 04 07 00 FF Variable speed p 0 low to 7 high Direct pqrs zoom position 0h 7AC0h Tele std 8x 01 04 07 02 FF Wide std 8x 01 04 07 03 FF Tele variable 8x 01 04 07 2p FF Wide variable 8x 01...
Page 78: ...8x 01 06 0A vv ww rr 03 01 03 FF vv Pan speed 01h 18h ww Tilt speed 01h 14h rr Zoom speed 00h 07h Down 8x 01 06 0A vv ww rr 03 02 03 FF Left 8x 01 06 0A vv ww rr 01 03 03 FF Right 8x 01 06 0A vv ww r...
Page 79: ...t in Telnet API CAM_PTZ_ PresetSpeed 8x 01 7e 01 0b pp qq rr FF pp pan speed 01h 18h qq tilt speed 01h 14h rr zoom speed 0h 07h Movement Zoom and Focus Inquiry Commands Inquiry Command Command Respons...
Page 80: ...Packet Comments CAM_WB Auto 8x 01 04 35 00 FF Normal auto Manual 8x 01 04 35 05 FF Manual control mode Corresponds to camera ccu set auto_white_balance in Telnet API CAM_RGain Reset 8x 01 04 03 00 FF...
Page 81: ...et gain in Telnet API CAM_BackLight On 8x 01 04 33 02 FF Backlight compensation On Off Off 8x 01 04 33 03 FF Corresponds to camera ccu set backlight_compensation in Telnet API CAM_WD On 8x 01 04 3D 02...
Page 82: ...1 1750 0x10 1 1500 1 1250 0x0F 1 1000 1 1000 0x0E 1 725 1 600 0x0D 1 500 1 425 0x0C 1 350 1 300 0x0B 1 250 1 215 0x0A 1 180 1 150 0x09 1 125 1 120 0x08 1 100 1 100 0x07 1 90 1 75 0x06 1 60 1 50 0x05...
Page 83: ...Value RoboSHOT 20 UHD 0x11 F1 8 0x10 F2 0x0F F2 4 0x0E F2 8 0x0D F3 4 0x0C F4 0x0B F4 8 0x0A F5 6 0x09 F6 8 0x08 F8 0x07 F9 6 0x06 F11 0x05 F14 0x00 CLOSE 78 Complete Manual for RoboSHOT 20 UHD and Ro...
Page 84: ...s 0D to 10 can be set only when the high sensitivity mode is ON By default it is off at power up reboot Iris Gain Limit Values Command CAM_Gain Value High Sensitivity Off High Sensitivity On 0x0C 33 d...
Page 85: ...02 FF On y0 50 03 FF Off CAM_ApertureInq 8x 09 04 42 FF y0 50 00 00 0p 0q FF pq Aperture gain CAM_ChromaInq 8x 09 7E 55 FF y0 50 05 00 00 00 0p FF p 0 Eh CAM_GammaOffsetInq 8x 09 04 1E FF y0 50 00 00...
Page 86: ...0s 0s FF IP address ppp qqq rrr sss CAM_TallyInq 8x 09 7E 01 0A FF y0 50 02 FF On y0 50 03 FF Off CAM_NRInq 8x 09 04 53 FF y0 50 0p FF Noise reduction p 00h to 05h CAM_MuteModeInq 8x 09 04 75 FF y0 5...
Page 87: ...e and speed 90 30 0 35 sec to 120 sec Horizontal FOV RoboSHOT 20 UHD 74 wide to 4 8 tele Horizontal FOV RoboSHOT 40 UHD 70 wide to 4 1 tele Minimum illumination 1 6 lux 100 lux recommended Aperture de...
Page 88: ...hat passes a continuity check but does not work reliably or does not pass enough power to the connected device The author would like to confess having made a certain number of almost good cables It ha...
Page 89: ...deo The camera s web interface is available and the camera responds to the directional controls on the remote Video is muted Select the Mute button in the web interface This button is available on eve...
Page 90: ...ss More than one device is using this IP address The camera responds to the remote but the web interface is not available The camera is not using the IP address you browsed to Press the Data Screen bu...
Page 91: ...20 UHD If the camera s administrative controls are not accessible you can restore factory defaults using the DIP switches on the back of the camera To restore factory default settings Set all DIP swi...
Page 92: ...midity condensing or wet environments n Inclement weather n Severe vibration n Inside the Large Hadron Collider or other particle accelerator n Dry environments with an excess of static discharge Do n...
Page 93: ...radio communications Operation of this equipment in a residential area is likely to cause harmful interference in which case the user will be required to correct the interference at his her own expen...
Page 94: ...munity EN 61000 4 4 2004 Corrigendum 2006 Electrical Fast Transients EN 61000 4 5 2006 Surge Immunity EN 61000 4 6 2009 Conducted Immunity EN 61000 4 8 2010 Power Frequency Magnetic Field EN 61000 4 1...
Page 95: ...e contacted by email at support vaddio com or by phone at one of the phone numbers listed on support vaddio com Return Material Authorization RMA number Before returning a product for repair or replac...
Page 96: ...to restocking charges n The Dealer has up to 60 days from the date of purchase to return Vaddio product for credit for future purchases of Vaddio product only n The Dealer has 61 to 90 days from the...
Page 97: ...be repaired under the non warranty terms if o The equipment has been damaged by negligence accident act of God mishandling used with the incorrect modified or extended power supply or has not been op...
Page 98: ...ustomers requesting an estimate on repair charges must do so up front when they call in for an RMA The RMA team will call or email with the estimate after evaluating the unit and before proceeding wit...
Page 99: ...e 16166230844 Public Domain https commons wikimedia org w index php curid 38931301 European Space Agency astronaut Luca Parmitano Expedition 36 flight engineer outside the International Space Station...
Page 100: ...64 recalling 64 CCU settings 46 47 61 63 ceiling mounted cameras 10 cheat sheet 17 22 46 47 color adjustment 47 lighting and image quality 46 Vaddio IR Remote Commander 17 web interface 22 chroma sett...
Page 101: ...els room 30 LED 16 64 83 enabling disabling 64 meaning of colors 16 83 LED color scheme switch setting 53 LED on off switch setting 53 light status indicator 16 64 83 enabling disabling 64 meaning of...
Page 102: ...38 S safety requirements 9 saving a configuration 31 scenes CCU 43 48 55 naming 48 storing 45 Scott 43 Security page web 28 29 session time out 28 settings default restoring 69 86 shelf mounted camer...
Page 103: ...ult 20 V Vaddio IR Remote Commander 17 variable bit rate IP streaming setting 37 version firmware 70 video mute 42 54 65 video resolution setting 7 VISCA commands 72 74 75 80 81 voil a small cat 87 W...
Page 104: ...tered trademarks of Legrand AV Inc HDBaseT and the HDBaseT Alliance logo are trademarks of the HDBaseT Alliance The terms HDMI and HDMI High Definition Multimedia Interface and the HDMI Logo are trade...