Greensmaster 3320/3420
DPA Cutting Units
Page 8 -- 7
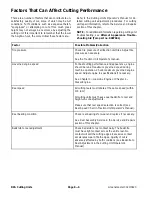
Factor
Possible Problem/Correction
Reel and bedknife sharpness
A reel and/or bedknife that has rounded cutting edges
or “rifling” (grooved or wavy appearance)
cannot
be
corrected by tightening the bedknife to reel contact.
Grind cutting reel to remove taper and/or rifling. Grind
bedknife to sharpen and/or remove rifling.
The most common cause of rifling is bedknife to reel
contact that is too tight.
Dull cutting edges must be corrected by grinding the
bedknife and cutting reel (see Preparing Reel for
Grinding in the Service and Repairs section of this
chapter).
A new bedknife must be ground flat (within 0.002”)
after installation to the bedbar. Backlapping may
be required to properly mate the reel and bedknife
after installation into the cutting unit.
NOTE:
On cutting units equipped with optional
bedknives, slightly dull cutting edges may be corrected
by backlapping (see Backlapping in the Service and
Repairs section of this chapter).
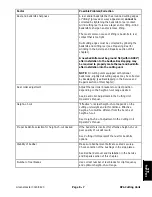
Rear roller adjustment
Adjust the rear roller brackets to correct position
depending on the height--of--cut range desired.
See Rear Roller Adjustment in the Cutting Unit
Operator’s Manual.
Height--of--cut
“Effective” or actual height--of--cut depends on the
cutting unit weight and turf conditions. Effective
height--of--cut will be different from the bench set
height--of--cut.
See Height--of--Cut Adjustment in the Cutting Unit
Operator’s Manual.
Proper bedknife selection for height--of--cut desired
If the bedknife is incorrect for effective height--of--cut,
poor quality of cut will result.
See Cutting Unit Operator’s Manual for bedknife
options.
Stability of bedbar
Make sure bedbar pivot bolts are seated securely.
Check condition of the bushings in the side plates.
See Bedbar Removal and Installation in the Service
and Repairs section of this chapter.
Number of reel blades
Use correct number of reel blades for clip frequency
and optimum height--of--cut range.
DP
A
Cutt
in
g
Un
its
Summary of Contents for Greensmaster 3420 TriFlex
Page 2: ...Greensmaster 3320 3420 This page is intentionally blank ...
Page 4: ...Greensmaster 3320 3420 This page is intentionally blank ...
Page 6: ...Greensmaster 3320 3420 This page is intentionally blank ...
Page 24: ...Greensmaster 3320 Page 3 6 Gasoline Engine This page is intentionally blank ...
Page 38: ...Greensmaster 3420 Page 4 4 Diesel Engine This page is intentionally blank ...
Page 54: ...Greensmaster 3420 Page 4 20 Diesel Engine This page is intentionally blank ...
Page 56: ...Greensmaster 3320 3420 Hydraulic System Page 5 2 This page is intentionally blank ...
Page 150: ...Greensmaster 3320 3420 Hydraulic System Page 5 96 This page is intentionally blank ...
Page 250: ...Greensmaster 3320 3420 Page 6 100 Electrical System This page is intentionally blank ...
Page 277: ...Greensmaster 3320 3420 Page 7 27 Chassis This page is intentionally blank Chassis ...
Page 325: ...Greensmaster 3320 3420 Groomer Page 9 13 This page is intentionally blank Groomer ...
Page 340: ...Greensmaster 3320 3420 Page 10 2 Foldout Drawings This page is intentionally blank ...
Page 347: ...Page 10 9 This page is intentionally blank ...
Page 356: ...Page 10 18 E Reels Wire Harness Drawing Greensmaster 3320 3420 Serial Number Below 312000000 ...
Page 358: ...Page 10 20 E Reels Wire Harness Drawing Greensmaster 3320 3420 Serial Number Above 312000000 ...
Page 360: ...Page 10 22 This page is intentionally blank ...


