Greensmaster 3420
Page 4 -- 13
Diesel Engine
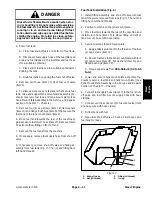
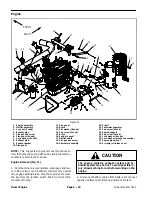
Radiator Removal (Fig. 8)
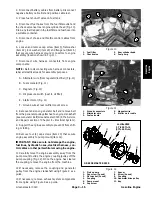
1. Park machine on a level surface, lower the cutting
units, stop the engine, engage parking brake and re-
move the key from the ignition switch.
CAUTION
DO NOT open radiator cap or drain coolant if the
engine or radiator is hot. Pressurized hot coolant
can escape and cause burns.
Ethylene--gycol antifreeze is poisonous. Dis-
pose of it properly or store it in a properly labeled
container away from children and pets.
2. Remove the radiator cap.
3. Drain radiator into a suitable container by discon-
necting lower radiator hose (item 21) from the radiator.
4. Remove screen (item 15) from radiator shroud.
5. Remove four (4) flange head screws (item 16) that
secure radiator shroud (item 2) to radiator assembly.
Remove radiator shroud.
6. Remove flange head screw that secures R--clamp
(item 14) to bottom of front shroud (item 19).
7. Remove the following hoses from the radiator:
A. Loosen hose clamps and disconnect breather
hose (item 24) and overflow hose (item 23) from ra-
diator filler neck.
B. Loosen hose clamp (item 6) and disconnect up-
per radiator hose (item 22).
8. Locate splice fitting in fuel return hose near fuel
pump. Disconnect one of the return hose sections from
splice fitting and remove return hose from both r--clamps
(item 7) on front shroud (item 19).
9. Remove flange head screw and flange nut that se-
cure fuel pump assembly to front shroud. Position fuel
pump assembly away from radiator assembly.
10.Disconnect fan wire connector from machine wire
harness.
11. Support radiator assembly to prevent it from falling.
12.Remove four (4) flange nuts that secure front shroud
to machine. Remove radiator assembly from machine.
13.Remove components from radiator as necessary us-
ing Figure 8 as a guide.
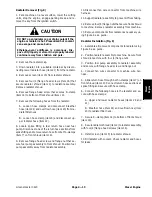
Radiator Installation (Fig. 8)
1. Assemble all removed components to radiator using
Figure 8 as a guide.
2. Position radiator assembly to machine. Secure front
shroud to machine with four (4) flange nuts.
3. Position fuel pump assembly to radiator assembly
and secure with flange head screw and flange nut.
4. Connect fan wire connector to machine wire har-
ness.
5. Slide return hose through both r--clamps (item 7) on
front shroud (item 19). Connect return hose sections at
splice fitting and secure with hose clamp.
6. Connect the following hoses to the radiator and se-
cure with hose clamps:
A. Upper and lower radiator hoses (items 22 and
21).
B. Breather hose (item 24) and overflow hose (item
23) to radiator filler neck.
7. Secure R--clamp (item 14) to bottom of front shroud
(item 19).
8. Secure radiator shroud (item 2) to radiator assembly
with four (4) flange head screws (item 16).
9. Install screen (item 15) to radiator shroud.
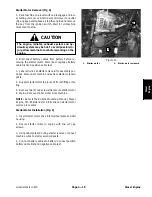
10.Fill radiator with coolant. Check radiator and hoses
for leaks.
Die
sel
Engine
Summary of Contents for Greensmaster 3420 TriFlex
Page 2: ...Greensmaster 3320 3420 This page is intentionally blank ...
Page 4: ...Greensmaster 3320 3420 This page is intentionally blank ...
Page 6: ...Greensmaster 3320 3420 This page is intentionally blank ...
Page 24: ...Greensmaster 3320 Page 3 6 Gasoline Engine This page is intentionally blank ...
Page 38: ...Greensmaster 3420 Page 4 4 Diesel Engine This page is intentionally blank ...
Page 54: ...Greensmaster 3420 Page 4 20 Diesel Engine This page is intentionally blank ...
Page 56: ...Greensmaster 3320 3420 Hydraulic System Page 5 2 This page is intentionally blank ...
Page 150: ...Greensmaster 3320 3420 Hydraulic System Page 5 96 This page is intentionally blank ...
Page 250: ...Greensmaster 3320 3420 Page 6 100 Electrical System This page is intentionally blank ...
Page 277: ...Greensmaster 3320 3420 Page 7 27 Chassis This page is intentionally blank Chassis ...
Page 325: ...Greensmaster 3320 3420 Groomer Page 9 13 This page is intentionally blank Groomer ...
Page 340: ...Greensmaster 3320 3420 Page 10 2 Foldout Drawings This page is intentionally blank ...
Page 347: ...Page 10 9 This page is intentionally blank ...
Page 356: ...Page 10 18 E Reels Wire Harness Drawing Greensmaster 3320 3420 Serial Number Below 312000000 ...
Page 358: ...Page 10 20 E Reels Wire Harness Drawing Greensmaster 3320 3420 Serial Number Above 312000000 ...
Page 360: ...Page 10 22 This page is intentionally blank ...

