Chapter 3
SYSTEM SETTINGS (NX-300 SETTING SOFTWARE)
3-12
5.4. Detecting Units
Detect all units connected to the local network.
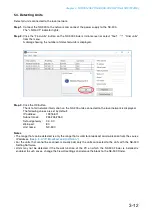
Step 1.
Connect the NX-300 to the network and connect the power supply to the NX-300.
The "LNK/ACT" indicator lights.
Step 2.
Click the
"Find units" button on the NX-300 Finder’s initial screen or select "Tool"
"Find units"
from the menu.
A dialog showing the number of detected units is displayed.
Step 3.
Click the OK button.
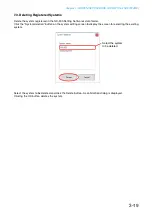
The list of all network information on the NX-300 units connected to the local network is displayed.
The following values are set by default:
address
1 .1 .1.1
Subnet mask
.
.
.0
Default gateway:
0.0.0.0
eb port
0
nit name
NX-300
Notes
• The range that can be detected is only the range that is alid for broadcast communication from the source
IP address.
(See
p. 6-3, "IP Broadcast and Unit Scan."
)
• or the units that cannot be scanned, manually add only the units connected to the AN ith the NX-300
Setting Software.
• nits may not be detected if the re all function of the
on hich the NX-300 inder is installed is
enabled. n such cases, change the re all settings and remo e the block to the NX-300 inder.
Summary of Contents for NX-300
Page 7: ...Chapter 1 SYSTEM SUMMARY ...
Page 12: ...Chapter 2 INSTALLATION AND CONNECTION ...
Page 23: ...Chapter 3 SYSTEM SETTINGS NX 300 SETTING SOFTWARE ...
Page 113: ...Chapter 4 SETTINGS AND MANAGEMENT BY BROWSER ...
Page 140: ...Chapter 5 SETTINGS NECESSARY WHEN USING THE NX 300 OPERATION SOFTWARE ...
Page 163: ...Chapter 6 APPENDIX ...


