Installing the Software
27
2
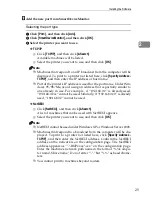
H
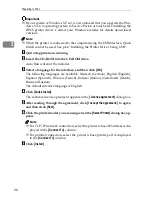
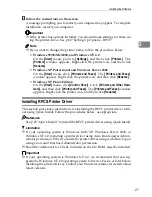
Follow the instructions on the screen.
A message prompting you to restart your computer may appear. To complete
installation, restart your computer.
Important
❒
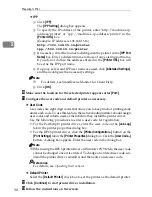
If the printer has options installed, you should make settings for them us-
ing the printer driver. See p.32 “Setting Up Options - RPCS”.
Note
❒
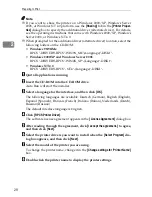
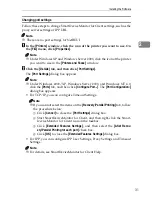
If you want to change the printer name, follow the procedure below:
•
Windows 95/98/Me/2000, and Windows NT 4.0
On the
[
Start
]
menu, point to
[
Settings
]
, and then click
[
Printers
]
. The
[
Printers
]
window appears. Right-click the printer icon, and then click
[
Rename
]
.
•
Windows XP Professional and Windows Server 2003
On the
[
Start
]
menu, click
[
Printers and Faxes
]
. The
[
Printers and Faxes
]
window appears. Right-click the printer icon, and then click
[
Rename
]
.
•
Windows XP Home Edition
On the
[
Start
]
menu, click
[
Control Panel
]
. Click
[
Printers and Other Hard-
ware
]
, and then click
[
Printers and Faxes
]
. The
[
Printers and Faxes
]
window
appears. Right-click the printer icon, and then click
[
Rename
]
.
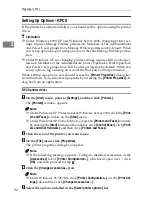
Installing RPCS Printer Driver
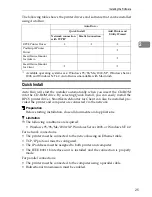
This section gives basic instructions for installing the RPCS printer driver with-
out using Quick Install. Follow the procedures below, as appropriate.
Reference
See p.25 “Quick Install” to install the RPCS printer driver using Quick Install.
Limitation
❒
If your operating system is Windows 2000/XP, Windows Server 2003, or
Windows NT 4.0, installing a printer driver using Auto Run requires Admin-
istrator permission. When you install a printer driver using Auto Run, log on
using an account that has Administrator permission.
❒
SmartDeviceMonitor for Client, included on the CD-ROM, must be installed.
Important
❒
If your operating system is Windows NT 4.0, we recommend that you up-
grade the Windows NT 4.0 operating system to Service Pack 4 or later before
installing the printer drivers. Contact your Windows retailer for details about
latest versions.
Summary of Contents for SD462
Page 2: ......
Page 4: ......
Page 28: ...13 AUX167S ...
Page 42: ...THIS PAGE LEFT BLANK INTENTIONALLY ...
Page 78: ...Basics 62 2 ...
Page 156: ...Printing Functions 140 3 ...
Page 194: ...Troubleshooting 178 4 ...
Page 214: ...User Tools 198 5 ...
Page 226: ...Remarks 210 6 ...
Page 242: ...226 EN USA C269 0756 ...
Page 244: ...Operating Instructions Type for 3585DNP2 CP6340D LDD350d DX 4640PD EN USA C269 0756 ...
Page 250: ...iv ...
Page 254: ...Printer Functions Available over a Network 4 1 ...
Page 256: ...Connecting the Network Cable to the Network 6 2 ...
Page 264: ...Setting Up the Machine on a Network 14 3 ...
Page 270: ...Windows Configuration 20 4 ...
Page 371: ...Copyright 2005 ...
Page 372: ...Network Guide GB GB EN USA C269 0780 ...
Page 378: ...iv ...
Page 380: ...2 ...
Page 388: ...Getting Started 10 1 ...
Page 428: ...Preparing to Print 50 2 ...
Page 466: ...Troubleshooting 88 5 ...
Page 483: ...Copyright 2006 ...
Page 484: ...Operating Instructions Printer Reference GB GB EN USA C269 0760 ...
Page 490: ...2 ...
Page 540: ...PostScript3 printer driver Setting Up for Printing 52 1 ...
Page 556: ...THIS PAGE LEFT BLANK INTENTIONALLY ...
Page 557: ...Copyright 2007 ...

