1-26
DSR-80/80P/60/60P
50
Chapter 4
Menu Settings
Chapter 4
Menu Settings
QSDI DUBBING [QSDI dub]: Selection of data for QSDI
dubbing
Description of setting
For dubbing through the QSDI interface, select data that the
dubbing applies to.
A/V [> A/V]: Dub the audio and video.
A/V/TC [> A/V/TC]: Dub the audio, video, and time code.
A/V/TC/CM [> A/V/TC/CM]: Dub the audio, video, time code,
and cassette memory contents.
Note
When “A/V” is selected, the time code recorded follows the
setting of the TIME CODE item in the setup menu.
TC INSERT [TC insert]: Time code rewriting
Description of setting
Rewrite the time code from an initial value which can be set
freely.
—
Auto mode (AUTO FUNCTION) execution menu
The following table shows the purpose and function of
the items in the auto mode execution menu.
For details of the use of individual items, see the sections
“Dubbing Signals in QSDI Format” (page 38) and
“Rerecording the Time Code — TC Insert Function” (page
35).
Menu Contents
Menu contents
Chapter 4
Menu Settings
51
Chapter 4
Menu Settings
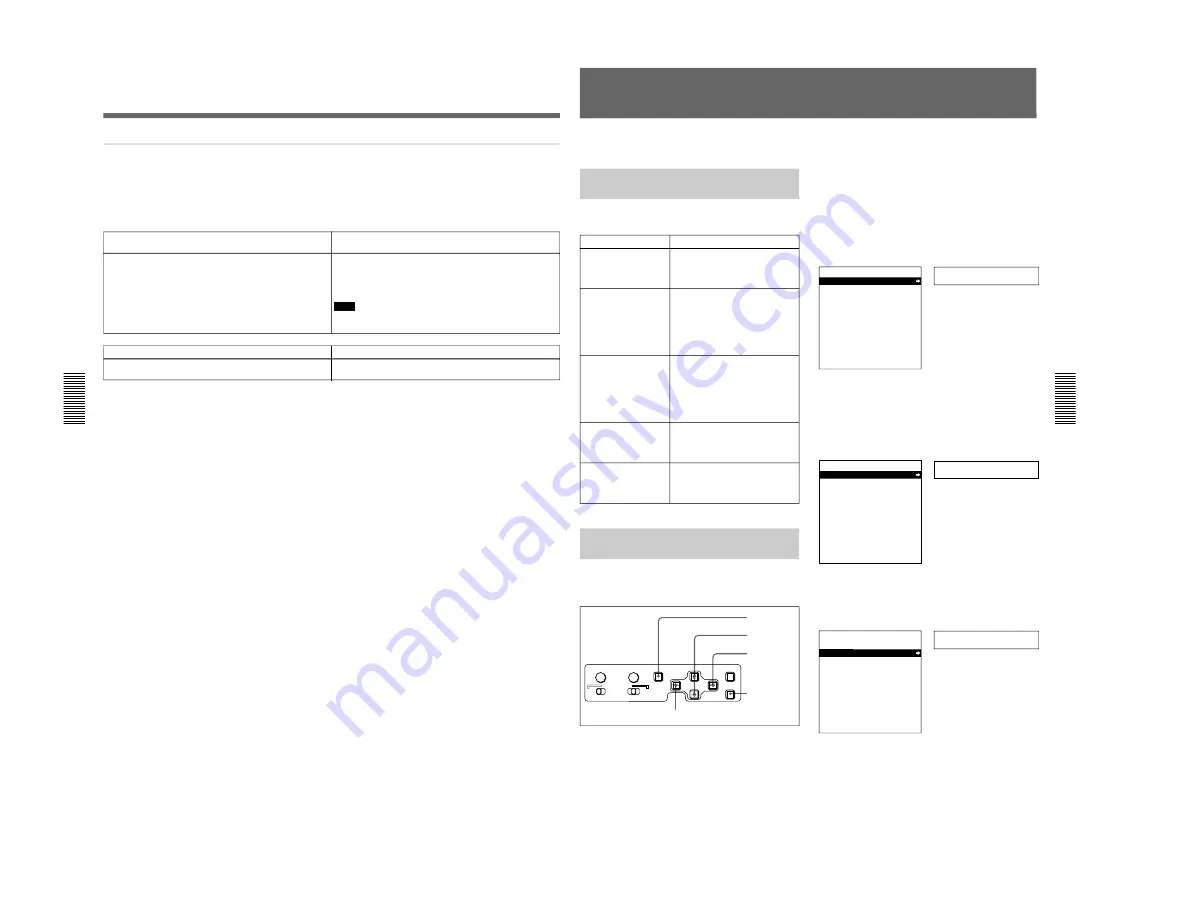
Changing Menu Settings
This section explains how to change menu settings.
Buttons Used to Change
Settings
Use the following buttons on the menu control panel to
change the menu settings.
Changing the Settings of Basic
Items
The factory default setting is to display only basic
items. To change the settings of basic items proceed as
follows.
Menu control buttons
Functions
MENU button
• Opens the menu and launches
menu control mode.
• Closes the menu and exits menu
control mode.
˘
and
≥
buttons
These buttons move the
highlighted cursor up and down
within the current level to select
an item or setting. Hold down one
of these buttons to make the
highlighted cursor move
continuously.
¿
and
÷
buttons
• Press the
÷
button to go down
one level.
• Press the
¿
button to go up
one level.
Hold down one of these buttons to
make the highlighted cursor move
continuously.
RESET (NO) button
• Returns the setting to the factory
default setting.
• Sends a negative response to
prompts on the monitor screen.
SET (YES) button
• Saves the new setting in
memory.
• Sends a positive response to
prompts on the monitor screen.
1
Press the MENU button on the menu control panel.
The menu selection level display appears on the
monitor, with “SETUP MENU” selected (shown in
reverse video).
The time counter display of this unit shows only
the currently selected item. When the item name is
long, it is abbreviated.
Menu selection level display
Setup menu
SYSTEM MENU
SETUP MENU
AUTO FUNCTION
HOURS METER
2
Press the
÷
button.
This displays all items in the menu level 1.
Level-1 menu display
Operational
SETUP MENU
OPERATIONAL FUNCTION
DISPLAY CONTROL
TIME CODE
MENU GRADE
:BASIC
3
Press the
≥
or
˘
button, to select the required
item.
Example: Display when “DISPLAY CONTROL” is selected
Display
SETUP MENU
OPERATIONAL FUNCTION
DISPLAY CONTROL
TIME CODE
MENU GRADE
:BASIC
9
8
2, 4, 6
3, 5, 7
1
SYNC PHASE
SC PHASE
MENU
MONITOR SELECT
RESET(NO)
SET(YES)
CH-
1/2
CH-
3/4
CH-
1/3
CH-
2/4
MIX
Monitor screen
Time counter display
Monitor screen
Time counter display
Monitor screen
Time counter display
(Continued)
Summary of Contents for DVCAM DSR-60
Page 2: ......
Page 54: ......
Page 174: ......
Page 220: ......
Page 236: ......
Page 238: ...8 2 N DSR 80 80P 60 60P SY 241B 241 CV101 CHARA SIZE 10 1 N DSR 60 80 ...
Page 242: ...8 2 P DSR 80 80P 60 60P SY 241B 241 CV101 CHARA SIZE 10 1 P DSR 60P 80P ...
Page 284: ......


