310
•
Integrated Payment Appendix
Sam4POS 6600/4800II Program Manual v2.12
3.
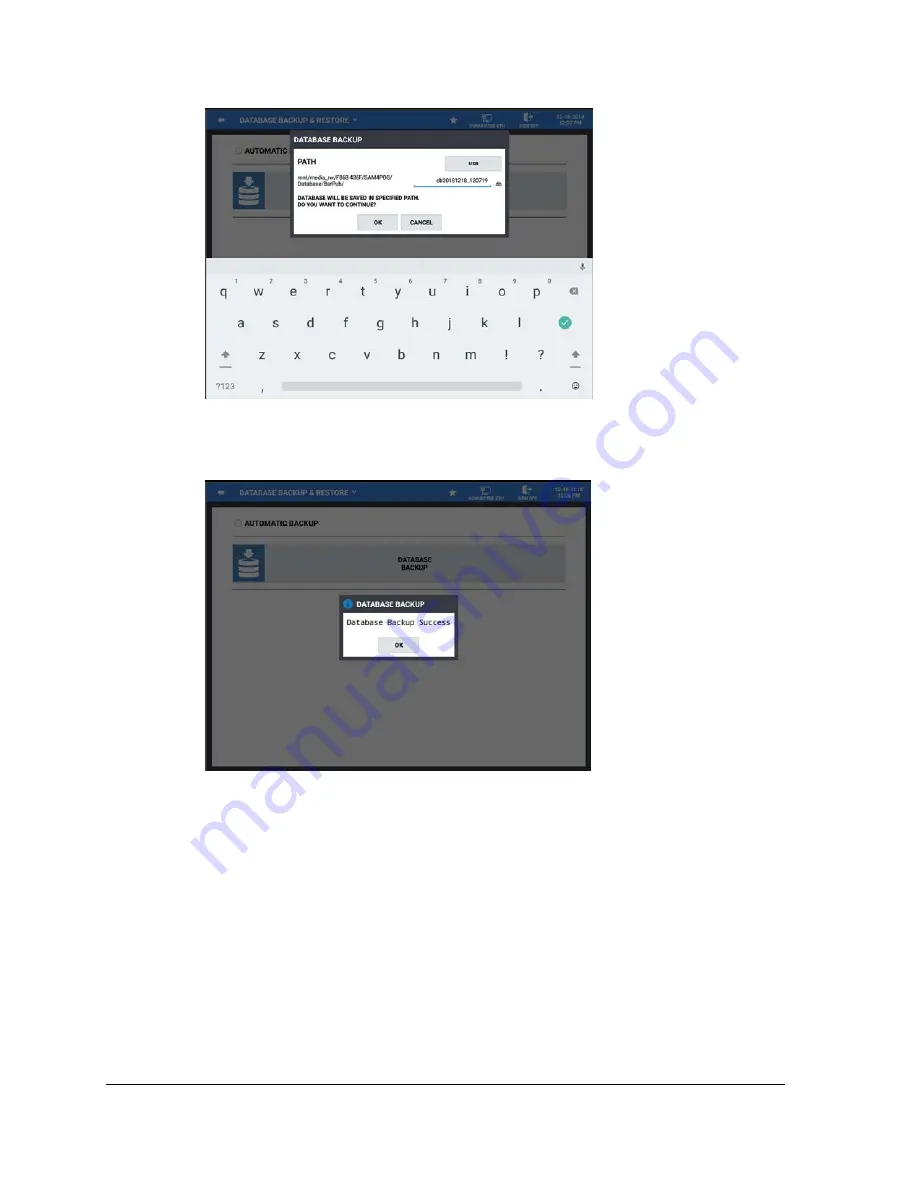
Select the
PATH
to save the backup to, selections are:
USB
or
INTERNAL STORAGE
.
4.
Press
OK
to back up the current database.
5.
When the backup has completed, the confirmation,
‘Database Backup Success’
displays.
6.
Press
OK.
Summary of Contents for SAM4POS
Page 10: ...10 Introduction Sam4POS 6600 4800II Program Manual v2 12...
Page 169: ...Sam4POS 6600 4800II Program Manual v2 12 Program Mode 169 Text Font Styles...
Page 267: ...Sam4POS 6600 4800II Program Manual v2 12 Program Mode 267...
Page 276: ...276 Program Mode Sam4POS 6600 4800II Program Manual v2 12 Log Backup Example...