5.
Adjust the misalignment of the ink landing position.
Procedure
1.
Press [
◀
] to select "SET".
MEDIA GAP ADJ.
[SET] NEXT
2.
Press [ENTER] to confirm your entry.
Printing of the test pattern starts.
You can select "NEXT" and press [ENTER] to skip the current menu and proceed to the next menu.
3.
Press [ENTER].
INPUT
ADJ. VALUES
4.
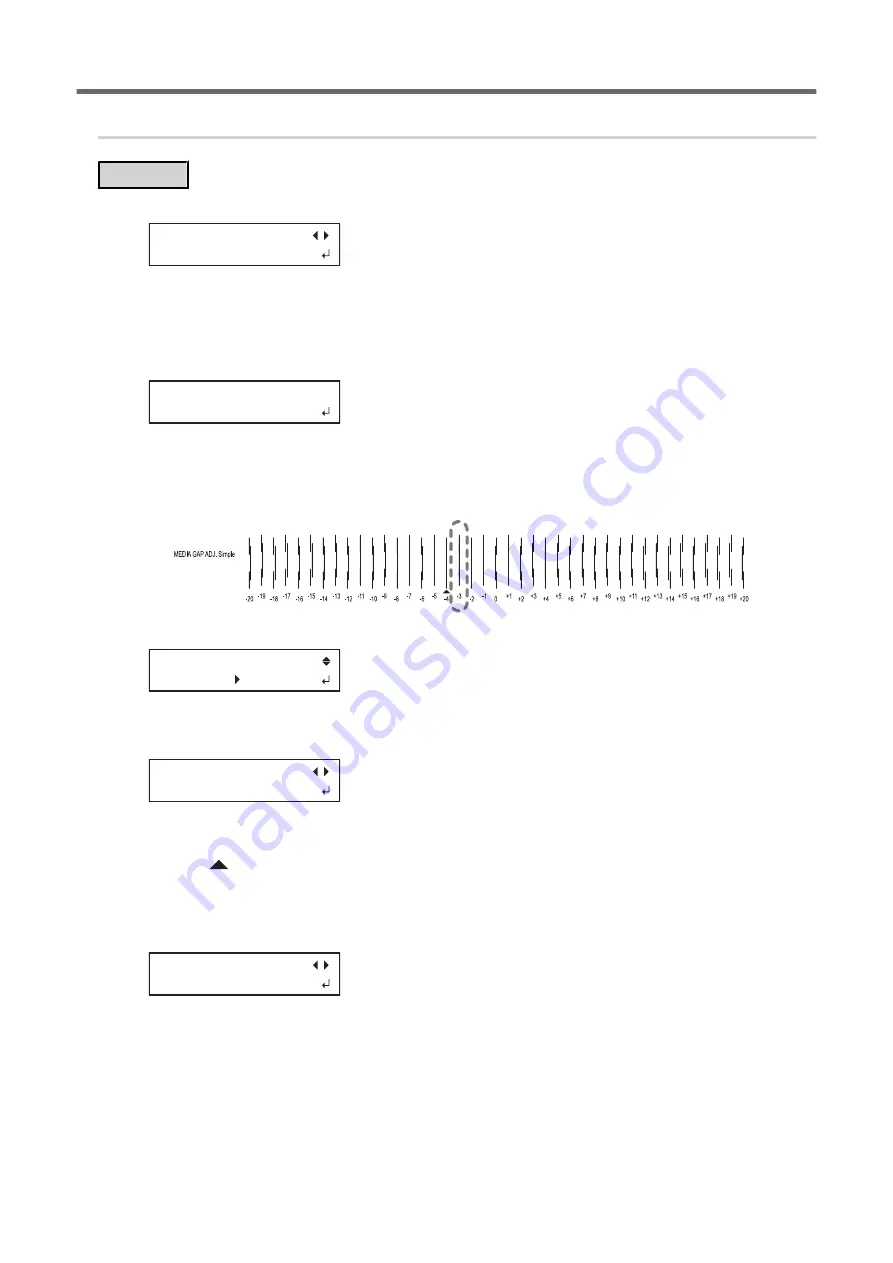
View the printed test pattern, and then determine the correction value.
Select the value that gives the least misalignment between the two lines. In the case of the following
figure, select "-3." When you cannot choose between two sequential numbers, select a value that is be-
tween them (you can set correction values in units of "0.5").
5.
Press [
▲
] or [
▼
] to select the correction value.
MEDIA GAP ADJ.
0 5
6.
Press [ENTER] to confirm your entry.
7.
Press [
◀
] to select "SET".
REDO ADJ.?
[YES] DONE
8.
Press [ENTER] to confirm your entry.
The test pattern is printed again. Check that the misalignment is minimized for the two vertical lines indi-
cated by "
" (that is, the current correction value). If the difference between the two vertical lines is
smaller in other locations, return to step 5 to configure the setting again.
If you do not need to change the correction value, press [ENTER] again.
9.
Press [
▶
] to select "DONE".
REDO ADJ.?
YES [DONE]
10.
Press [ENTER] to confirm your entry.
Printing Output
1. Printing Method
61
Summary of Contents for TrueVIS VF2-640
Page 7: ...1 Basic Handling Methods 6...
Page 51: ...Ink Pouch TR2 Cleaning Liquid Pouch Replacement 50 2 Basic Operations...
Page 52: ...2 Output Method 51...
Page 61: ...REDO ADJ YES DONE 10 Press ENTER to confirm your entry Printing Output 60 1 Printing Method...
Page 68: ...3 Optimizing Quality and Effi ciency 67...
Page 99: ...W1100mm B Adjusting the Output start Location 98 2 Optimizing Work Efficiency...
Page 121: ...4 Maintenance 120...
Page 169: ...5 Troubleshooting Methods 168...
Page 196: ...6 Appendix 195...


