About the SAMPLING MENU
83
83
Sampling
(To Storage)
After you sample a sound, SAMPLING To Storage saves your
samples to internal storage without assigning them to the pads or
keyboard.
NOTE
Before sampling, make sure that there is enough memory
remaining. You can still record samples all the way up the maximum
length even if there is not enough memory, but the samples may
not save, depending on how much memory is left.
1 .
Connect the device (audio device or mic) you
want to sample as necessary to the MIC/LINE
INPUT jack.
MEMO
To sample an audio device in stereo, connect the left channel to L/
MONO jack, and the right channel to R jack.
2 .
Press the [SAMPLING] button.
The SAMPLING MENU screen appears.
3 .
Touch SAMPLING <To Storage>.
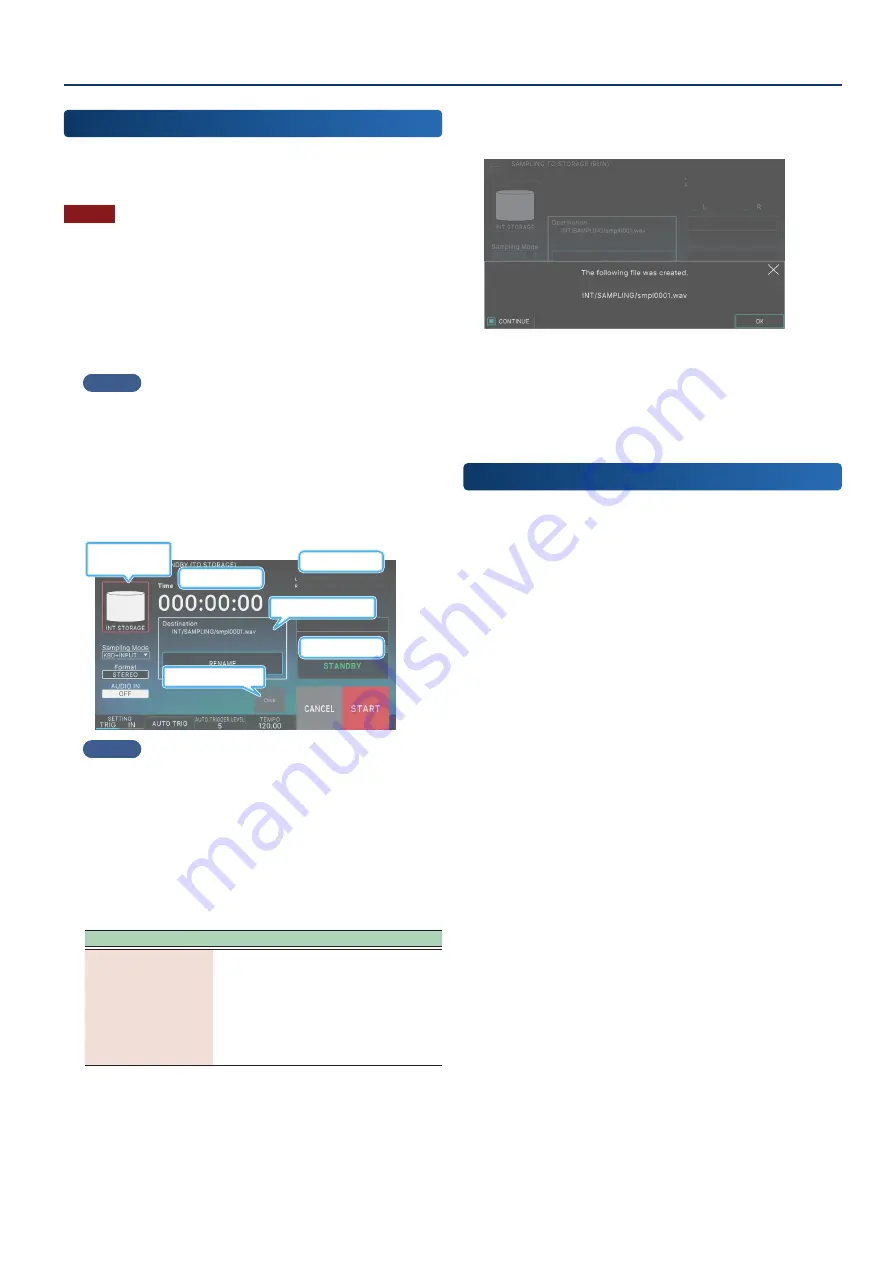
The SAMPLING STANDBY (TO STORAGE) screen appears.
Time counter
Rec status
Click on/off
Name of file created
Level meter
Changes where
samples are stored
MEMO
Touch <INT STORAGE> to change where you want to save the
sample.
4 .
Touch <Sampling Mode> to select the sampling
mode.
5 .
Set the input volume as necessary.
6 .
Configure the sampling settings.
Parameter
Explanation
Destination
This is the filename used to save the wave
after sampling. Touch <RENAME> to
change the filename.
You can change the first 12 characters of
the filename. A four-digit number starting
with “0001” and counting up is appended
to the 12-character name after you change
it.
7 .
Play the device that you’ve connected to this
unit, and touch <START> when you want to begin
sampling.
“NOW SAMPLING” will display while you are sampling, and the
time counter will advance.
8 .
Touch <STOP> when you want to stop sampling.
Sampling will stop and a dialog box appears.
9 .
Select [E6] OK.
If the [E1] CONTINUE check box is selected, the unit returns
to the SAMPLING STANDBY screen and you can continue
sampling. If the check box is not selected, the unit returns to the
SAMPLING MENU screen.
Sampling
(To Pad)
“SAMPLING To Pad” combines all of the steps you need to make the
samples playable using the pads.
Refer to “Sampling (To Pad)” (p. 95) for details on how to do this.
Summary of Contents for FANTOM-06
Page 6: ...6 6 Memo Memo ...
Page 52: ...52 52 Memo Memo ...
Page 78: ...78 78 Memo Memo ...
Page 108: ...108 108 Memo Memo ...
Page 174: ...174 174 Memo Memo ...
Page 190: ......


