49
4. Perform cutting.
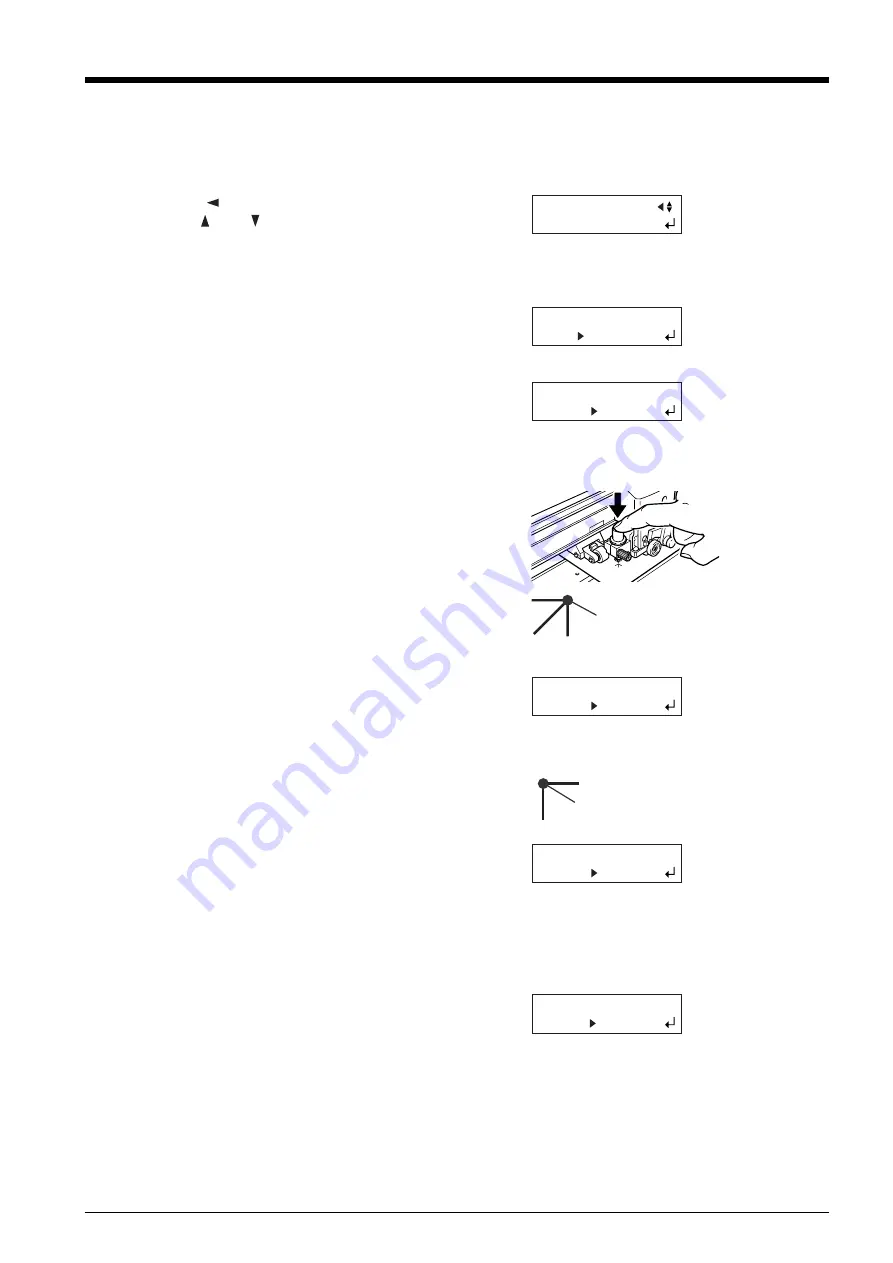
First use the alignment tool to line up the tip of the alignment tool with the leading edge of the crop marks, then send the cutting data.
6
Follow the same procedure to perform alignment for
mark 3 (and if the [4-POINT START] setting is
selected, for mark 4 as well).
7
When you've finished performing alignment for mark
3 (or mark 4), press the [ENTER] key to display the
screen shown in the figure.
8
Remove the alignment tool and install the blade
holder.
* If for some reason you want to go back to an earlier
step in these settings, such as to redo alignment,
pressing the [MENU] key displays the previous
screen, where you can redo the settings.
1
Press the [
] key.
Use the [
] and [
] keys to select either [4-POINT
START] or [3-POINT START], then press the
[ENTER] key. For four crop marks, select [4-POINT
START]. For three crop marks, select [3-POINT
START].
The screen shown in the figure appears.
2
Make sure the alignment tool is mounted, then press
the [ENTER] key.
The tool moves to stop near the lower-left crop mark (
mark 1), and the screen shown in the figure appears.
3
Using the cursor keys, align the tip of the alignment
tool with the crop mark.
With your finger, press down lightly on the alignment
tool to make sure its tip lies over the crop mark.
4
Press the [ENTER] key.
The tool moves to near the lower-right crop mark
(mark 2) and the screen shown in the figure appears.
5
In the same way as for mark 1, align the tip of the
alignment tool with the crop mark, then press the
[ENTER] key.
The tool moves to near the upper-left crop mark (mark
3) and the screen shown in the figure appears.
MANUAL
4-POINT START
REPLACE WITH TOOL
(QUIT MENU)
SET MARK 1
(RETURN MENU)
SET MARK 2
(RETURN MENU)
SET MARK 3
(RETURN MENU)
REPLACE WITH BLADE
(RETURN MENU)
Adjust the tip of the
alignment tool here.
Adjust the tip of the
alignment tool here.
Summary of Contents for Camm-1 Pro GX-300
Page 9: ...To Ensure Safe Use 7...
Page 16: ...14...
Page 54: ...52...
Page 66: ...64...
Page 70: ...68...
Page 81: ...79...
Page 82: ...80...
Page 83: ......
Page 84: ...R3 070216...


