44
1
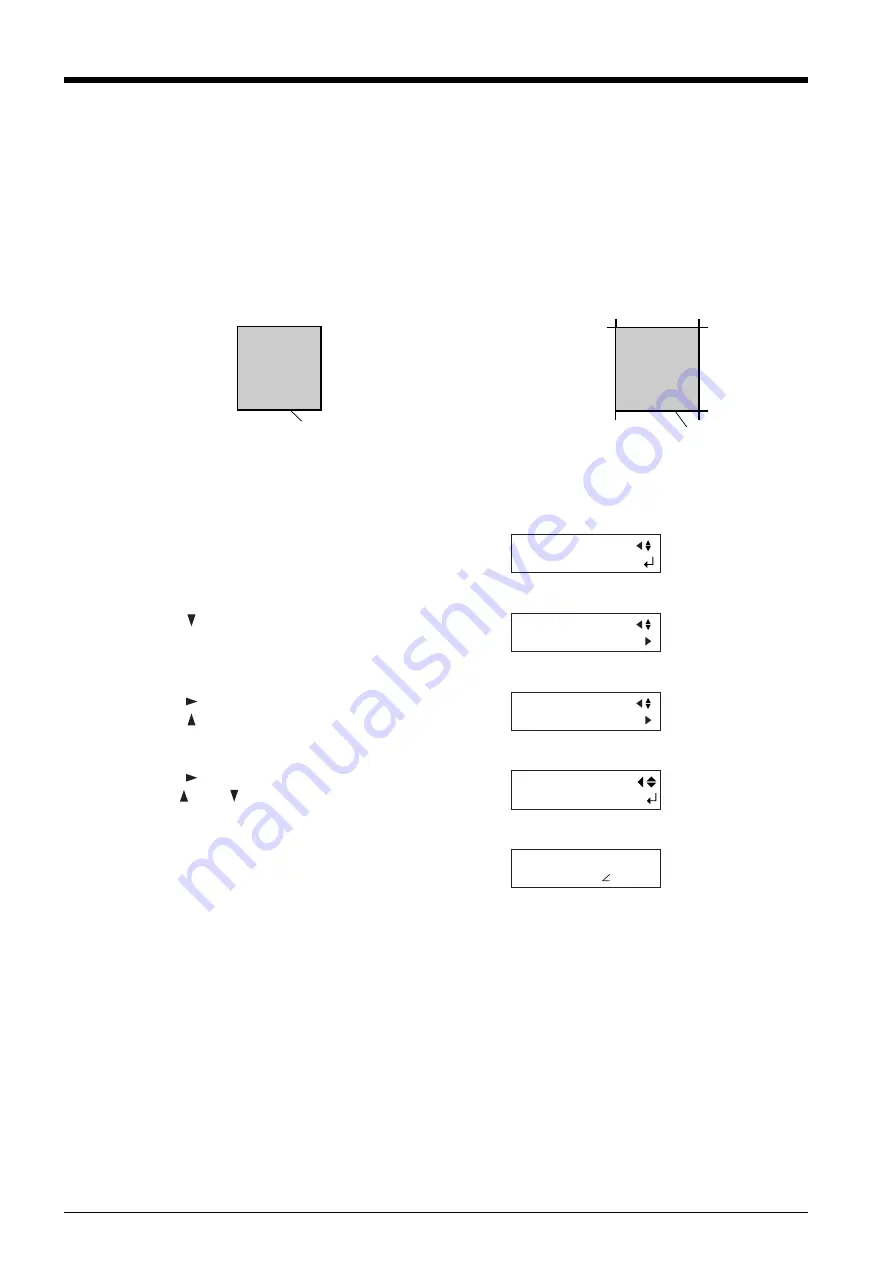
Press the [MENU] key several times until the screen
shown in the figure appears.
2
Press the [
] key several times.
3
Press the [
] key.
Press the [
] key several times.
To set overcutting to [ENABLE], follow the steps below.
4
Press the [
] key .
Use the [
] and [
] keys to set to [ENABLE].
5
Press the [ENTER] key to enable the setting.
Press the [MENU] key to go back to the screen shown
in the figure.
OVER CUT: DISABLE
OVER CUT: ENABLE
Cutting line
Cutting line
4-7 The Overcut Feature
This cuts an excess margin of 1 mm (0.04 in.) from the first and last line segments. This is effective when you want to finish with
angles that are especially sharp, such as when cutting thick material.
This should normally be left set at [DISABLE]. When you want to cut especially attractive corners, set it to [ENABLE]. Note that
when you are cutting small text and intricate shapes, cutting-in may occur on the portion of the material you are using, and so this
should be set at [DISABLE].
Cutting results differ as shown in the following figures depending on whether the Overcut function is disable or enable.
UNSETUP
OTHERS
OVER CUT DISABLE
OVER CUT DISABLE
*ENABLE
20cm/s
50gf 0.250mm A
Summary of Contents for Camm-1 Pro GX-300
Page 9: ...To Ensure Safe Use 7...
Page 16: ...14...
Page 54: ...52...
Page 66: ...64...
Page 70: ...68...
Page 81: ...79...
Page 82: ...80...
Page 83: ......
Page 84: ...R3 070216...


