Setting up for Printing
27
2
•
[
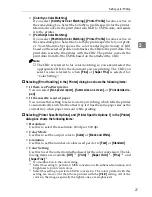
ColorSync Color Matching
]
If you select
[
ColorSync Color Matching
]
,
[
Printer Profile
]
becomes active in
the same dialog box. Select the ColorSync profile specific for the printer.
Macintosh converts the print data from RGB to CMYK data, and sends
it to the printer.
•
[
PostScript Color Matching
]
.
If you select
[
PostScript Color Matching
]
,
[
Printer Profile
]
becomes active in
the same dialog box. Select the ColorSync profile specific for your print-
er. Your Macintosh prepares the color rendering dictionary (CRD)
based on the selected profile and attaches the CRD to the print data. The
print data is sent to the printer with the CRD. The printer converts the
print data from RGB to CMYK based on the attached the CRD.
Note
❒
The CRD is referred to for color matching, so you should select the
appropriate CRD for the document you are printing. The CRD you
select is also referred to when
[
Fine
]
or
[
Super Fine
]
is selected for
“Color Setting”.
❖
❖
❖
❖
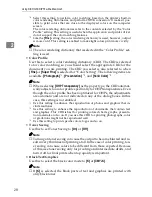
Selecting
[
Error Handling
]
in the
[
Printer
]
dialog box shows the following items:
•
If there is a PostScript error
You can select
[
No special report
]
,
[
Summarize on screen
]
, or
[
Print detailed re-
port
]
.
•
If the cassette is out of paper
You can use this setting to select auto tray switching, which tells the printer
to automatically switch to the other tray if it has the same paper size as the
current tray when paper runs out while printing.
❖
❖
❖
❖
Selecting
[
Printer Specific Options
]
and
[
Printer Specific Options 1
]
in the
[
Printer
]
dialog box shows the following items:
•
Resolution
Use this to select the resolution; 600 dpi or 300 dpi.
•
Color Mode
Use this to set the output color to
[
Color
]
or
[
Black and White
]
.
•
Gradation
Use this to set the number of colors used per dot to
[
Fast
]
or
[
Standard
]
.
•
Color Setting
Use this to set the correction method used for the color conversion. The fol-
lowing items are available:
[
Off
]
*1
,
[
Vivid
]
*2
,
[
Super Vivid
]
*3
,
[
Fine
]
*4
, and
[
Super Fine
]
*5
.
*1
No modification to the color setting.
*2
Select this setting to perform CMYK conversion with enhanced saturation and
brightness to print vivid colors.
*3
Select this setting to perform CMYK conversion. The colors printed with this
setting are more vivid than those printed with the
[
Vivid
]
setting. All of the
colors in the image, especially the lighter ones, are emphasized.
Summary of Contents for Lanier AP206
Page 12: ...viii ...
Page 24: ...Getting Started 12 1 ...
Page 46: ...Configuring the Printer for the Network 34 3 ...
Page 72: ...UE USA G063 8647 ...
Page 84: ...x ...
Page 118: ...Paper and Other Media 34 3 ...
Page 209: ...125 MEMO ...
Page 210: ...126 UE USA G063 MEMO ...
Page 212: ...UE USA G063 8667 ...
Page 274: ...Windows NT 4 0 Configuration 48 3 ...
Page 300: ...Macintosh Configuration 74 5 ...
Page 339: ...Copyright 2000 ...
Page 340: ...Network Interface Board Operating Instructions EE GB UE USA G063 8680 ...
Page 366: ...Using RICOH SCRIPT2 with Windows 22 1 ...
Page 374: ...Using RICOH SCRIPT2 with a Macintosh 30 2 ...
Page 380: ...36 EE GB UE USA G063 MEMO ...
Page 381: ...Copyright 2000 ...
Page 382: ...RICOH SCRIPT2 Operating Instructions EE GB UE USA G063 8900 ...
Page 388: ...iv ...
Page 404: ...16 UE USA G063 MEMO ...
Page 405: ...Copyright 2000 ...
Page 406: ...UNIX Supplement UE USA G063 8697 ...


