51
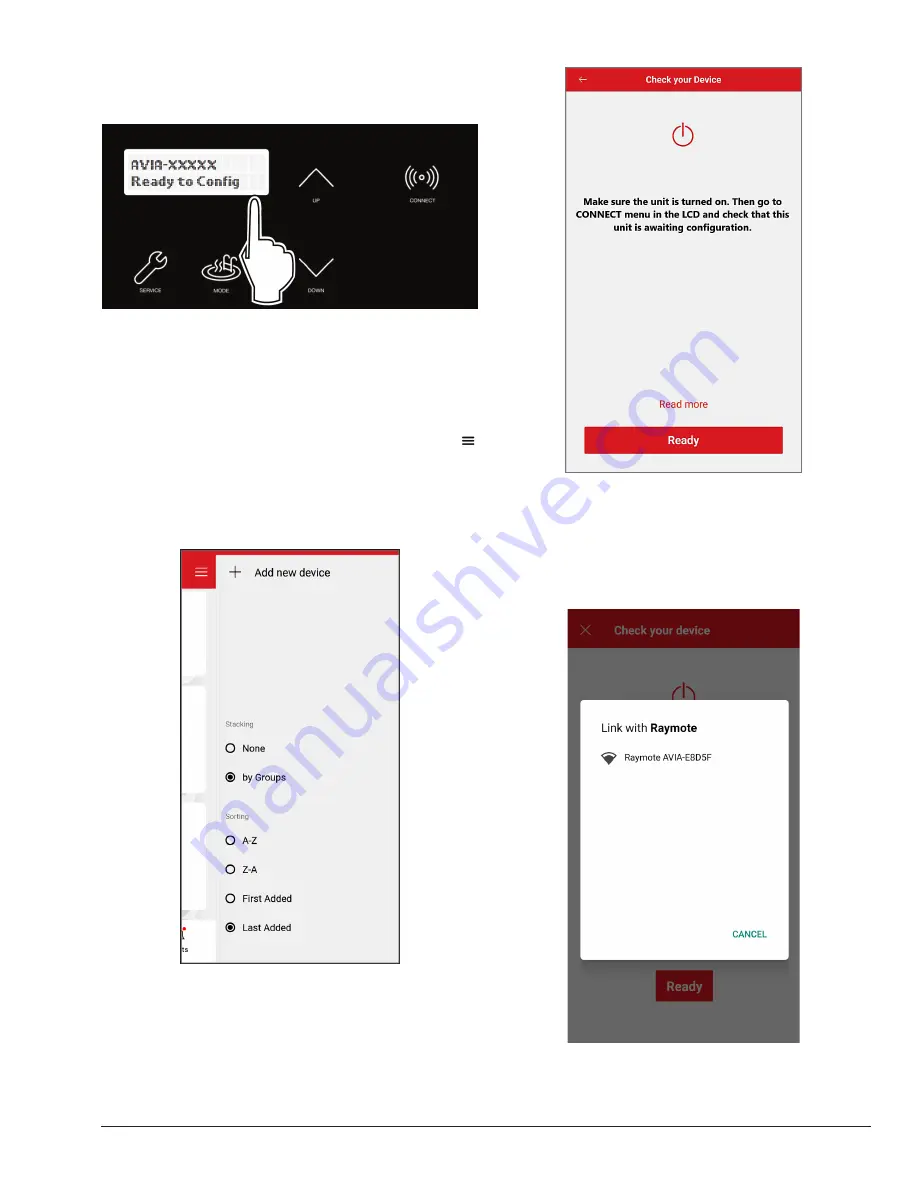
2. The CONNECT menu should display the Wi-Fi State,
indicating "Ready to Config" wireless connection,
and also the HOTSPOT identifier. See
Figure 80
.
Figure 80. Wi-Fi Ready to Configure and HOTSPOT
Identifier
3. At this point your unit is ready for connection.
NOTE
: The following sections provide the instructions for
Android and iPhone devices.
4. In the Raymote app, press the menu button
located at the top left corner of the screen, then press
"+ Add new device". See
Figure 81.
Add a New Device on your Android
Figure 81. Add New Device
1. "Check your Device" screen will appear. Ensure to
have AVIA heater powered and Wi-Fi signal available
in the area, then press "Ready" button. See
Figure
82.
Figure 82. Check your Device
2. Depending on your configuration, one or more devices
will appear on the app. See
Figure 83
. Select the
HOTSPOT identifier that matches the unit's display
as shown in
Figure 83
.
Figure 83. Link with Raymote
Summary of Contents for AVIA 264A
Page 67: ...67 2 H 1 R 1 H 7 S 2 C 3 C 5 S...
Page 68: ...68 1 F 2 F 2 G 1 M 4 M 5 M 6 M 7 M 8 M 10 M 6 G 3 G 4 G...
Page 69: ...69 1 B 2 B 2 F 1 P 3 P 2 P...
Page 70: ...70 1 V 2 V 3 V 11C 11 M OPTIONAL...
Page 71: ...71 14 H 15 H 4 H 12 M 7 H 9 H 7 C 8 C 12 H 13 H 16 H 11 H 10 H 10 C 9 C 8 H 6 H 5 H 3 H...
Page 146: ...67 2 H 1 R 1 H 7 S 2 C 3 C 5 S...
Page 147: ...68 1 F 2 F 2 G 1 M 4 M 5 M 6 M 7 M 8 M 10 M 6 G 3 G 4 G...
Page 148: ...69 1 B 2 B 2 F 1 P 3 P 2 P...
Page 149: ...70 1 V 2 V 3 V 11C 11 M OPTIONAL...
Page 150: ...71 14 H 15 H 4 H 12 M 7 H 9 H 7 C 8 C 12 H 13 H 16 H 11 H 10 H 10 C 9 C 8 H 6 H 5 H 3 H...


