


3. Select
Intensity
.
The slider bar control is displayed.
4. Adjust the control to the required value.
5. Select
Back
to confirm setting and close slider
bar, or
6. Select
Auto
to enable automatic Intensity control.
Setting auto Intensity offset
When connected to a
CPx70
series sonar module
the Auto Intensity can be offset by +/–50%.
From the
Sensitivity Settings
menu:
1. Select
Intensity
.
2. Ensure
Auto
is selected.
3. Adjust the slider control to the required value.
The scrolling image will now track the automatic
setting by the offset value specified.
Color Gain
Non—
CPx70
series, Traditional,
CHIRP
and Legacy
sonar modules use different colors to determine
the strength of an echo. You can adjust the color
intensity manually between 0% and 100% or set it to
automatic.
20% Manual
Auto
80% Manual
The color gain control sets the lower limit for the
strongest echo color. All echoes with a signal
strength above this value are displayed in the
strongest color. Those with a weaker value are
divided equally between the remaining colors.
• Setting a low value produces a wide band for the
weakest color, but a small signal band for the
other colors.
• Setting a high value gives a wide band for the
strongest color, but a small signal band for the
other colors.
Adjusting the color gain
To adjust the Color gain on Traditional,
CHIRP
and
Legacy sonar modules follow the steps below.
From the Fishfinder application:
1. Select
Menu
.
2. Select
Sensitivity settings
.
3. Select
Color Gain
.
The slider bar control is displayed.
4. Adjust the control to the required value.
5. Select
Back
to confirm setting and close slider
bar, or
6. Select
Auto
to enable automatic Color gain
control.
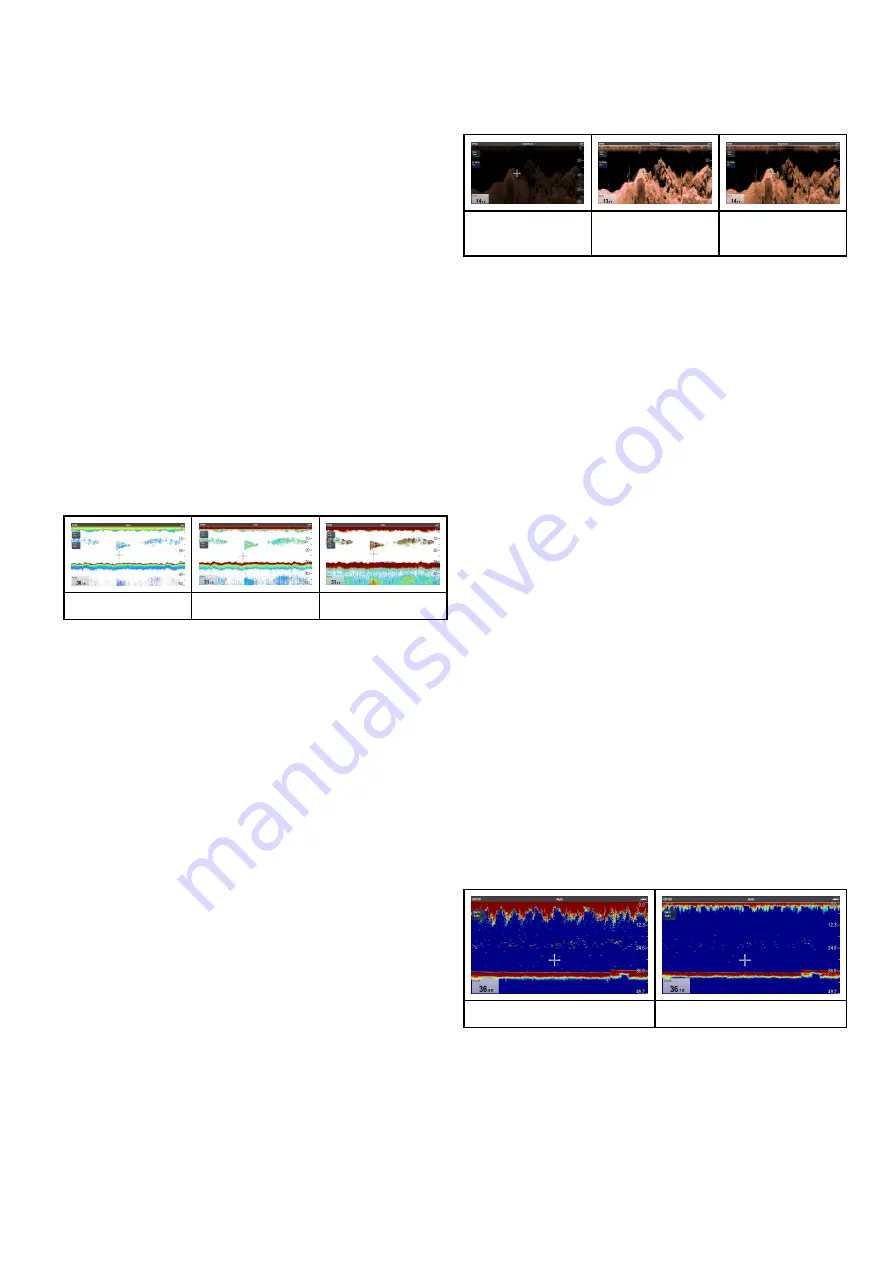
Contrast
DownVision
TM
and
SideVision
TM
use monochrome
shading to determine the strength of echoes. You
can adjust the contrast manually between 0% and
100% or set it to automatic.
20% Manual
Contrast
Auto Contrast
80% Manual
Contrast
Contrast sets the lower limit for the strongest echo
shade. All echoes with a signal strength above this
value are displayed in the lightest shade. Those
with a weaker value are divided equally between the
remaining shades.
• Setting a low value produces a wide band for the
darkest shade, but a small signal band for the
other shades.
• Setting a high value gives a wide band for the
lightest shade, but a small signal band for the
other shades.
Adjusting the contrast
To adjust the contrast setting follow the steps below.
From the Fishfinder application:
1. Select
Menu
.
2. Select
Sensitivity settings
.
3. Select
Contrast
.
The Contrast slider bar control is displayed.
4. Adjust the control to the required value.
5. Select
Back
to confirm setting and close slider
bar, or
6. Select
Auto
to enable automatic contrast.
Surface filter
The
Surface filter
setting is available when
connected to a
CPx70
series sonar module. The
control reduces the amount of noise / clutter
displayed near the surface by varying the gain
throughout the water column.
0%
100%
The Surface filter can be set to automatic or can be
adjusted manually. In manual:
• a low value decreases the depth to which the filter
is applied and produces stronger targets / more
clutter near the surface.
• a high value increases the depth to which the filter
is applied and produces weaker targets / less
clutter near the surface.
Fishfinder application
223
Summary of Contents for A65
Page 2: ......
Page 8: ...8 LightHouse multifunction display operation instructions...
Page 12: ...12 LightHouse multifunction display operation instructions...
Page 24: ...24 LightHouse multifunction display operation instructions...
Page 62: ...62 LightHouse multifunction display operation instructions...
Page 90: ...90 LightHouse multifunction display operation instructions...
Page 118: ...118 LightHouse multifunction display operation instructions...
Page 122: ...122 LightHouse multifunction display operation instructions...
Page 140: ...140 LightHouse multifunction display operation instructions...
Page 198: ...198 LightHouse multifunction display operation instructions...
Page 232: ...232 LightHouse multifunction display operation instructions...
Page 308: ...308 LightHouse multifunction display operation instructions...
Page 316: ...316 LightHouse multifunction display operation instructions...
Page 338: ...338 LightHouse multifunction display operation instructions...
Page 346: ...346 LightHouse multifunction display operation instructions...
Page 370: ...370 LightHouse multifunction display operation instructions...
Page 374: ...374 LightHouse multifunction display operation instructions...
Page 389: ......
Page 390: ...www raymarine com...


