


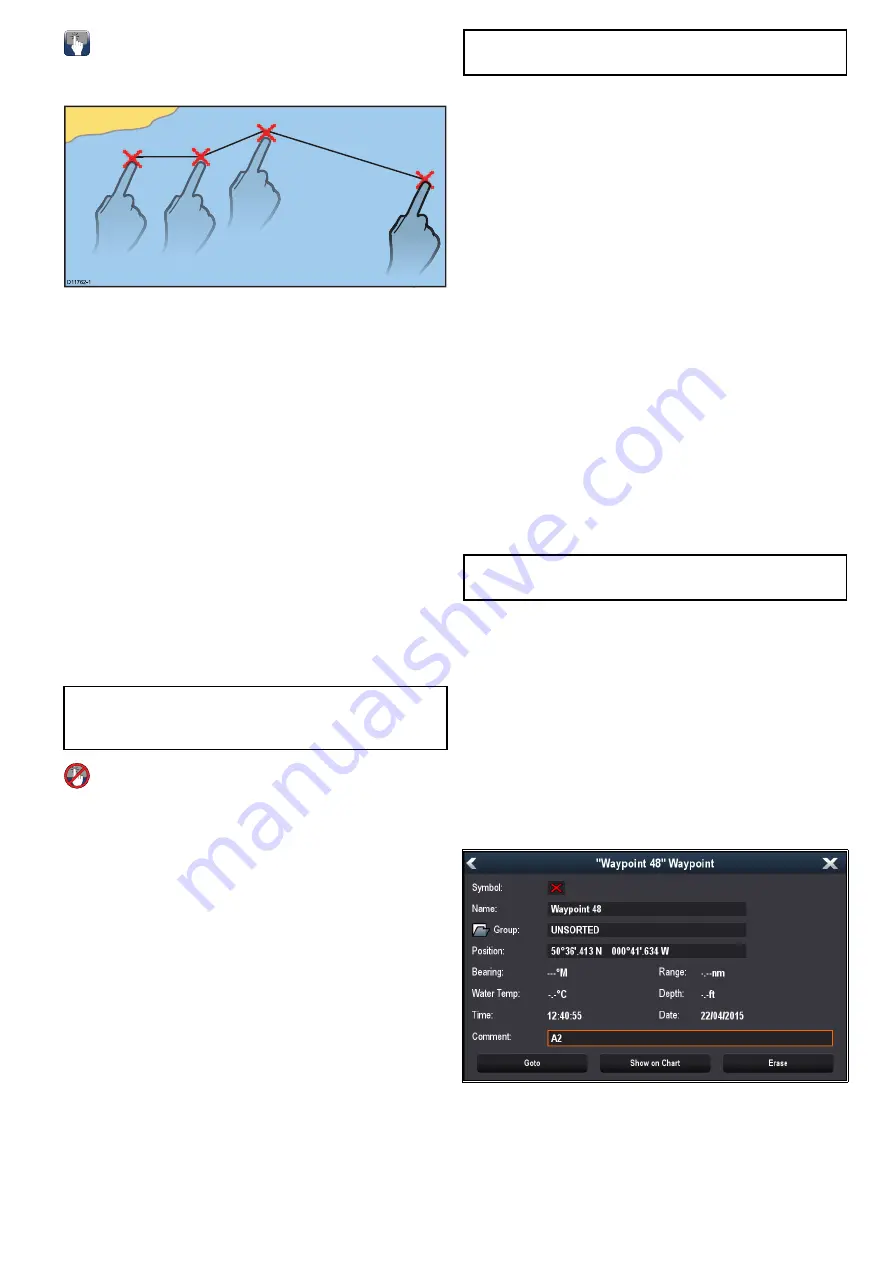
Building a route
You can build a route on a touchscreen multifunction
display by following the steps below.
D
11762-1
From the chart application:
1. Select and hold a location on screen.
The chart context menu is displayed.
2. Select
Build Route
.
The build route menu is displayed.
3. Select a location on screen to be the starting
position.
4. Select relevant locations to place subsequent
waypoints in order.
The route is saved and displayed as each
waypoint is placed.
5. When complete select
Finish Build
.
The finish route build pop up message is
displayed.
6. Select
Follow
to immediately follow the route. or
7. Select
Edit
to change the route name or change
the route color. or
8. Select
Exit
to save the route and return to the
chart application.
Note:
If you place a waypoint at the wrong
position, select
Undo Waypoint
from the Route
Menu.
Building a route
From the chart application:
1. Select
Menu
.
2. Select
Navigate
.
3. Select
Build Route
.
The build route menu is displayed.
4. Select
Place Wpt
.
5. Using the
Joystick
select a location on screen.
6. Press the
Ok
button to place the first waypoint
in the route.
7. Use the
Joystick
and the
Ok
button to place
subsequent waypoints.
The route is saved and displayed as each
waypoint is placed.
8. When your route is complete select
Finish Build
.
The finish route build pop up message is
displayed.
9. Select
Follow
to immediately follow the route. or
10. Select
Edit
to change the route name or change
the route color. or
11. Select
Exit
to save the route and return to the
chart application.
Note:
If you place a waypoint at the wrong
position, select
Undo Waypoint
.
Building a route using the waypoint list
From the chart application:
1. Select
Menu
.
2. Select
Navigate
.
3. Select
Build Route
.
The build route menu is displayed.
4. Select
Use WPT List
.
The waypoint list is displayed.
5. Select the required waypoint.
You will be taken back to the build route menu.
6. Add subsequent waypoints to the route.
The route is saved and displayed as each
waypoint is placed.
7. When your route is complete select
Finish Build
.
The finish route build pop up message is
displayed.
8. Select
Follow
to immediately follow the route. or
9. Select
Edit
to change the route name or change
the route color. or
10. Select
Exit
to save the route and return to the
chart application.
Note:
If you select the wrong waypoint, select
Undo Waypoint
from the route menu.
Building a route using racemark IDs
You can build a route quickly by entering a list of
racemark IDs. Each Racemark ID must be unique
and must have been entered into the comments field
of the relevant waypoints.
Racemark IDs must:
• only use alpha numeric characters
• not include any spaces
• be separated from any other information in the
field using a space.
From the Chart application menu:
1. Select
My Data
.
2. Select
Routes
.
3. Select
Build using racemark IDs
.
An instructional pop-up is displayed, unless you
have previously selected
Don’t show again
.
Waypoints, Routes and Tracks
151
Summary of Contents for A65
Page 2: ......
Page 8: ...8 LightHouse multifunction display operation instructions...
Page 12: ...12 LightHouse multifunction display operation instructions...
Page 24: ...24 LightHouse multifunction display operation instructions...
Page 62: ...62 LightHouse multifunction display operation instructions...
Page 90: ...90 LightHouse multifunction display operation instructions...
Page 118: ...118 LightHouse multifunction display operation instructions...
Page 122: ...122 LightHouse multifunction display operation instructions...
Page 140: ...140 LightHouse multifunction display operation instructions...
Page 198: ...198 LightHouse multifunction display operation instructions...
Page 232: ...232 LightHouse multifunction display operation instructions...
Page 308: ...308 LightHouse multifunction display operation instructions...
Page 316: ...316 LightHouse multifunction display operation instructions...
Page 338: ...338 LightHouse multifunction display operation instructions...
Page 346: ...346 LightHouse multifunction display operation instructions...
Page 370: ...370 LightHouse multifunction display operation instructions...
Page 374: ...374 LightHouse multifunction display operation instructions...
Page 389: ......
Page 390: ...www raymarine com...


