


Example warning message
Description
Resolution
The start and end point of the desired
route are further than 100 nm apart.
Create smaller route legs. e.g. instead
of trying to create a route from point A
to point B, create a route from point A
to point B to point C to point D, this will
enable a route longer than 100 nm to be
created for each route leg.
A safe route could not be generated
The first waypoint will be placed but the
end waypoint will not.
Check the chart area along the expected
route to identify areas which cannot be
navigated through due to obstacles or
land mass.
Review or edit a route
There are a variety of attributes associated with
routes. These can be reviewed and edited.
You can:
• Show or hide a route on the chart screen.
• Review details of the route
• Change the name or color of a route.
• Add, move and remove waypoints from a route.
• Change the route lines width.
Note:
An active route can be edited, with the
exception of the active waypoint. If a waypoint
being edited becomes active, then the system
shall cancel the edit; the waypoint shall remain in
its original position.
Showing or hiding routes and tracks
From the chart application:
1. Select
Menu
.
2. Select
My Data
.
3. Select
Routes
or
Tracks
.
4. Select
Show/Hide
.
5. Select the route or track to switch between Show
and Hide.
Selecting a route to review or edit
1. Do one of the following to select the required
route:
• From the chart application, select a route on
screen to display the route context menu.
• From the chart application, select:
Menu > My
Data > Routes
and select the required route
from the list.
• From the Homescreen, select:
My Data >
Routes
and select the required route from the
list.
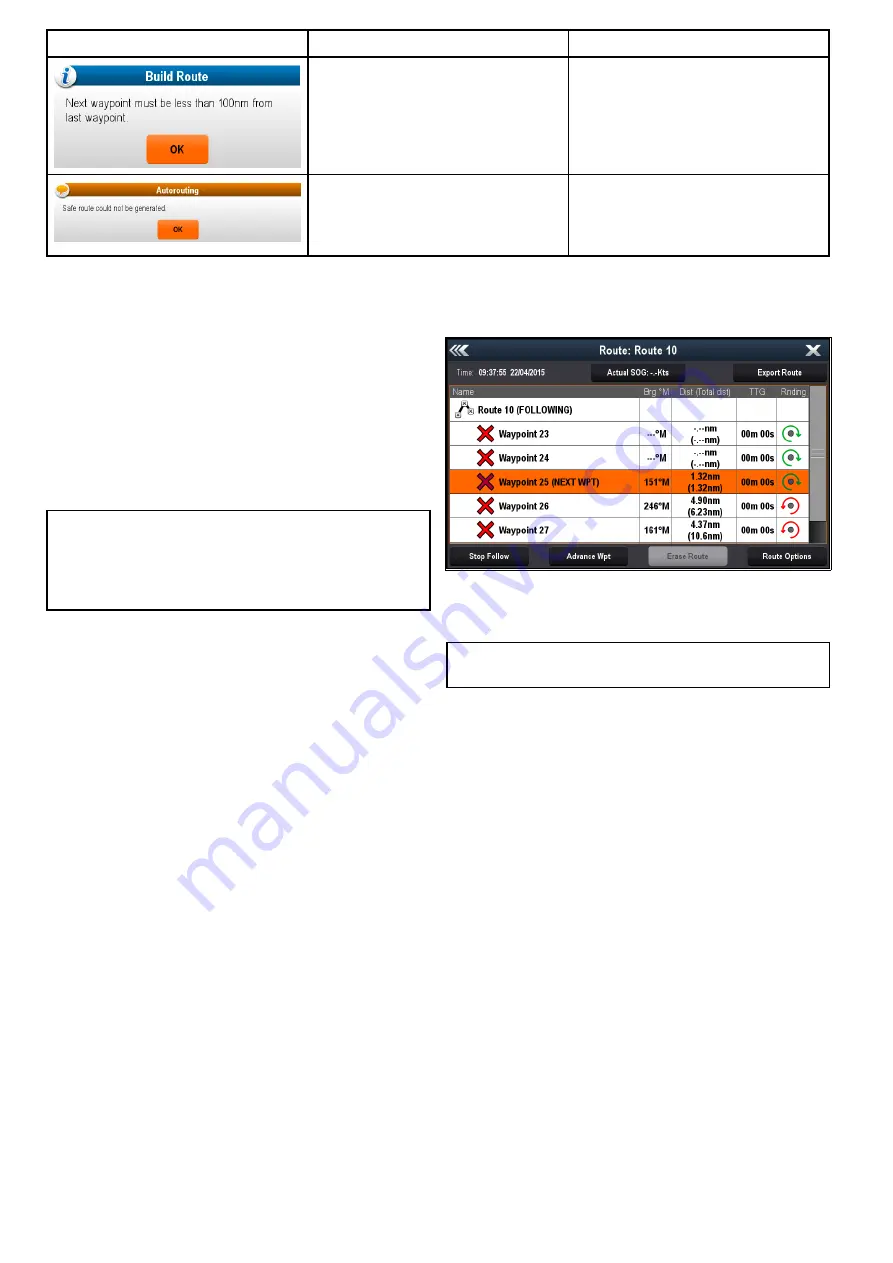
Displaying the Route Plan
When following a route the current Route Plan can
be reviewed and edited.
From the Chart application menu:
1. Select
Navigate
.
2. Select
Route Plan
.
Note:
You can also access the Route plan by
selecting
Edit Route
from the Route context menu.
Adding a waypoint to a route on the chart screen
From the chart application:
1. Select the appropriate leg of the route.
The route context menu is displayed.
2. Select
Insert Waypoint
.
3. Select the location for the new waypoint.
The leg of the route is stretched to include the
new waypoint.
Removing a waypoint from a route
From the chart application:
1. Select the waypoint you want to erase.
The waypoint context menu is displayed.
2. Select
Remove Waypoint
.
The Remove waypoint dialog is displayed.
3. Select
Yes
to confirm or
No
to cancel the action.
The waypoint will be removed from the route but will
still be available.
Moving a waypoint within a route
From the chart application:
1. Position the cursor over the waypoint you want
to move.
The waypoint context menu is displayed.
2. Select
Move Waypoint
.
3. Select the new location for the waypoint.
158
LightHouse multifunction display operation instructions
Summary of Contents for A65
Page 2: ......
Page 8: ...8 LightHouse multifunction display operation instructions...
Page 12: ...12 LightHouse multifunction display operation instructions...
Page 24: ...24 LightHouse multifunction display operation instructions...
Page 62: ...62 LightHouse multifunction display operation instructions...
Page 90: ...90 LightHouse multifunction display operation instructions...
Page 118: ...118 LightHouse multifunction display operation instructions...
Page 122: ...122 LightHouse multifunction display operation instructions...
Page 140: ...140 LightHouse multifunction display operation instructions...
Page 198: ...198 LightHouse multifunction display operation instructions...
Page 232: ...232 LightHouse multifunction display operation instructions...
Page 308: ...308 LightHouse multifunction display operation instructions...
Page 316: ...316 LightHouse multifunction display operation instructions...
Page 338: ...338 LightHouse multifunction display operation instructions...
Page 346: ...346 LightHouse multifunction display operation instructions...
Page 370: ...370 LightHouse multifunction display operation instructions...
Page 374: ...374 LightHouse multifunction display operation instructions...
Page 389: ......
Page 390: ...www raymarine com...


