Chapter 6
86
Envizio Pro™ and Envizio Pro II® Installation and Operation Manual
Applying Prescription Maps
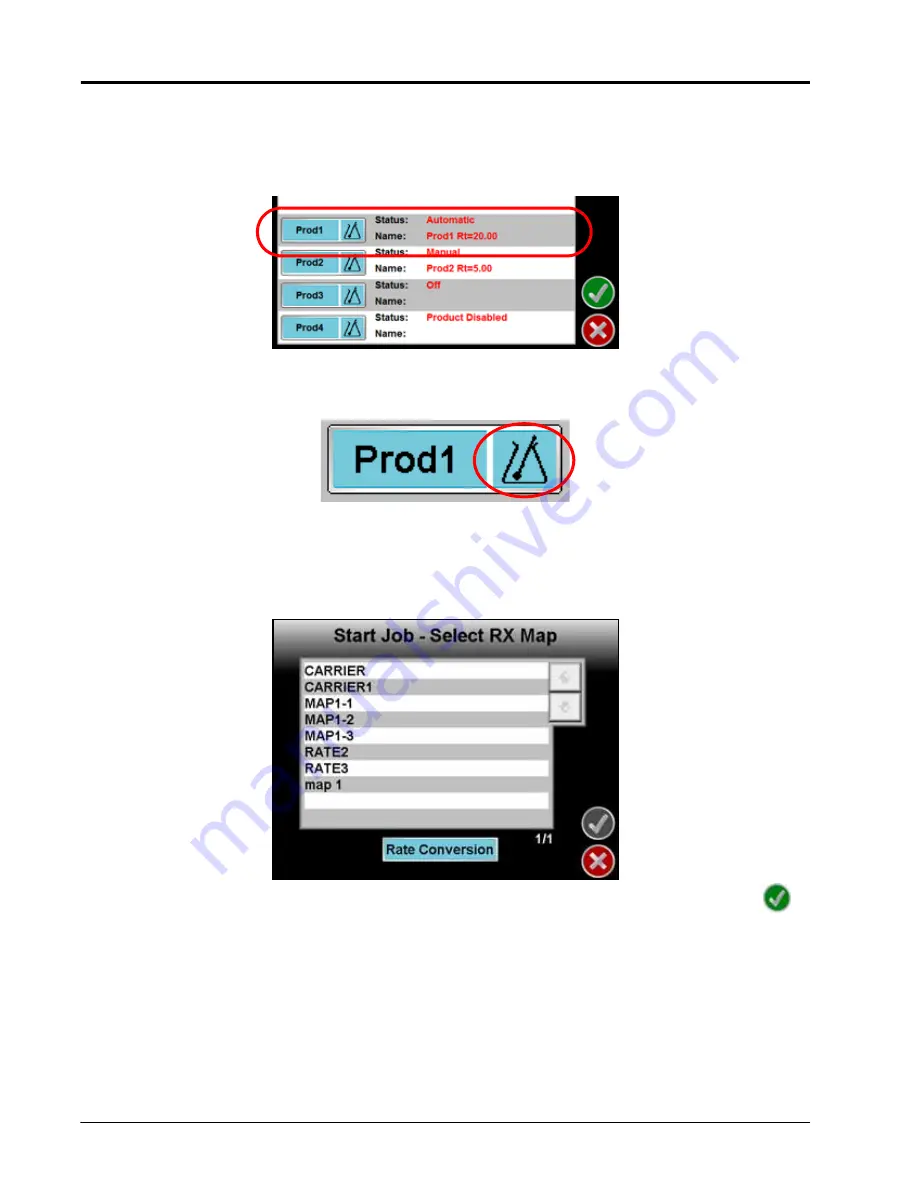
A prescription map may be applied to any enabled product during the Start Job process. With the variable rate
feature enabled, the Start Job - Verify Settings screen displays the name of the prescription map along with the
product to which the prescription map will be applied.
To Apply a Prescription Map
1.
Touch the Rx symbol in the corresponding Product button.
For example, touch the Rx symbol in the Product 1 button to apply a prescription map to the product
controlled by the first product node.
Note:
To remove a prescription map, touch the ‘Prod1’ area of the button to display the Product Setup
screen. Touch the Rate button and enter a value.
2.
A list of available prescription maps is displayed on the Start Job - Select Rx Map screen.
Select the name of the prescription map to apply to the selected product and then touch the Accept
icon to apply the prescription map.
Note:
To modify the rates within the selected prescription map, select the Rate Conversion button. Use
the on-screen keypad to enter the multiplier of the prescription map for the current job.
3.
Verify other job settings before beginning the job. Refer to the
section on page 56 for more
information.
Summary of Contents for Envizio Pro
Page 3: ......
Page 13: ...Table of Contents x Envizio Pro and Envizio Pro II Installation and Operation Manual ...
Page 51: ...Chapter 4 36 Envizio Pro and Envizio Pro II Installation and Operation Manual ...
Page 65: ...Chapter 5 50 Envizio Pro and Envizio Pro II Installation and Operation Manual ...
Page 193: ...Chapter 9 178 Envizio Pro and Envizio Pro II Installation and Operation Manual ...
Page 197: ...Chapter 10 182 Envizio Pro and Envizio Pro II Installation and Operation Manual ...
Page 229: ...Appendix D 214 Envizio Pro and Envizio Pro II Installation and Operation Manual ...
Page 285: ...Index 270 Envizio Pro and Envizio Pro II Installation and Operation Manual ...


