© Copyright Qvis ®. All documentation rights reserved.
86
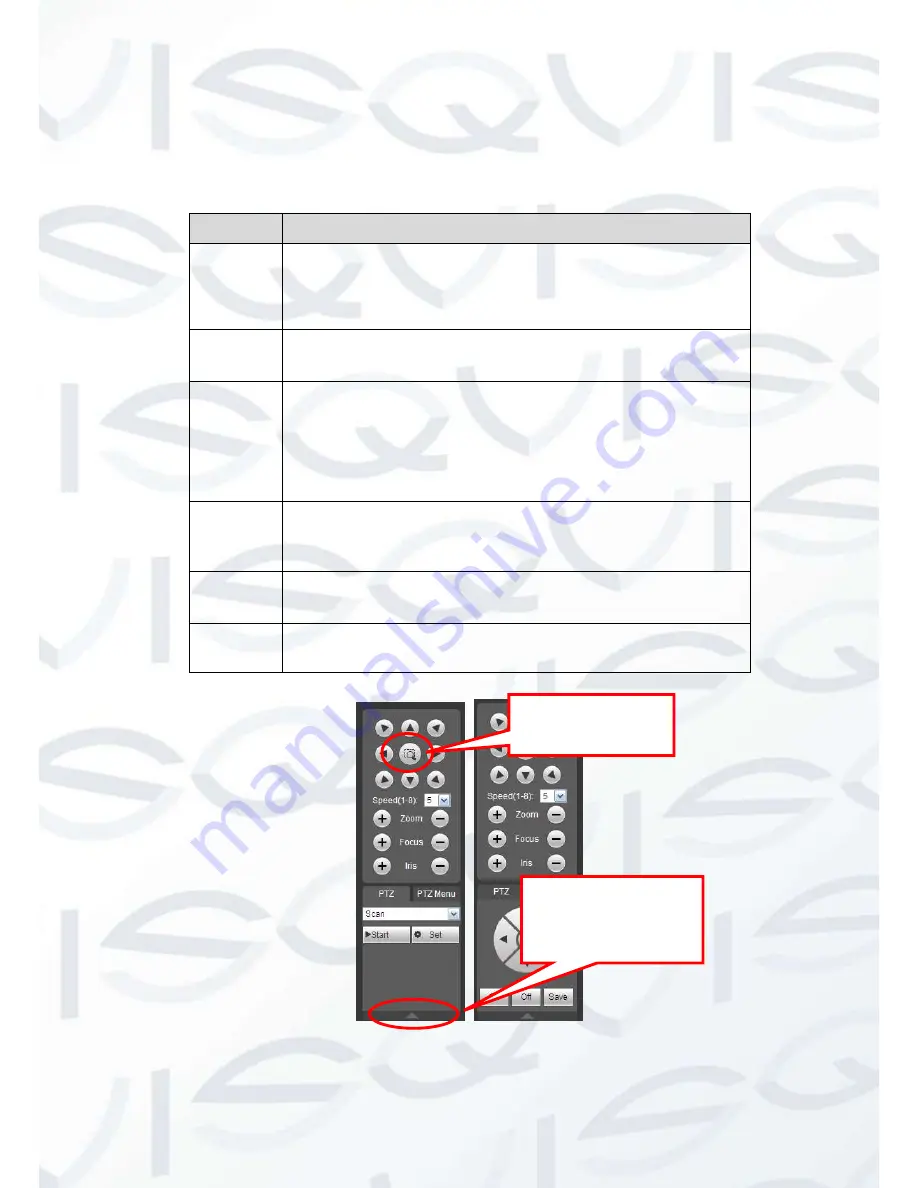
Click 3D intelligent positioning key, system goes back to the single screen mode. Drag the mouse in
the screen to adjust section size. It can operate PTZ automatically.
Please refer to the following sheet for PTZ setup information.
Parameter
Function
Scan
Select Scan from the dropdown list.
Click Set button, you can set scan left and right limit.
Use direction buttons to move the camera to you desired
location and then click left limit button. Then move the camera
again and then click right limit button to set a right limit.
Preset
Select Preset from the dropdown list.
Turn the camera to the corresponding position and Input the
preset value. Click Add button to add a preset,.
Tour
Select Tour from the dropdown list.
Input preset value in the column. Click Add preset button, you
have added one preset in the tour.
Repeat the above procedures you can add more presets in one
tour.
Or you can click delete preset button to remove one preset from
the tour.
Pattern
Select Pattern from the dropdown list.
You can input pattern value and then click Start button to begin
PTZ movement such as zoom, focus, iris, direction and etc.
Then you can click Add button to set one pattern.
Aux
Please input the corresponding aux value here.
You can select one option and then click AUX on or AUX off
button.
Light and
wiper
You can turn on or turn off the light/wiper.
Figure 6-12
You can click this icon to
display or hide the PTZ
control platform.
3D Intelligent Positioning
Key


