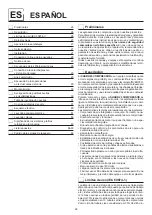
11
Connection of plasma torch
and ground wire
IMPORTANT: Do not use torches on the Plasma system oth-
er than the model supplied; the use of unsuitable torches may
cause dangerous conditions for the operator.
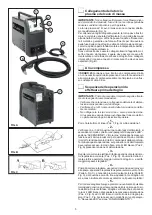
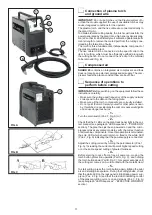
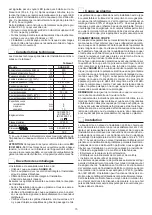
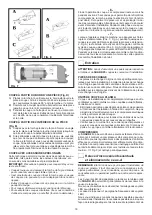
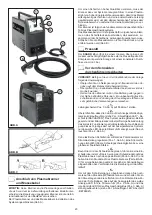
The plasma torch and the live cable are connected directly to
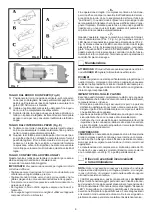
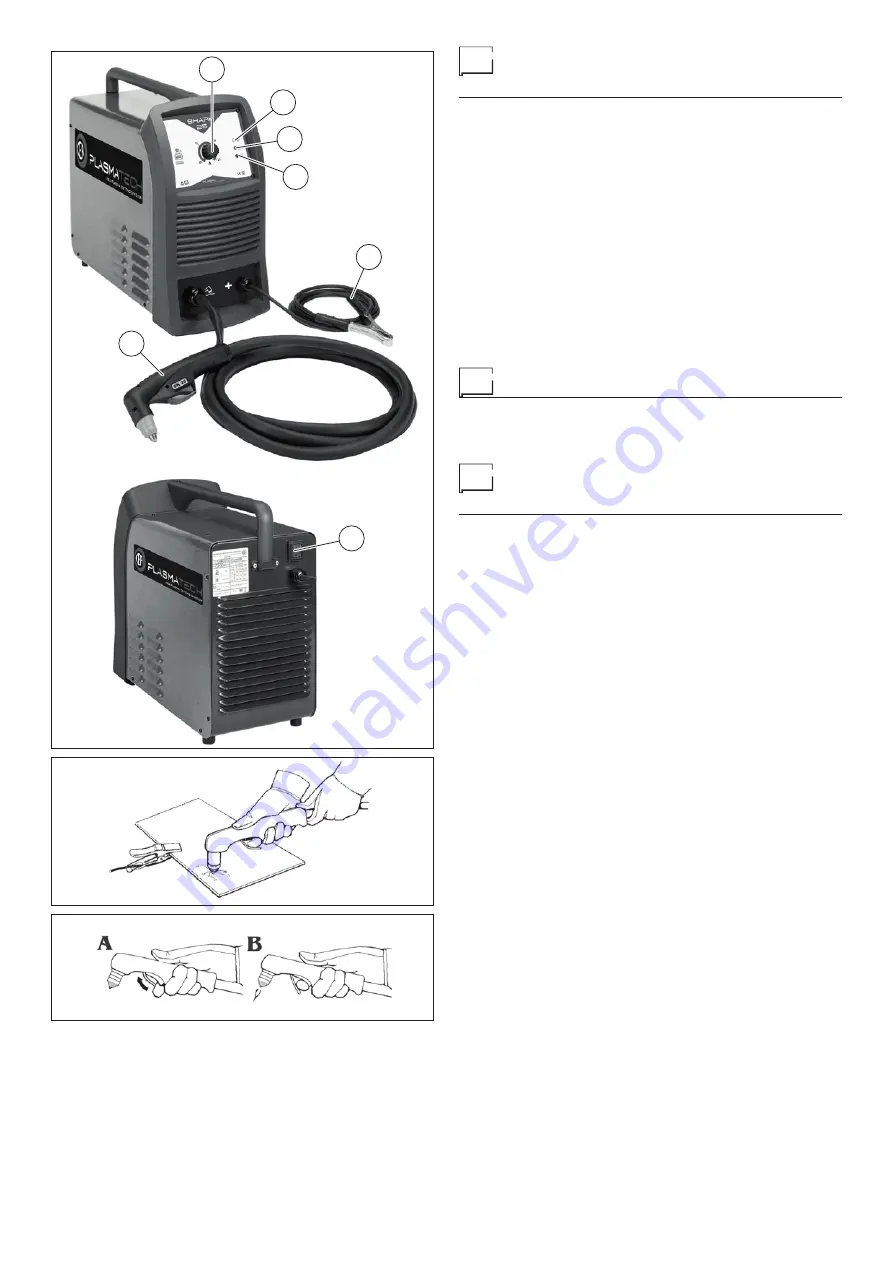
the plant (Fig. A).
To obtain elevated cutting quality, the torch must transform the
power generated by the plant into a high energy density plas-
ma jet, so that it can efficiently melt metal and guarantee suffi-
cient strength to remove the meted part from the cutting zone,
impeding the formation of burrs.
The torch is this a fundamental, indispensable component of
the plasma cutting plant.
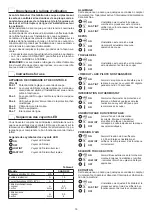
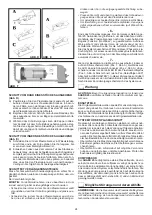
The live cable must be connected via the specific clip to the
item for cutting, which must be efficiently earthed along with
the cutting bench. Do not connect the live clip to the material
to be removed (Fig. B).
Compressed air
SHARK 25
contains an integrated air compressor and thus
does not require an external compressed air supply. The com-
pressor feeds the plant a constant flow at about 3 bar.
Sequence of operations to
perform before cutting
IMPORTANT: Before switching on the equipment follow these
instructions carefully:
•
Make sure the voltage and frequency of the supply network
correspond to the data on the rating plate.
•
Make sure all the torch components are correctly installed.
•
Do not point the torch toward yourself or other persons near-
by. If switched on accidentally the pilot arc spark would ignite
and cause dangerous burns.
- 1 -
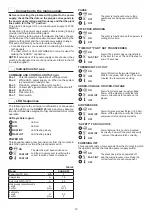
Turn the main switch (Pos. 7, Fig. A) to 1.
- 2 -
Check that the 3 LEDs on the plant rack panel light in the cor-
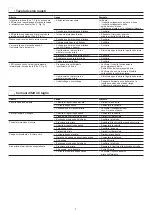
rect manner (see paragraph “LED Sequences” - “POWER ON”
section). The plant has just been powered on and the micro-
processor takes several seconds to verify the correct function
of all machine components. Once this operation is terminated,
the sole LED which should remain on fixed is the white LED
(Pos. 2, Fig. A) indicating that the power supply is connected.
- 3 -
Adjust the cutting current by turning the potentiometer (Pos. 1,
Fig. A). Increasing the current will permit higher speed cutting
or, at the same speed, cutting of greater thickness.
- 4 -
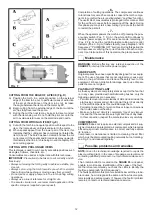
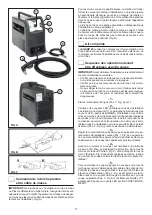
Before starting to cut, effect a free air power on, moving the
torch button protection upwards (Part A, Fig. C), and holding
the torch button down (Part B, Fig. C), for several seconds until
the cutting arc comes on. Avoid contact with the metallic item!
- 5 -
To start cutting, press the torch button again, lighting the pilot
arc and starting air expulsion. During the cutting phase, check
that the white LED on the rack panel is lit indicating power sup-
ply on (Pos. 2, Fig. A) and that the red LED indicating control
of the plasma cutting cycle is on and steady (Pos. 3, Fig. A)
(see paragraph “LED Sequences” - “EFFECTIVE WORKING”
section).
1
2
3
4
5
6
7
FIG. A
FIG. B
FIG. C


